FREE 1 to 3-Day Delivery on Orders $149+ Details
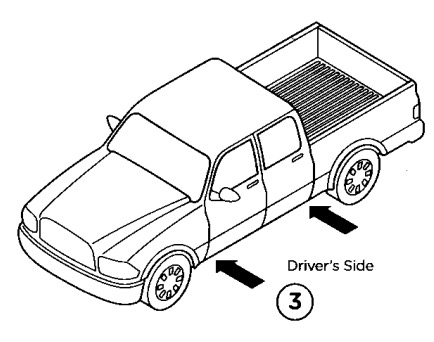
How to Install Raptor Series 3 in. Nerf Bar - Polished Stainless Steel on your F-150
Note. When installing the brackets and bars, all hardware must be left loose until all the items are attached.
1. Remove all contents from the package and check stainless steel tubes for any damage. Also, verify that all components and hardware listed above are included before you begin installation.
2. Begin installation on the drivers side by removing the black rubber plugs or tape covering the existing holes in the Rocker Panel.
4. Located the Oblong Hole towards the Rear of the Rocker Panel. Install the M12 Bolt Plate through the hole as shown.
5. Fasten the Plastic Push Nuts onto the studs of the M12 Bolt Plate to hold it into place.
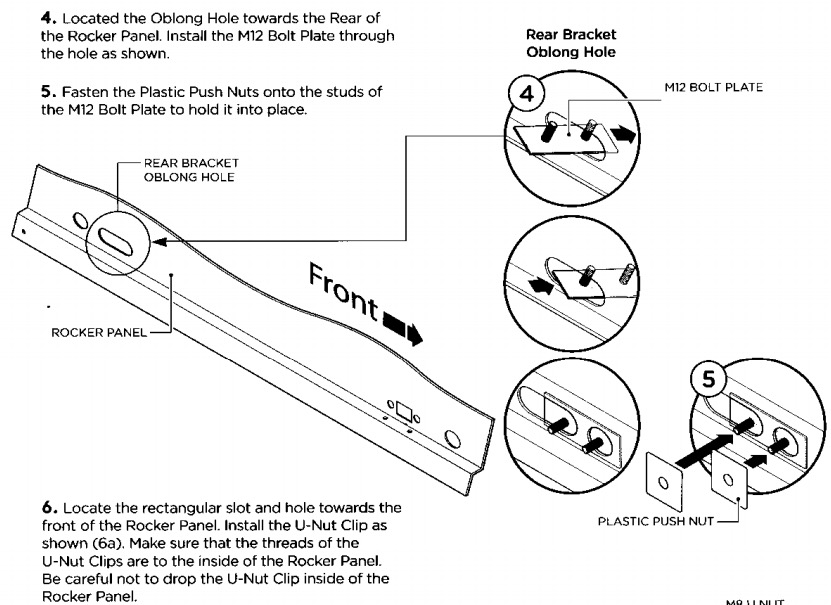
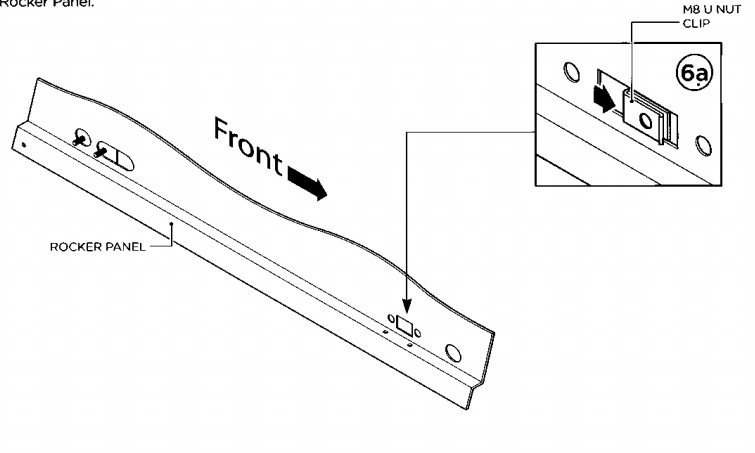
6. Locate the rectangular slot and hole towards the front of the Rocker Panel. Install the U-Nut Clip as shown (6a). Make sure that the threads of the
U-Nut Clips are to the inside of the Rocker Panel. Be careful not to drop the U-Nut Clip inside of the Rocker Panel.
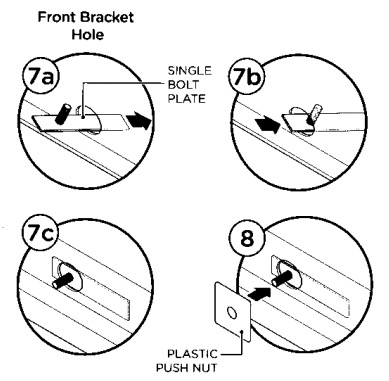
7. Locate the hole near the Front of the Rocker Panel
and place the Ml2 Single
Bolt Plate through the hole as shown.
8. Fasten the Plastic Push Nut onto the stud of the Ml2 Single Bolt Plate to hold it
into place.
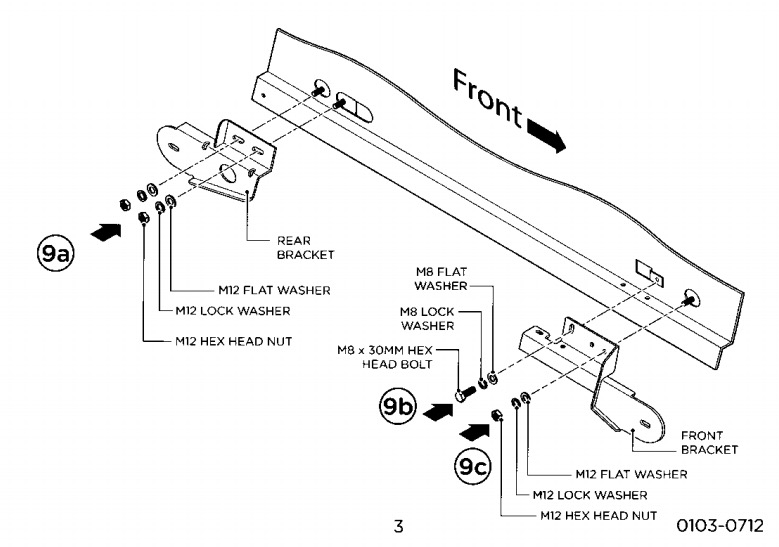
9.Place the Rear Bracket onto the Rocker Panel and fasten to the M12 Bolt Plate using two (2) M12 Hex Head Nuts, two (2) M12 Lock Washers and two (2) M12 Flat Washers. (9a)
Place the Front Bracket onto the Rocker Panel using one (1) MS x 30MM Hex Head Bolt. one (1) MB Lock
Washer and one (1) M8 Flat Washer through the first hole that aligns with the U Nut Clip (9b). Then fasten the Bracket to the Stud of the Ml2 Single Bolt Plate using one (1) M12 Hex Head Nut. one (1) M12 Lock Washer and one (1) M12 Flat Washer (9c).
10. Fasten the bottom of the Front Bracket to the Pinch Weld of the Rocker Panel using two (2) M8 X 30 Hex Head Bolts, four (4) MB Lock Washers, four ( 4) MB Flat Washers and two (2) MS Hex Head Nuts.

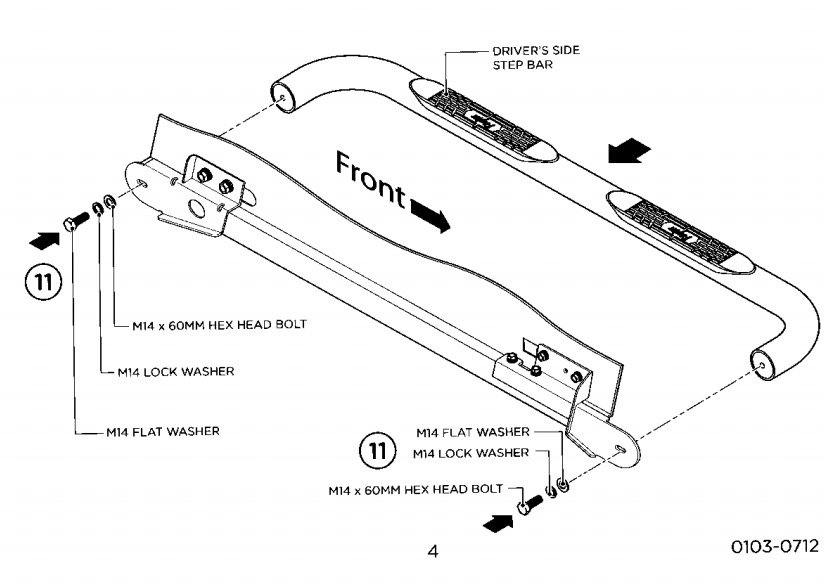
11. Fasten the Step Bar to the Front and Rear Brackets using one (1) M14 x GOMM Bolt, one (1) M14 Lock Washer and one (1) M14 Flat Washer per bracket.
Repeat these steps for passenger side installation. When all hardware is in place, everything must be tightened. See Page 1 for Torque Specifications.