FREE 1 to 3-Day Delivery on Orders $149+ Details
How to Install Putco LED Dayliner G3 Kit - Polished Trim on your F-150
Tools Required
- Electrical Tape
- 7mm, 8mm, and 10mm Wrench
- Flathead Screwdriver or Plastic Pry Bar
- Small Needle Nose Pliers
Please read all instructions before installation and to check to see that all parts are included.
NOTE: The vehicle surface temperature must be a minimum of 16°C (60°F) before installation begins.
Note: The dayliner wires will run between the grille and headlight. Ensure there are no moving parts that may cause damage to the wires.
Dayliner Installation
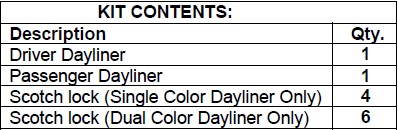
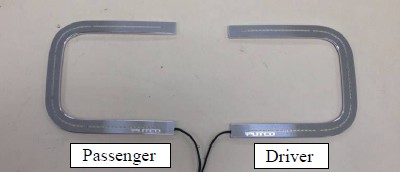
1. Remove dayliners from packaging. Check to see if all parts from above table of kit contents are included.
Note: All steps are shown on passenger side. Repeat steps for driver side dayliner installation.
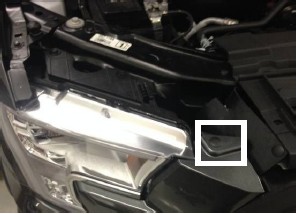
2. Remove plastic tree clips with screwdriver (location shown by square).
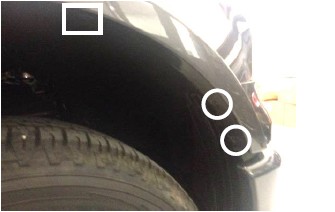
3. Remove (2) 7mm bolts (circles) and (1) tree clip (square) under front wheel well for trucks with factory plastic fender trim. If truck does not have factory fender trim, only remove the (2) 7mm bolts in location shown above.
4. This step is for trucks with factory plastic fender trim only. (Skip to Step 5 if truck does not have factory fender trim) Pop off first 4 clips from the front on factory fender trim using a flathead screwdriver or plastic pry bar.
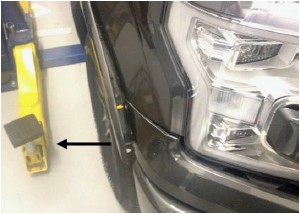
5. Pull off plastic cover around headlight. Pull straight out with a decent amount of force to release plastic clips. Set cover aside.
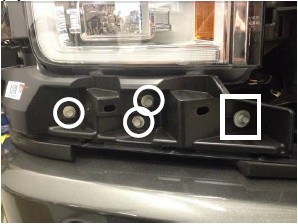
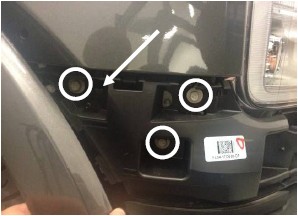
6. Remove (3) 10mm bolts (circles) and (1) 8mm bolt (square) from plastic molding below headlight. Set bolts aside.
7. Remove black plastic clip from inside wheel well. Clip is attached to the plastic molding from where bolts in Step 6 were removed.
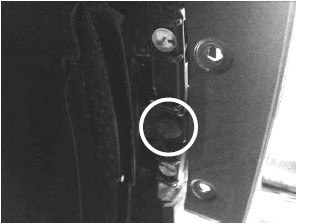
8. Remove (3) 10mm bolts from the side of the plastic molding. Once bolts are removed, use needle nose pliers to release clip shown by arrow. Pull part out from truck about a half inch.
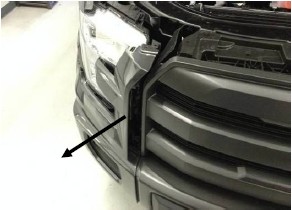
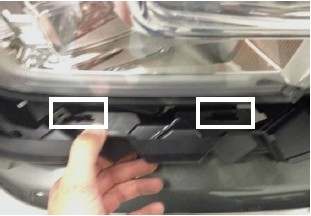
9. Pull plastic molding out away from light about 1" and unclip 2 plastic clips with a flathead screwdriver. Location shown above.
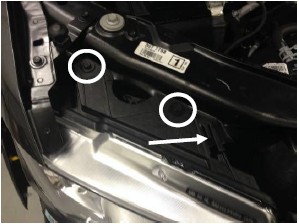
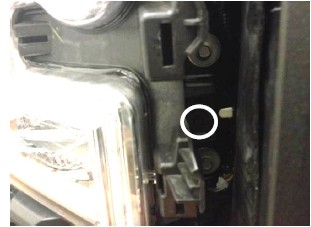
10. Remove (2) 10mm bolts on the top and (1) 10mm bolt on the side that hold in headlight housing. Locations shown by circles above. Once bolts are removed, unclip tab shown by arrow and pull headlight straight out. Unplug (1) harness for LED headlights or (3) harnesses for halogen headlights from the back of the headlight housing. Place headlight housing aside in a safe location.
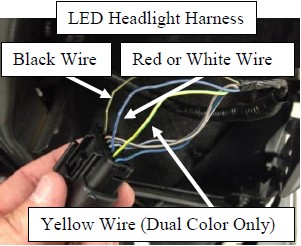
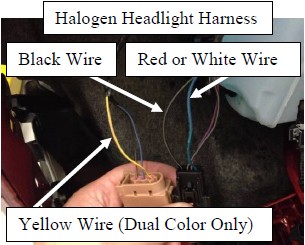
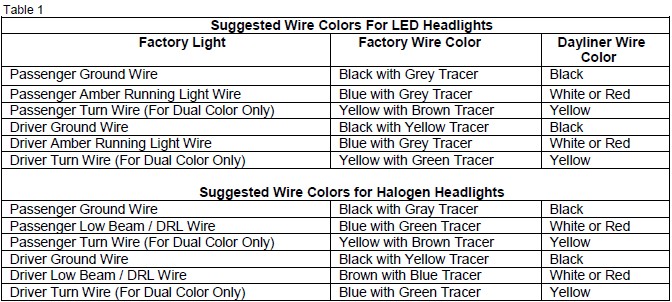
11. On factory harnesses, find required wires for dayliner installation. Above images show both LED and halogen headlight harnesses. (Only one of these images will be used) Images are an example of where Putco dayliner wiring will be installed. Refer to Table 1 for Factory Wire Colors.
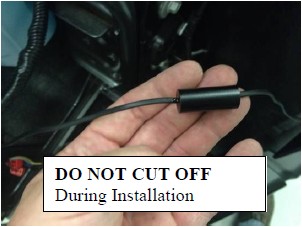
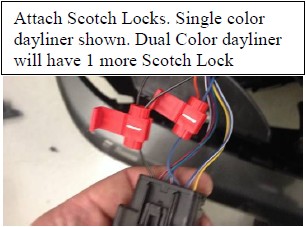
12. Find correct dayliner for side you are working on. If desired, cut dayliner wires to shorter length. (DO NOT CUT OFF DRIVER, shown above) Leave enough wire past driver to wire into factory harness. Use Scotch locks to attach dayliner wires to factory harness wires.(Found in step 11) (DO NOT CUT FACTORY WIRING). Place both wires in scotch lock and press steel clip down with a pliers. One end of scotch lock allows a wire to pass through it, use this side on the factory wiring. Verify wires are secured in place. Once all wires are attached, check function of dayliner before moving on the step 13.
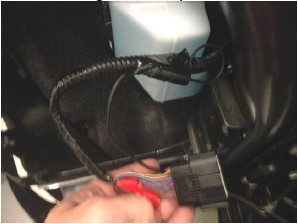
13. Clip Scotch Lock clips shut. Secure dayliner wiring to factory wiring harness using electrical tape or zip ties. For Dual Color dayliners only, secure driver box to truck and leave enough room for headlight to be reinstalled.
14. Place dayliner above grille and reinstall factory headlight. Verify that all harness(es) are plugged in. Secure headlight with factory hardware.
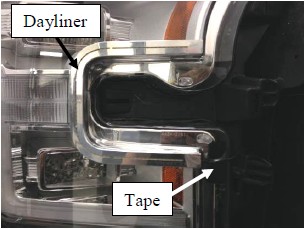
15. Clean headlight with 70% (or higher) Isopropyl Alcohol . Remove red tape backing on dayliner and place dayliner on headlight in location shown above. Press firmly for 30sec. Tape dayliner wire to headlight.
16. Reassemble truck in reverse order of Steps 1-9. Keep truck above 16°C (60°F) and do not wash for 12-24 hours.