 FREE 1 to 3-Day Delivery on Orders $149+ Details
How to Install NGK G-Power Platinum Performance Spark Plugs on your F-150
Installation Time
2 hours
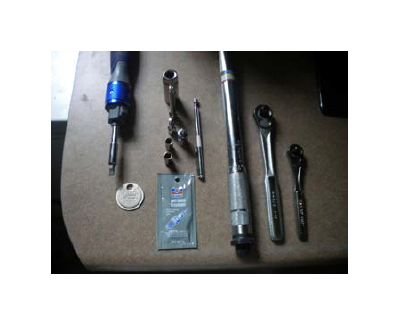
Tools Required
- Ratchet
- Torque wrench
- Extension
- 5/8” spark plug socket
- 5/16” socket
- 7mm socket
- Telescoping magnet
- Spark plug gap tool
- Flat head screw driver
- Anti-Seize
- Compressed air
Removal Procedure:
1. Begin by removing the negative battery cable from battery using the 5/16” socket. Separate the cable from the battery using a shop rag if necessary.
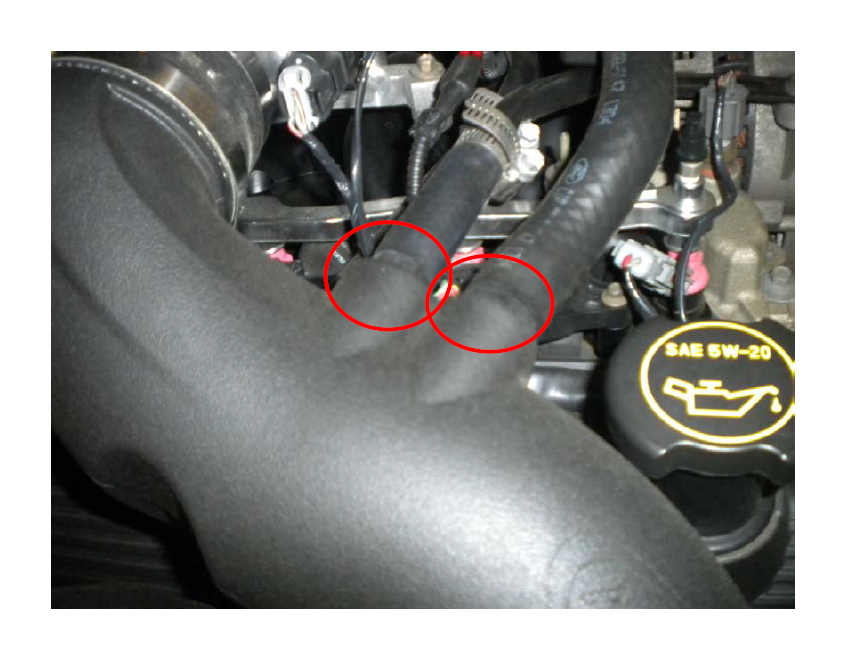
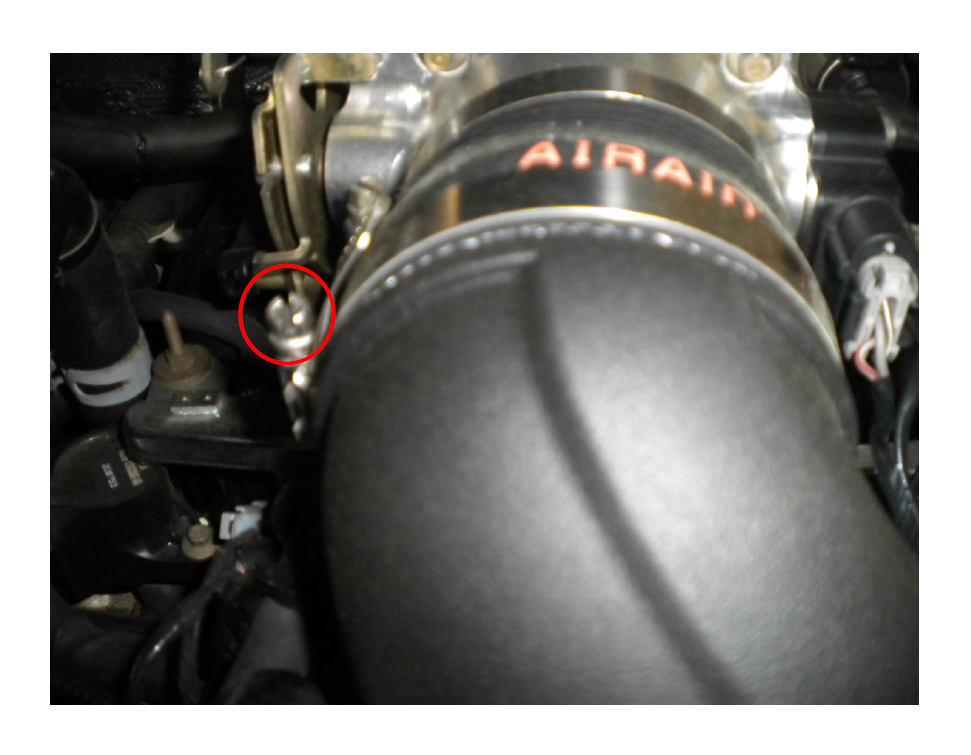
2. Remove the two vacuum lines (IAC and PCV) from the upper intake tube. Remove the upper intake tube from throttle body and the mass air flow sensor adaptor using the flat head screwdriver to loosen the band clamps.

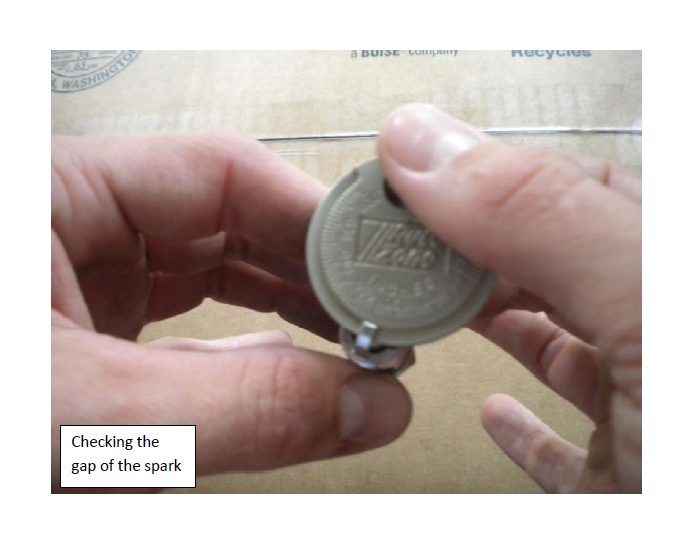
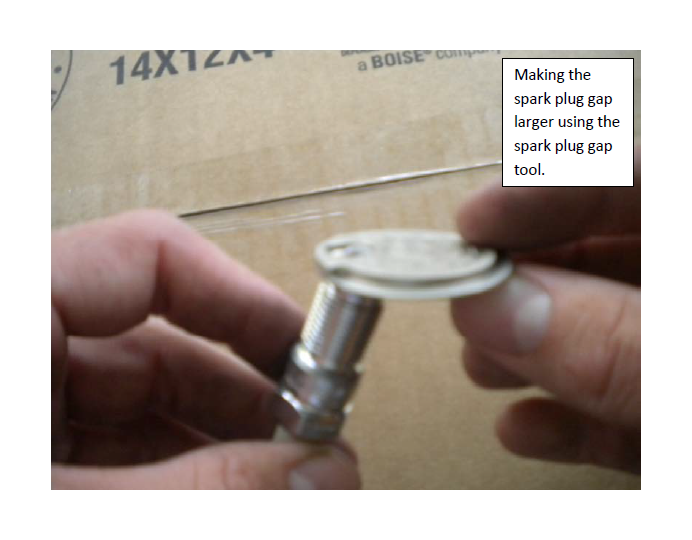
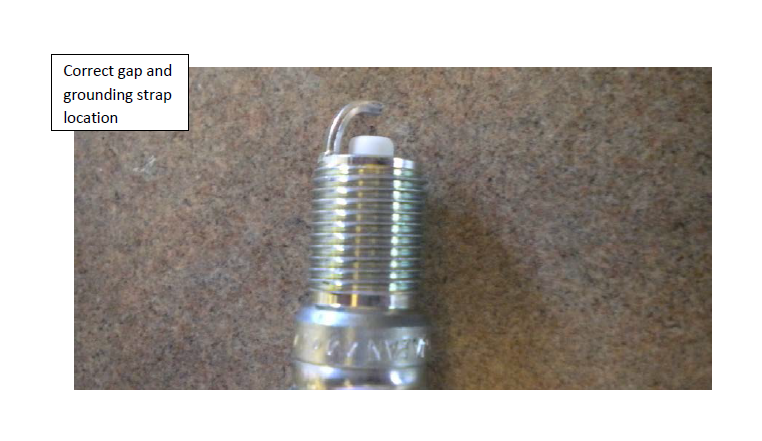
3. Check your new NGK spark plug gaps. When I received mine, they were all gapped to 0.060 inch. The Ford specification for spark plug gap is 0.052-0.056 inch. To close the gap on a spark plug, LIGHTLY tap the grounding strap on a counter or hard surface. To open the gap more, use the spark plug gap tool to increase the gap. This is the most time consuming part of the entire process, but be sure to get your gaps consistent and correct. Also, ensure that the grounding strap is directly over the electrode.
4. Before removing any of the spark plugs, use some compressed air, I used keyboard cleaner, and blow around the coil on plugs to remove any debris that could fall into the cylinder once the spark plug is removed.
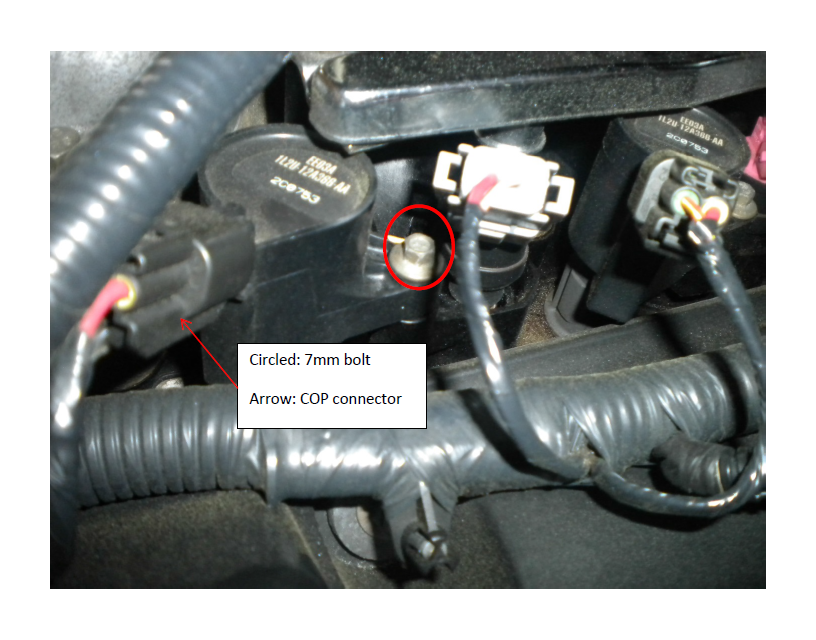
5. Working on one spark plug at a time, begin the removal of the coil on plug (COP) by first unplugging it’s connector, and then by removing the 7mm bolt that secures it to the intake manifold. You may find it easier to access the bolt on some by first removing the fuel injector connector (squeeze off). It may be helpful to recover an accidentally dropped bolt or socket using the telescoping magnet.
6. Remove the COP by giving it a wiggle and removing it from under the fuel rail.
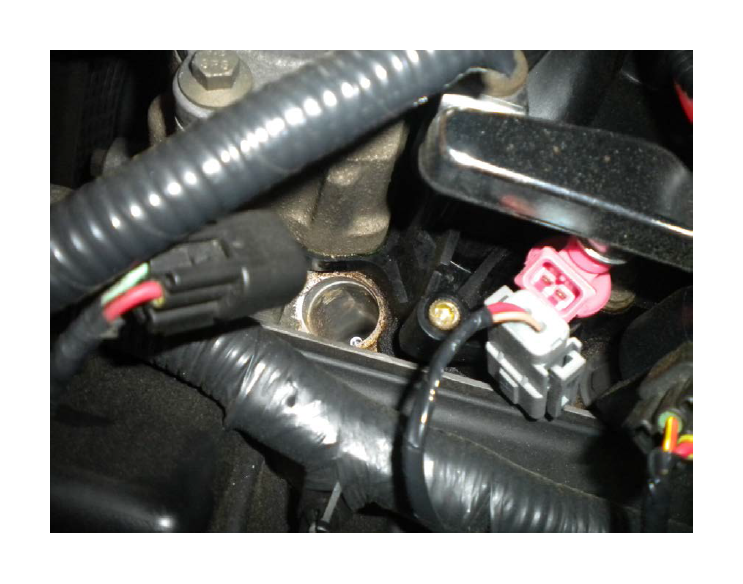
7. Using the ratchet, extension, and spark plug socket, remove the spark plug.
8. Inspect the old spark plugs for any signs of premature wear.
Installation Procedure:
1. With your new spark plug gapped appropriately, apply anti-seize to the threads (anti-seize may be purchased in small quantity at your local auto parts counter).

2. Load the new spark plug into the spark plug socket and attach the extension. Start threading in the new spark plug until it is as tight as you can get it by hand.
3. Using your torque wrench, tighten the spark plug to 11-14 lb-ft.
4. Carefully replace the COP, and tighten its 7mm bolt until snug (remember that it is being bolted to a plastic intake manifold).
5. Re-connect the plug to the COP.
6. Follow these steps until all eight spark plugs have been replaced.
7. After complete, double check all connections to insure there are no misfires.
8. Replace the upper intake tube, tighten band clamps, and reconnect the two vacuum lines.
9. Reconnect the negative battery terminal.
Installation Instructions Written By AmericanMuscle Customer John Collman 5/3/2013

