 FREE 1 to 3-Day Delivery on Orders $149+ Details
How to Install MBRP Installer Series Cat-Back Exhaust - Split Rear Exit on your F-150
PLEASE READ BEFORE STARTING INSTALLATION
While MBRP Inc. has made every effort to ensure that all components of this system are of superior quality and properly packaged, it is the installer's responsibility to ensure the following before removal of the factory exhaust:
• that ALL components shown above are present.
• that ALL mating components fit together.
• that there are no damaged components.
• that the system you have purchased is appropriate for your vehicle year, model and configuration.
• that the system will not interfere with any modifications previously installed or planned.
• that you have read and understand these instructions.
If you have any questions or are uncertain about any aspect of the installation of this system to your vehicle please contact your dealer before commencing installation.
Removal of stock system:
1. Apply a penetrating lubricant liberally to all exhaust fasteners, hangers and rubber insulators.
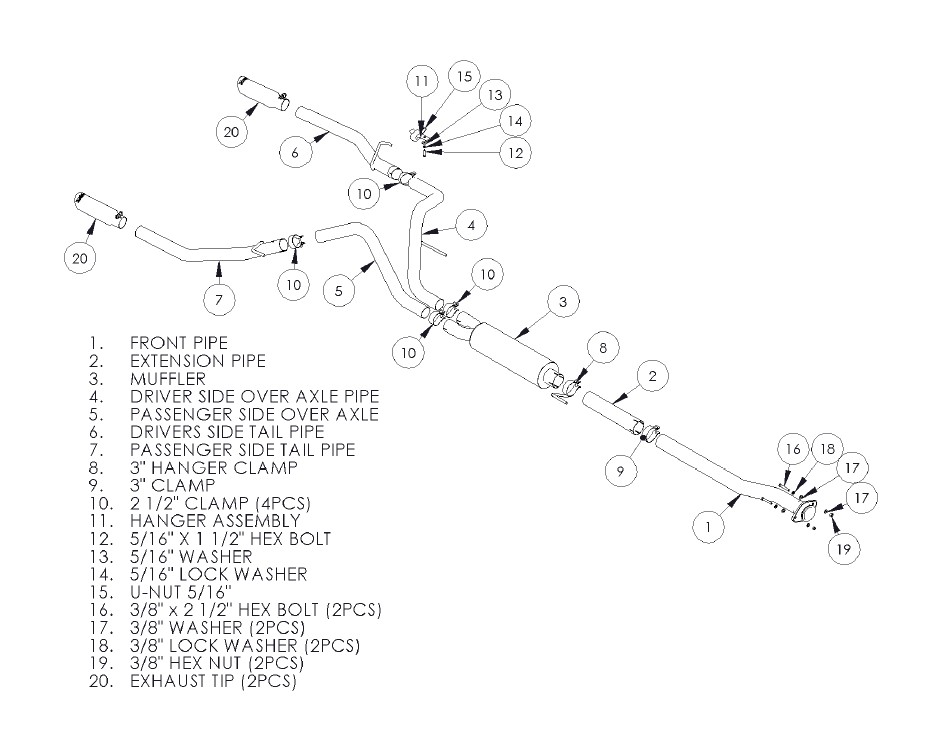
2. Loosen the flange located behind the “Y” pipe. Refer to Figure 1.
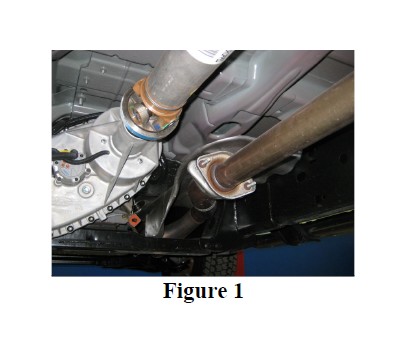
3. Loosen the clamp located in front of the muffler. Refer to Figure 2.

4. Remove the hangers from the rubber insulators and remove the exhaust from the vehicle. If a hoist or hydraulic lift is not being used the tail pipe may need to be cut to clear the rear axle. Refer to Figure 3.
Installation of MBRP Inc. Performance Exhaust:
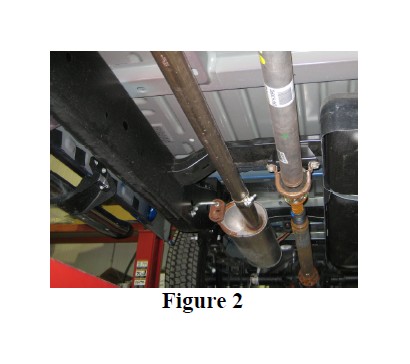
1. Install Front Pipe to the existing flange using the fasteners provided. Refer to Figure 5.
Note; the Extension Pipe will not be required on most models.
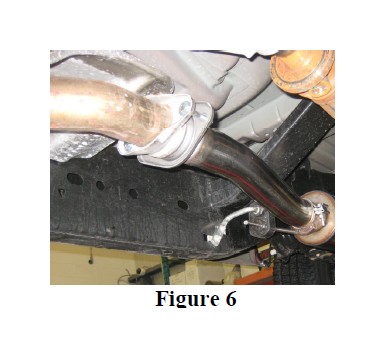
2. Slide a 3” Clamp over the Front Pipe and install Extension Pipe onto the Front Pipe. Install the Hanger Clamp loosely to the Extension Pipe (or Front Pipe if the Extension Pipe is not required) and place the hanger into the existing rubber insulator. Refer to Figure 6.
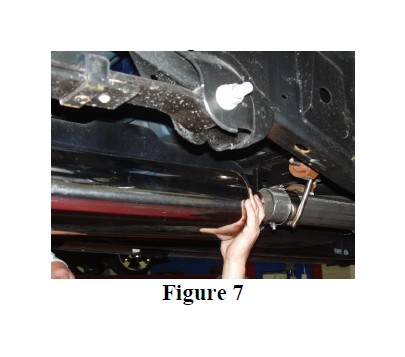
3. Slide the Muffler onto the Extension Pipe or Front Pipe as required. Refer to Figure 7.
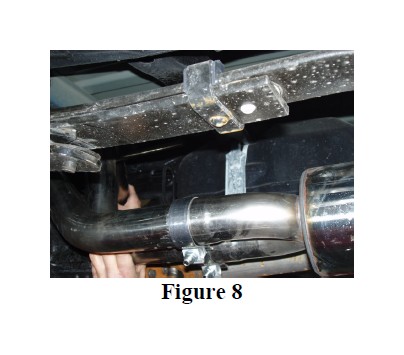
4. Loosely install the Driver Side Over Axle Pipe connecting it to the outlet closest to the drive shaft. Install the hanger into the rubber insulator located above the Muffler outlets. Install the Passenger Side Over Axle Pipe to the remaining outlet. Refer to Figure 8.

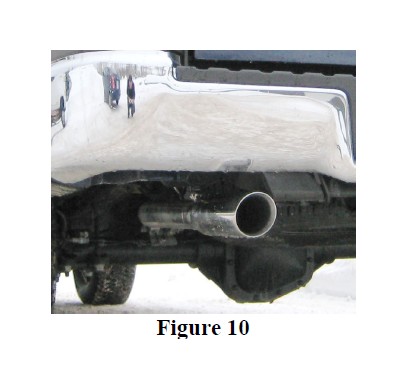
5. Attach the expanded end of the Driver Side Tail Pipe connect it to the Driver Side Over Axle Pipe using a 2 1/2” Clamp. Note; some lines will have to be relocated and secured away from the exhaust. Refer to Figure 9 & 10.
6. Move the Driver Side Tail Pipe into approximate position. Directly above the tail pipe hanger on the bottom of the frame there will be a square hole with a round hole beside it. Slide the 5/16” U Nut provided into the square hole, towards the round hole with the threaded part inside the frame so that the frame is sandwiched by the 5/16” U Nut. Attach the Hanger Assembly provided using the 5/16" hardware supplied. Slide the Driver Side Tail pipe Hanger into the Hanger Assembly. Refer to Figure 9 & 10 .
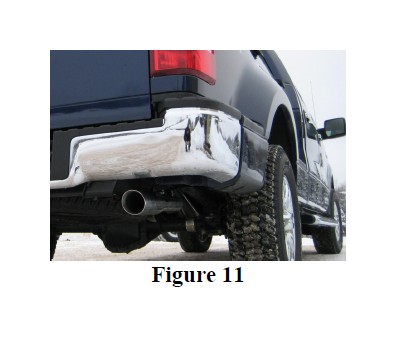
7. Feed the expanded end of the Passenger Side Tail Pipe from the rear of the vehicle over the axle and loosely connect it to the Passenger Side Over Axle Pipe. Slide the Passenger Side Tail Pipe hanger into the factory rubber insulator. Refer to Figure 11
8. Install and adjust the Exhaust Tips to suit. Using a 17mm wrench tighten the lock bolt on the Exhaust Tip.
9. Align the exhaust as required. Starting at the front of the exhaust tighten all clamps and connections.
10. Check along the whole length of the exhaust system to ensure that there is adequate clearance around the spare tire, fuel and brake lines or any wiring. If any interference is detected relocate or adjust.
Congratulations! You are ready to begin experiencing the improved power, sound and driving excitement of your MBRP Inc. performance exhaust system. We know you will enjoy your purchase.

