FREE 1 to 3-Day Delivery on Orders $149+ Details
How to Install Matte Black Full Length Sripes - 10-1/4 in. on your F-150
Installation Time
6 hours
Tools Required
- Spray bottle with soap & water mixture
- Plastic Squeegee
- Pair of scissors
- X-Acto knife or razor blade
- Painters tape 1”
- Surface cleaner-Mequiars Deep Crystal System paint cleaner

Shop Parts in this Guide
Prep:
Clean car well to ensure good adhesion of the decal, using a surface cleaner if neccesary. Rewash the car to remove anything missed and to rinse any chemicals left behind. Fill a spray bottle with a mixture of water and soap (we use baby shampoo), about 4 large drops per 32 oz. spray bottle of water. Be sure to install decal out of direct sunlight. Also having someone to assist you if you can is very helpful.
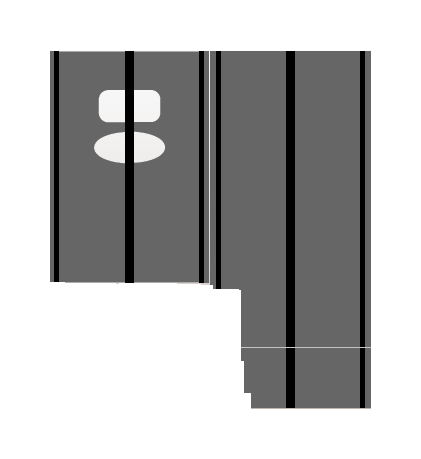
The stripes you are installing are made from a wrapping cast material. That means it is the same material used in wrapping complete vehicles. The material is forgiving, repositionable to a reasonable extent. and is typically installed dry without transfer tape. Here we will install it with a soap and water mixture and with no transfer tape. You can use the spacing stripes provided to align the decal. The spacing stripes location are noted on a diagram at the end.
Tailgate installation
Place a length of masking tape horizontally across the tailgate at several locations. Mark the center measuring from side to side on the tailgate. From the center, measure over left and right 1/2” , this will leave you marks 1” wide down the center of the tailgate.
You can then take the center spacing vinyl from the backing and run it down the center of the tailgate. This will provide the spacing for the center of the stripes. You can then remove the horizontal tape. Tear the tape off at the spacing stripe leaving underneath the spacer for now.
Apply 2 layers of tape along the seem of the tailgate and tailgate top protector. Applying one then tucking it tight against the seam then applying a second in the same manner. Leave this tape in place till the top of the stripes are installed.

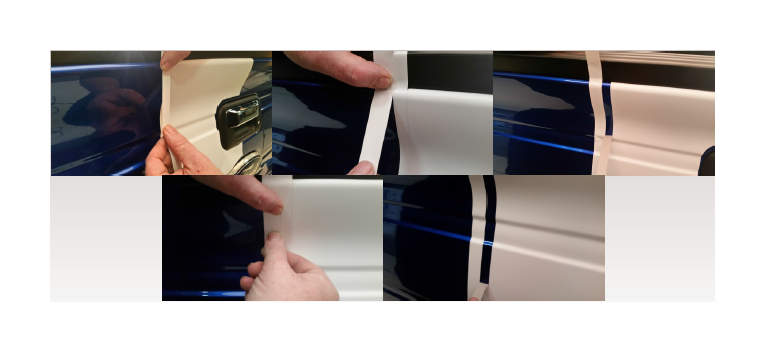
Remove one of the wider stipes from the backing of the vinyl. With the soap water mixture spray the back of the vinyl. Make sure to cover the vinyl with solution but it doesn't need to be dripping wet.
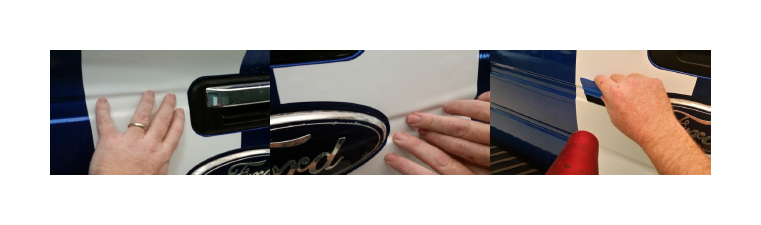
The first location to align this part is between the logo and tail gate latch. Slide the vinyl up against the spacing stripe and align the vinyl so that there is an equal distance around the logo on the top and side. Also you should have equal distance on the latch from the bottom and side.
Once in place squeegee out the solution starting from the inside of the stripe to the outside and also going from between the latch and the logo first. Once that area is tacked down proceed squeegeeing upward being conscience of any body contours. It is also possible to use light heat ,with a hair dryer, at this point to help tack the vinyl down and help conform to any body contours. Use a low heat setting you don’t want it more than tacked down until you are sure of your placement.
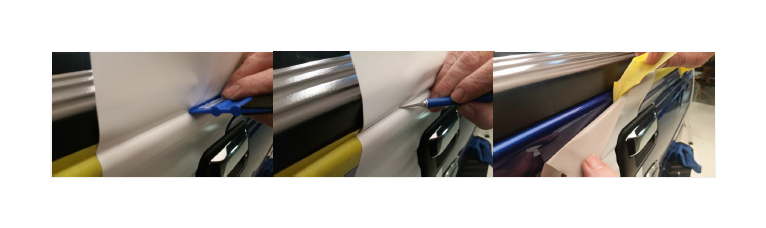
Using you squeegee crease the vinyl against the top protector. Do this with the squeegee edge. You can then carefully use an X-Acto knife and cutting the vinyl only using the crease you made to trim the vinyl off. This is were you applied two layers of tape earlier to protect the paint. Peel back the vinyl and remove the tape. Leaving the tape in place for the other side till that is installed. Squeegee down the vinyl tight. At this time after making sure the vinyl is correctly placed, use a hair dryer on low setting and dry the vinyl on the car. The bottom can be trimmed 1/2” or so below the tailgate and tucked around. Again drying it with a hair dryer.
Apply the other side in the same manner as above. Remove the center spacing stripe. Remove any other tape left behind
For the outer pin stipes, you will take the outer spacing stripes and lay them out from top to bottom right against the wide stripe sec-tion that has been installed. This will give you a guided edge to place your outer pinstripes spaced correctly. You can leave the top an bottom extra over hang for the spacing stripe. Apply you outer pinstripe laying it up against the spacing stripe being conscience of the body contours. Trim the top and bottom the same as you did the wide stripes. Then remove the spacing stripe.
Hood & Bumper Installation
The hood can be installed using the same techniques used to install the tailgate section. Care should be taken when measuring the center of the hood. Due to the irregular shape it may be more difficult to get an accurate centerline. You can use 1” masking tape instead of the spacing stripe. This can give you several chances to be sure you have it right. After getting the center stripe step back and visually check for center to be sure you have it correct. There is a small section if you choose to install the bumper area. Follow the same techniques as before.
The black stripes are the spacing stripes and should be removed and used for spacing then discarded after complete installation
The Grey stripes are you graphics to be used as the installed stripes.
The cut outs may differ from this illus-tration compared to year fitment.