FREE 1 to 3-Day Delivery on Orders $149+ Details
How to Install Magnaflow MF Series Cat-Back Exhaust - Dual Side Exit - Before Rear Tire on your F-15
Installation Time
2 hours
Tools Required
- 15mm Socket/Wrench
- 13mm Socket/Wrench
- 10mm Socket
- Hammer/Mallet
- 17mm Socket
- Flathead Screwdriver
- 2 Extensions
- Jack or Pipe Stand
- Lubricant

Note:
The torque specifications proved above are specified within the manufacturers warranty; "Over-tightening will result in the clamp breaking, and will NOT be warranted by Magnaflow."
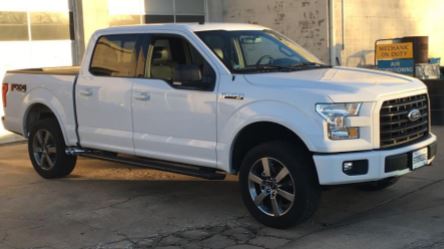
This installation was completed on a 2016 F150 Super Crew with the 5.0.
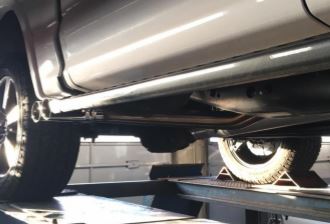
Removing the Stock Exhaust
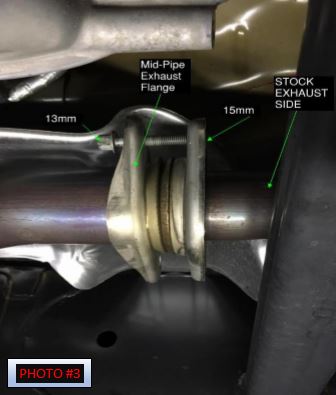
1. Using a 13mm, loosen the bolts form the mid-pipe flange.
Note: The 15mm nuts are welded to the exhaust side of the stock system.
2. Using a 10mm, remove the two 10mm bolts from the inlet side of the stock muffler.
3. Finish removing the bolts from the mid-pipe flange.
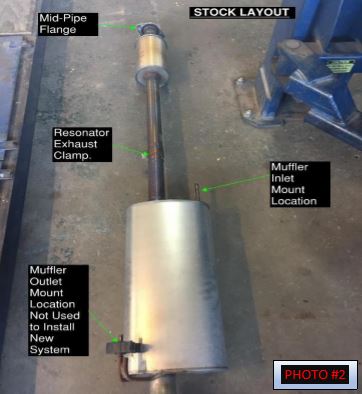
4. At this point you can remove the stock exhaust system by pushing toward the back of the truck on the entire system. Please note that there is an additional bracket that can be removed to help with this step, but is not necessary.
a. See Photo #2--outlet side of the stock muffler
b. This bracket is not used in the installation of the new Magnaflow system.
Installation of Magnaflow Exhaust System
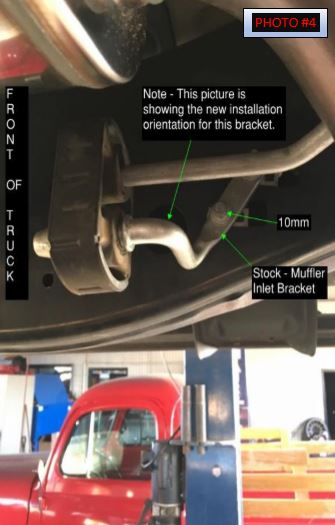
1. Using a 10mm, reinstall the stock muffler inlet bracket in the orientation.
See photo #4.
Note: Grease the rubber hanger to help it accept the new hanger from the Magnaflow system.
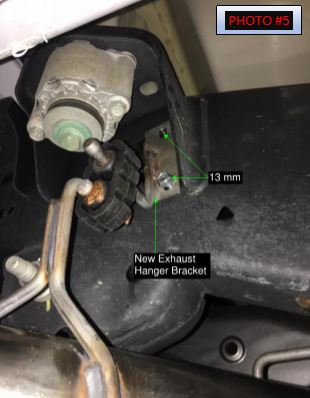
2. Using a 13mm, install the new exhaust hanger bracket. Torque to 30-35 ft-lbs.
a. Install the 2 U-TYPE PANEL NUTS--these must be installed into the frame to provide a threaded component to allow the 13mm bolts to fasten to.
3. Using a 13mm and 15mm, install new pipe section that goes to the mid-pipe exhaust flange.
a. Recommendations: with the supplied hardware for this step, run the nut all the way up the bolt and then back off. This will help the installation process due to the limited space you have to work in.
Installing the Muffler/Tail Pipe section
4. Slide the flange pipe into the inlet of the muffler, at the same time using the newly installed bracket and rubber hanger and the reoriented stock bracket, slide the corresponding hanger rods on the new muffler/tail pipe section into place.
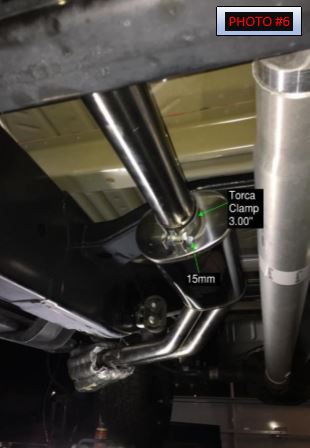
5. Using a 15mm, loosley snug the provided Torca Clamp (Saddle Clamp) directly over the inlet of the muffler.
Note: This Clamp will be your final adjustment of your tips in relation to the body line.
Fastener Inspection Step (Front to Back)
6. Loosley snug all fasteners; Mid-Pipe Flange nuts and bolts, and Torca Clamp. Now set the desired elevation of the tips in relation to the body line. If you cannot make this adjustment, loosen the Torca Clamp enough to rotate the muffler section--this will adjust the height of your tips.
Note: When setting the desired height of your tips, make sure there is adequate room between your frame rail and the new system or you will get a vibration.
Finalize the tightening sequence of fasteners with the noted torque specs located under the parts section of the first page.
7. Recommendations: Test for 25-50 miles and check all fasteners, and tighten where necessary.
Enjoy your new Magnaflow Cat-Back System!
Before & After