 FREE 1 to 3-Day Delivery on Orders $149+ Details
How to Install JLT V3.0 Satin Oil Separator - Driver Side (99-03 Lightning; 02-03 Harley Davidson) on your Ford F-150

Shop Parts in this Guide
Please review complete instructions prior to installing.
1. Verify you have all of the following parts included in the kit: (1) JLT Oil Separator, (1) JLT angled mounting bracket, (2) fine thread machine screws, (2) Course mounting screws, (2) 1/2 hose kits
2. Gather all of the following tools needed for the installation: Drill with small bit, Phillips screw driver, light oil.
3. Choose a mounting location for the Separator. We recommend mounting it on the plastic cowl panel directly above the brake booster. It must be mounted low enough so it doesn’t come in contact with the hood and in a location where you can still unscrew the can and remove it.
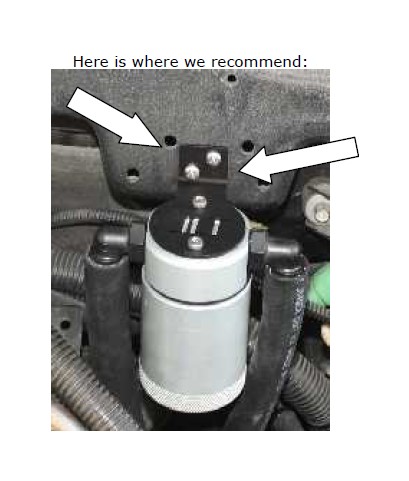
4. Hold the JLT bracket in position and mark the holes to be drilled. Drill 2 holes smaller than the mounting screws and attach the mount.
5. Use the 2 supplied fine thread screws to attach the Oil Separator to the mounting bracket. Mount the Separator so the JLT LOGO IS LINED UP WITH THE JLT ON THE BRACKET.
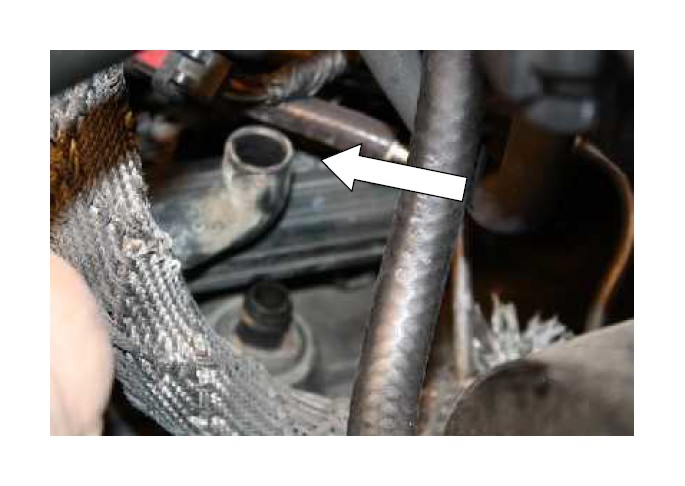
6. Pull the hard plastic PCV hose out of the rubber 90* on the valve cover and rotate the 90* fitting straight up.
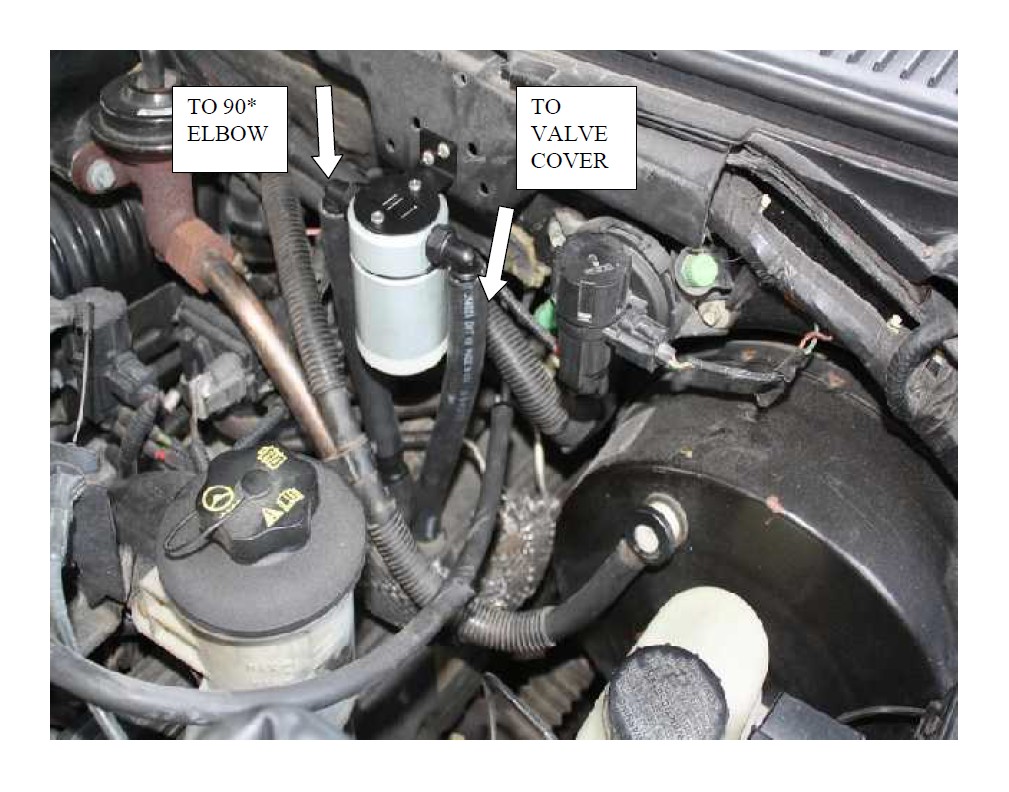
Use the supplied pre-built 1/2 hoses to connect the fitting on the valve cover (use light oil in hose to aide in sliding over fitting) to the fitting on the Separator and then from the Separator to the hard plastic factory line as shown below.
To properly clean the filter in the Oil Separator, spray any degreaser or solvent through it and let it air dry. Clean it every 10,000 miles. Thanks for the business. If you have any questions, please e-mail [email protected] or call 757-335-1940. Our hours are Monday-Friday. 8:00am – 5:00pm Eastern Time.
