 FREE 1 to 3-Day Delivery on Orders $149+ Details
How to Install JLT Performance Cold Air Intake - HydroCarbon (11-14 6.2L, Excluding Raptor) on your Ford F-150
Please review complete instructions prior to installing.
1. Verify you have all of the following parts included in the kit: (1) JLT Intake tube W/ PCV fitting and breather hose fitting, (1) 3.5”-4" Silicone Reducer, (1) 56 size clamp, (1) 64 size clamp (1) 4.5x6 Air Filter, (1) Heat Shield, (2) MAF screws, (1) Power Steering Relocator Bracket and hardware and (1) MAF Gasket
2. Gather all of the following tools needed for the installation: 5/16 nut driver, T-20 torx driver, Phillips head screw driver, 10mm socket, 6 inch extension and rachet.
3. Install Tune for JLT Intake – Refer to instructions included with the Tuner.
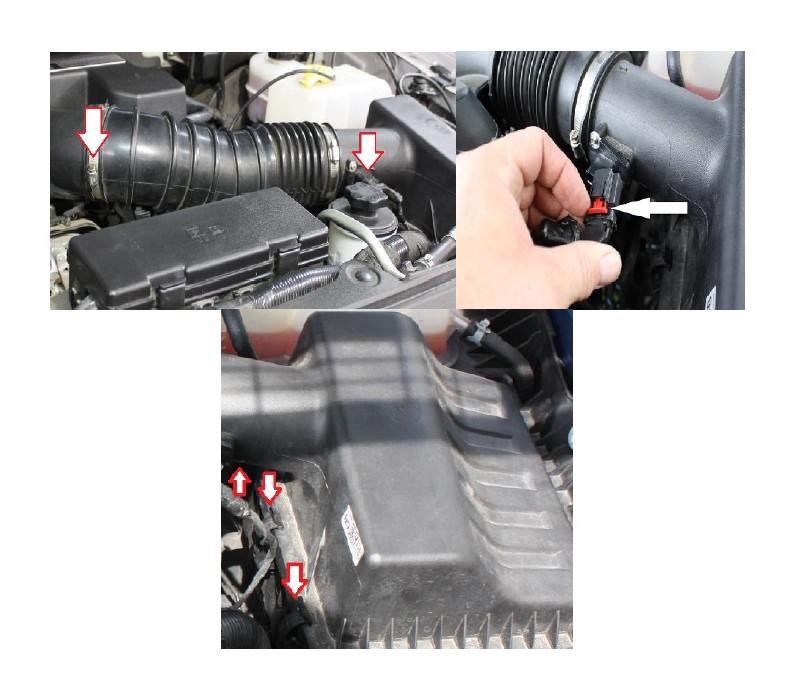
4. Remove the stock upper air box by loosing the clamp at the intake plenum, and MAF plug you must pull the red locking clip outward to unplug sensor. The top of the air box is held to the bottom with 3 retaining clips, pop those off and remove the entire intake tube assembly.
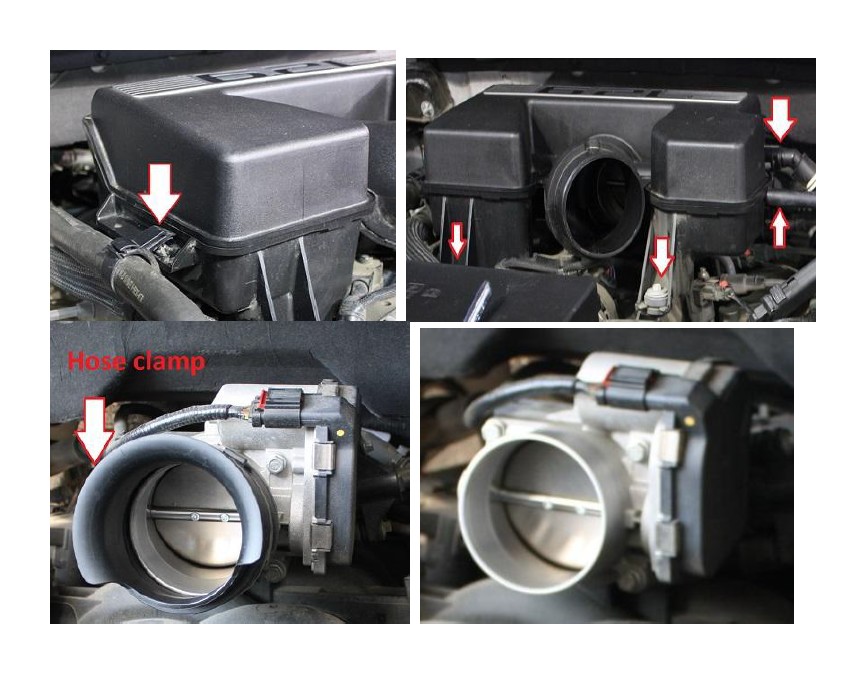
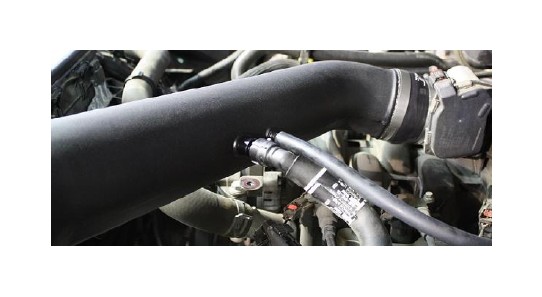
5. Remove the two bolts holding the plenum to the engine, remove the PCV connection, EVAP breather hose on the driver side and coolant hose clip on the passenger side by prying it up with a screw driver. Once all of these have been disconnected, pull the entire plenum towards the front of the truck to remove the plenum box. You will be left with just a rubber air horn on the throttle body. Loosen the hose clamp and remove this rubber horn.
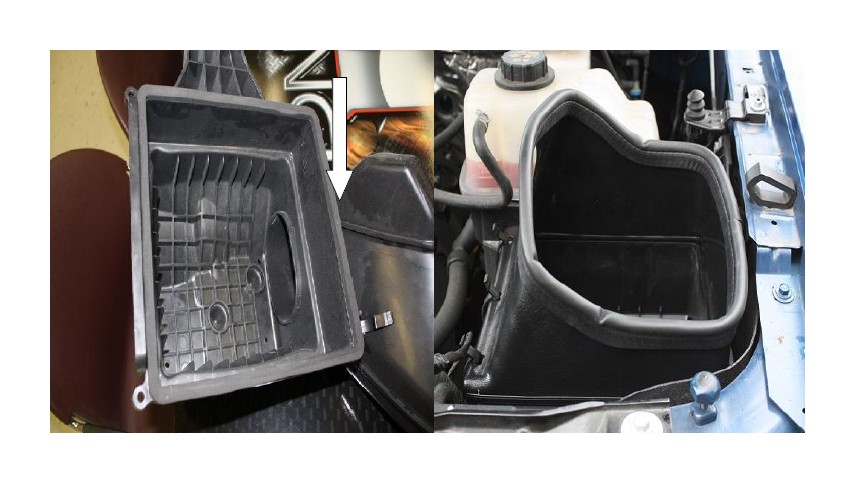
6. Remove the adhesive backing and install the JLT Air box gasket onto the lower air box onto the factory box. Install the JLT Heat shield it will slide into the back portion. Reattach the 3 clips to secure the heat shield
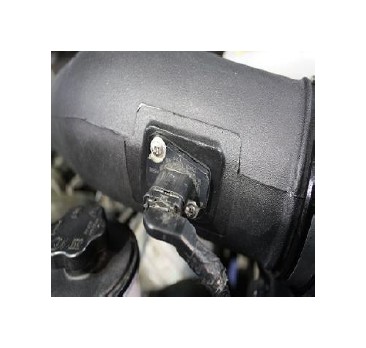
7. Remove the factory MAF sensor from the stock intake tube and install the MAF sensor into the JLT intake tube with the supplied screws and MAF gasket (DO NOT USE THE STOCK SCREWS!) Attach the silicone reducer to the JLT intake tube and loosely install the clamps.
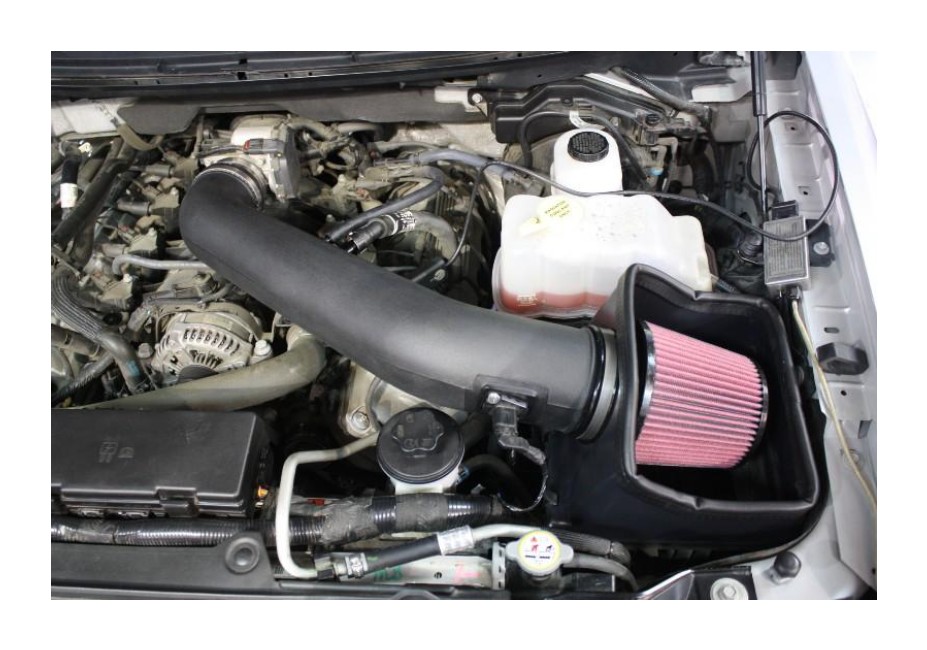
8. Install the silicone reducer on the throttle body and rotate down to sit in the heat shield and tighten clamps. The tube will sit on the heat shield gasket. Now install the air filter onto the end of the tube and tighten the clamp. Plug in the PCV fitting, breather hose and MAF plug. That's it! CLAMPS ONLY NEED TO BE SNUG-DO NOT OVER TIGHTEN
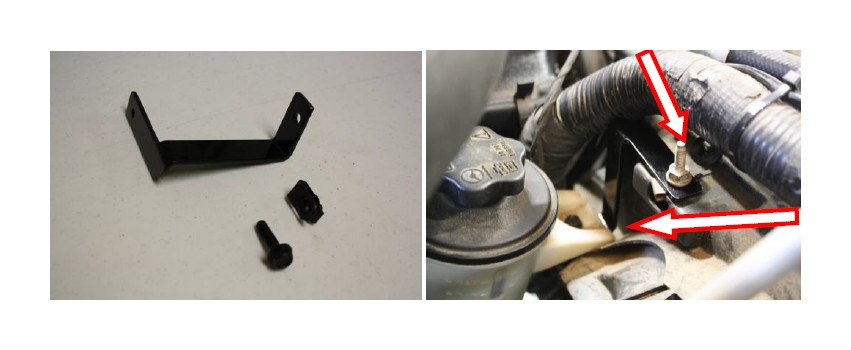
9. Remove 11mm bolt holding power steering reservoir to the fan shroud and use the supplied bracket and hardware to reattach in the lower position.
Oil Filter: The frequency you should clean your filter will depend on your driving conditions. It is recommended to check your filter at every oil change or 3,000 miles. If there is a build up of dirt as thick as the wire mesh, then it’s time to clean your filter. As dirt builds up on your filter, the restriction of the airflow also increases. More frequent cleanings will improve your fuel economy and your vehicle’s performance.
To properly clean your oil filter, we recommend the S&B Precision Cleaning & Oiling Kit (located in the Parts Sold Separately Section of our website, www.JLTtruecoldair.com).

