FREE 1 to 3-Day Delivery on Orders $149+ Details
How to Install Iron Cross Patriot Board Side Steps - Polished Stainless (04-14 SuperCrew) on your Ford F-150

STEP 1: Remove contents from box and check for damage parts. Verify all parts are present. making sure to read and understand instructions before beginning.
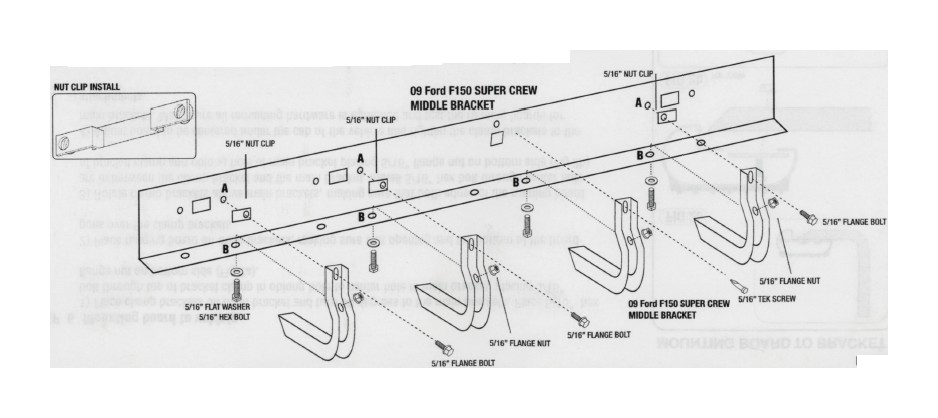
STEP 2: Locate factory running board mounts on bottom side of the cab. Regular Cabs have 2 mount locations, Super Cabs and Crew Cabs have 3.
STEP 3: Install (1) nut clip into one side of the factory location (Fig 1).
STEP 4: Position the main bracket and start the 5/16" hex bolt and flat washer into the pinch weld through hole "6" and fasten with 5/16" flange nut. Thread 5/16" flange bolt through top of bracket into 5/16" nut clip at hole"A".
STEP 5: 2009 Super Crew Cabs use TEK SCREW through the top hole of bracket into body panel.
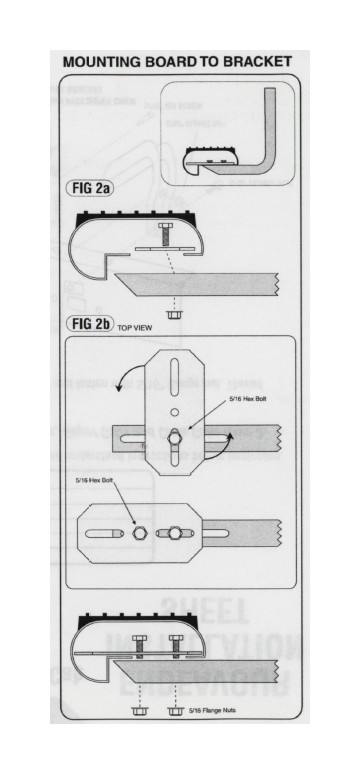
STEP 6: Mounting board to vehicle.
1) Place clamp brackets on main bracket and turn 90 degrees to the main brackets. Place 5/16" hex bolt through top of bracket clamp in oblong hole to center hole in main bracket, placing 5/16" flange nut on bottom side (Fig 2a).
2) Place running board on main brackets, making sure that opening and the bottom of the board goes over the clamp brackets.
3) Rotate clamp brackets above main brackets, making sure that both edges of the running board are in between the clamp bracket and the main bracket. Install 5/16" hex bolt through center hole of bracket clamp and oblong hole of main bracket placing 5/16" flange nut on bottom side (Fig 2b).
4) Adjust board to be centered under the cab of the vehicle and tighten the clamp brackets to the main brackets. Make sure all remaining hardware is tightened and test the running boards for attachments.