FREE 1 to 3-Day Delivery on Orders $149+ Details
How to Install Iron Cross HD Side Steps on your F-150
BRACKET INSTALLATION
1. Remove contents from box and check for damaged parts. Verify all parts we present, making sure to read and understand instructions before install.
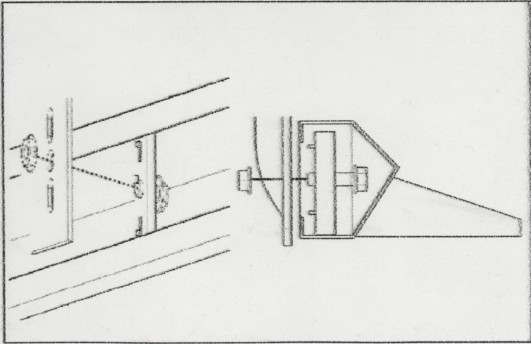
2. Locate factory threaded studs on inside body panel and pinchweld.
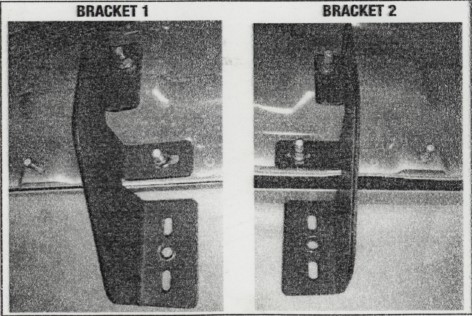
BRACKET 1 is the FRONT Bracket.
BRACKET 2 is MIDDLE and REAR Bracket
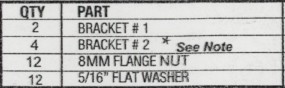
3. Position the bracket over the factory studs. Install 5/6" fiat washer
and 5/16" lock washer and 8MNI Flange Nut on studs . Tighten hardware over bracket.
Note: For Regular and Extended Cab, use only 2 Middle/Rear brackets
4. Repeat install on passenger side.
HD STEP INSTALL
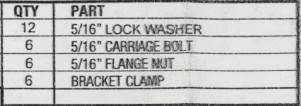
1. Install 5/16" carriage bolt and ''bracket clamp' to each bracket through hole 'C' Having a second person or jack stands will be helpfull on install.
2. CAREFULLY place HD STEP over bracket clamps and align so that clamp tabs are in between step channel. Begin to hand tighten 5/16' flange nut while making sure bracket clamps are aligning to the bracket holes.
3. Once you have all clamps hand tightened to bracket, this should allow the HD Step to slide forward and back to allow for final alignment to vehicle.
4. Once satisfied with alignment, tighten all 5/16" flange nuts for final install.