FREE 1 to 3-Day Delivery on Orders $149+ Details
How to Install Injen Power-Flow Cold Air Intake - Wrinkle Black on your F-150

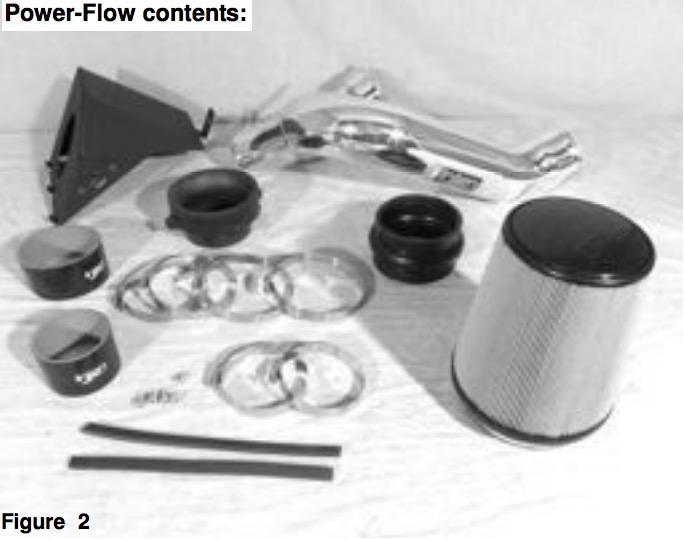
Shop Parts in this Guide
Step 1: Disconnect battery before install.
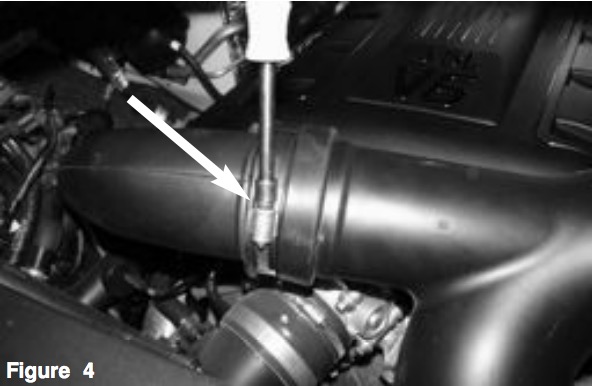
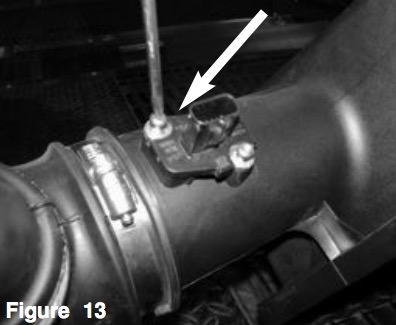
Step 2: Loosen clamp using 8mm nut driver.

Step 3: Loosen clamp using 8mm nut driver. Disconnect the MAF sensor harness.
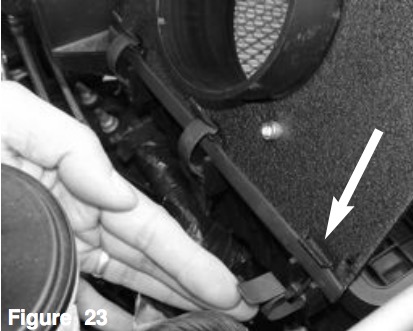
Step 4: Un-clip the 3 clips holding in the upper half of the air box.
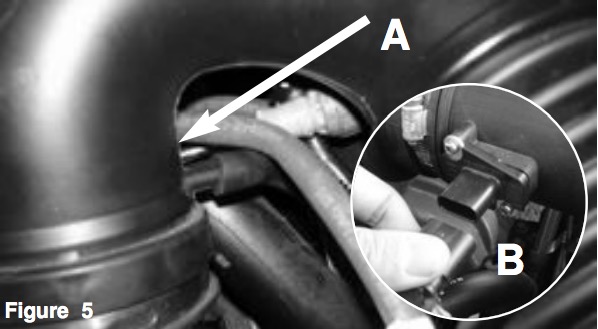
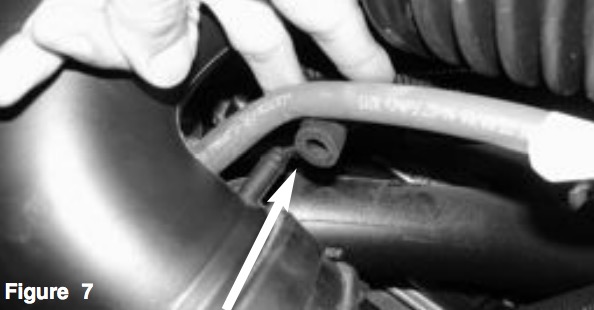
Step 5: Pull back the vacuum line from the intake tube.
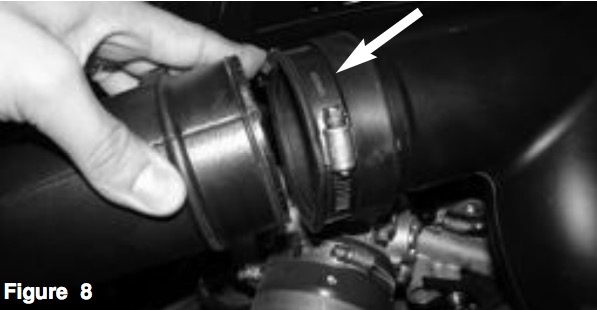
Step 6: Once the clamp is loosen, pull back the hose from the turbo inlet side.
Step 7: Pull back the larger side of the stock intake tube.
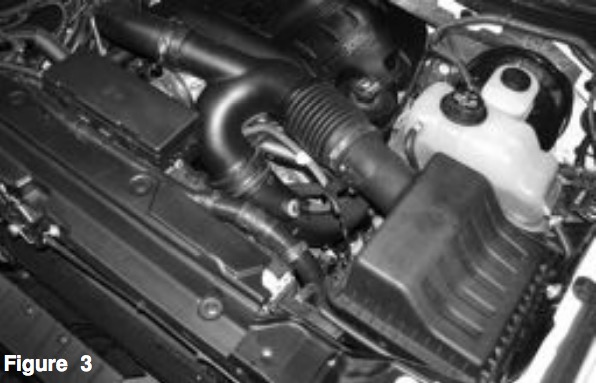
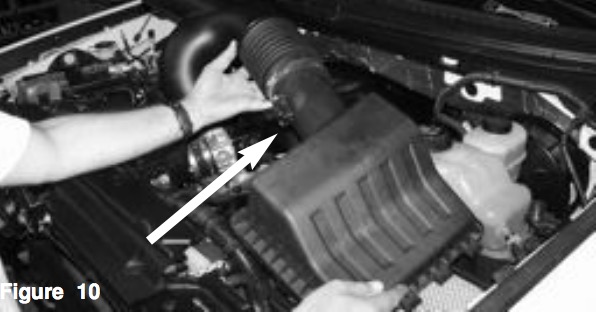
Step 8: Now lift up and remove the stock intake assembly out of vehicle.
Step 9: With 13mm socket and extension, loosen the bolt on side of air box housing.
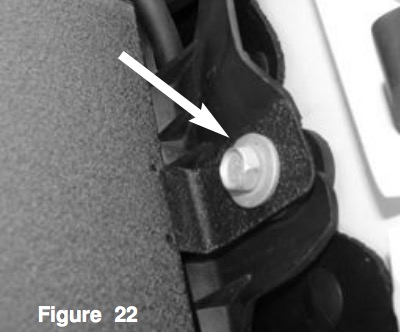
Step 10: Remove bolt and save for later install.
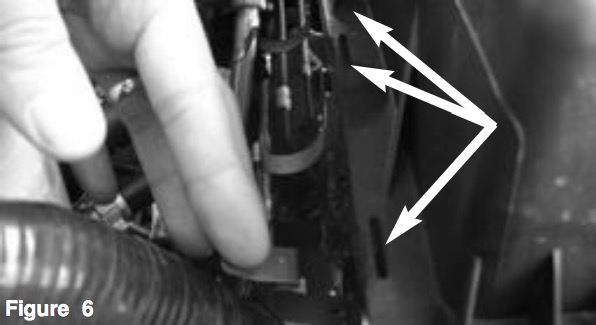
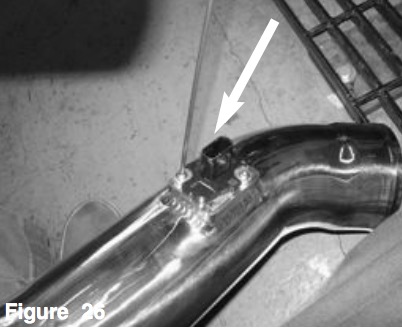
Step 11: With t20 torx bit, loosen and remove the 2 screws holding in the MAF sensor.

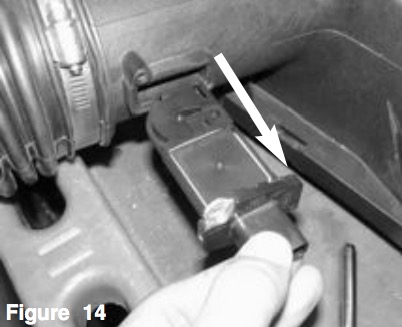
Step 12: Carefully pull the MAF sensor out and set aside.
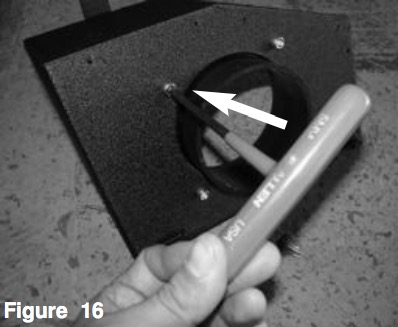
Step 13: Install the 3.75” velocity adaptor tot he inside of the heat shield.

Step 14: Secure the adaptor using the provided M6 button head screws and tighten using allen key.
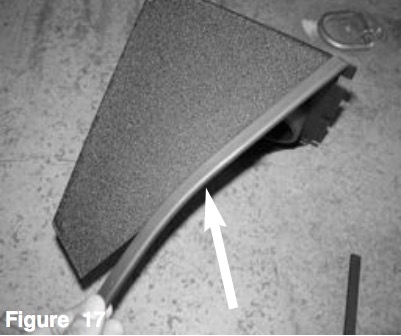
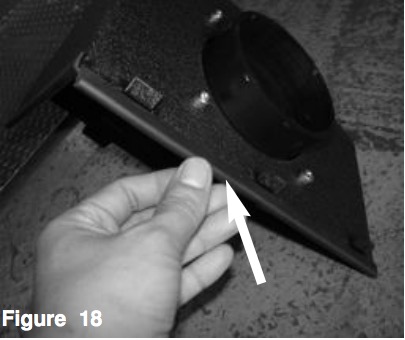
Step 15: Attach the vinyl trim to the side of the heat shield.
Step 16: Attach the other vinyl trim to the side with tabs. Note: make sure you attach the trim to heat shield to prevent rubbing and vibration.
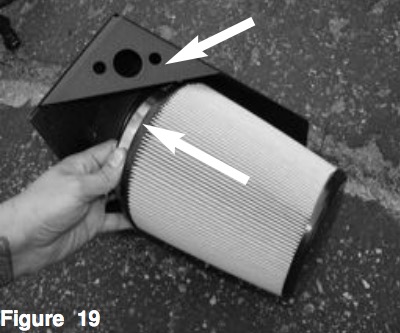
Step 17: Install the filter to the adaptor and tighten using 8mm nut driver.

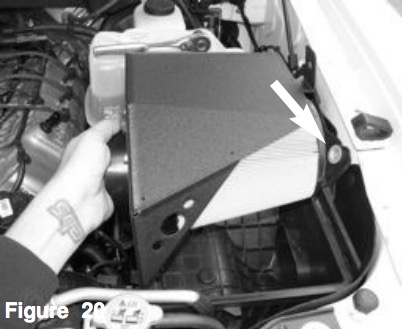
Step 18: Instal the heat shield assembly into the vehicle and position tab side first.
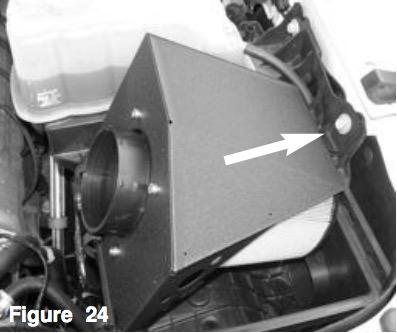
Step 19: Make sure the heat shield assembly with trim seats in the groove. Position heat shield forward for the tab to align with hole from step 11. Align the tabs to clips.
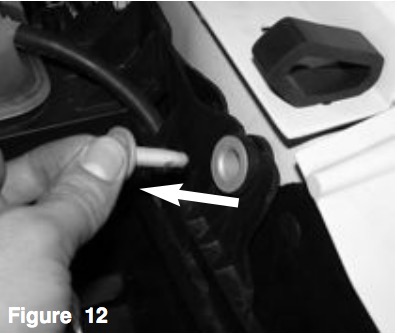
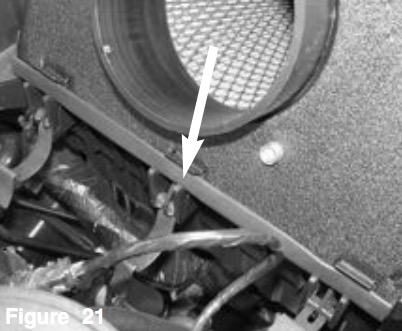
Step 20: Secure the tab using the bolt from step12.
Step 21: Secure the heat shield and clip to tabs.
Step 22: Tighten the bolt using 13mm socket and ratchet. Make sure the heat shield assembly is tight and secure.
Step 23: Install the MAF sensor into the new injen intake tube
Step 24: Secure the MAF sensor using provided M4 button head screws and tighten using 2.5mm allen key.
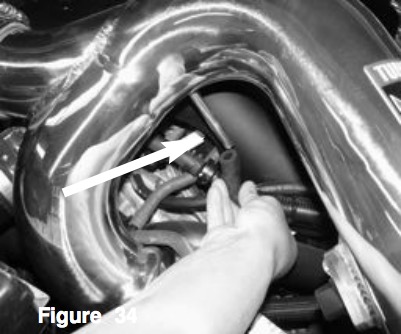
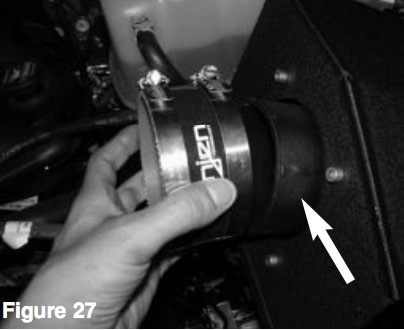
Step 25: With clamps provided, attach to the straight hose and install to the adaptor on the heat shield assembly.
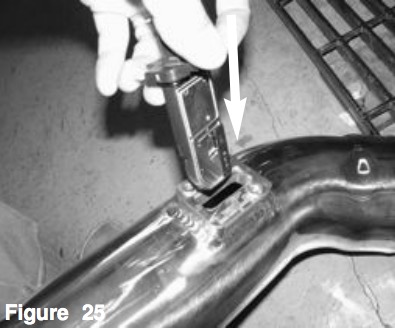
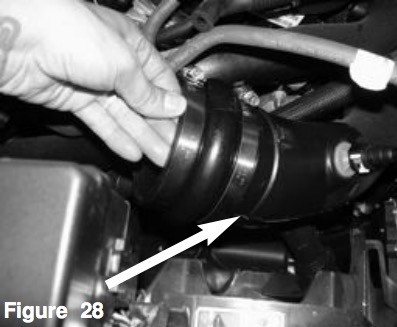
Step 26: Install the hump hose with clamps to the larger side of the stock turbo inlet tube, Do not tighten.
Step 27: Install the 3” straight hose to the passenger side turbo inlet tube.
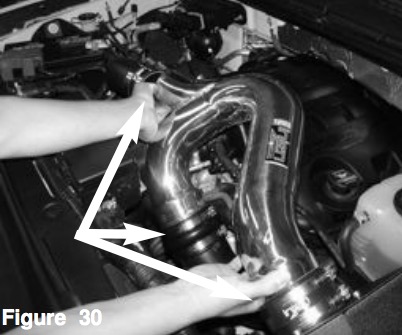
Step 28: Install the intake tube into the vehicle and position to the throttle body and adaptor.
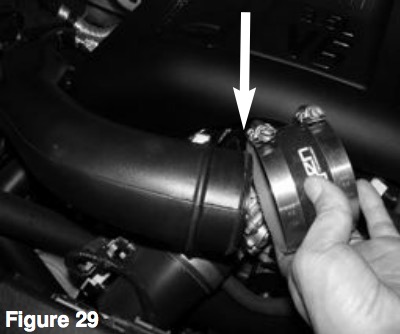
Step 29: Now tighten the clamps on using 8mm nut driver.
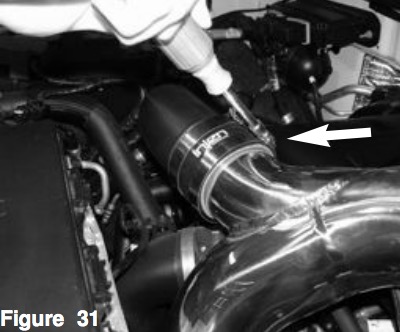
Step 30: Tighten the clamps on the hump hose using 8mm nut driver. Tighten all re-maining clamps also.
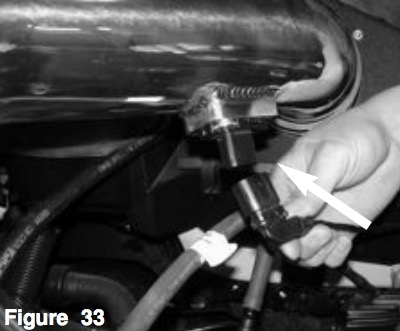
Step 31: Re-connect the MAF sensor harness.
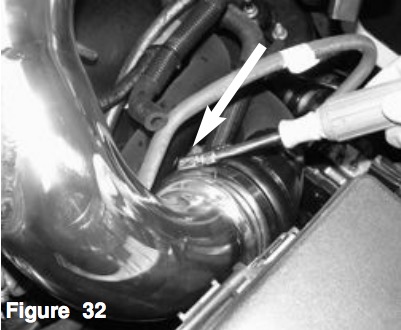
Step 32: Re-connect the vacuum line to the fitting on the new injen intake tube.
Step 33: Check the entire system for the best possible fit. Once you have checked the entire system for leaks, rubbing or rattling, continue to tighten all nuts, bolts and clamps. Reconnect the negative battery terminal prior to starting the engine.
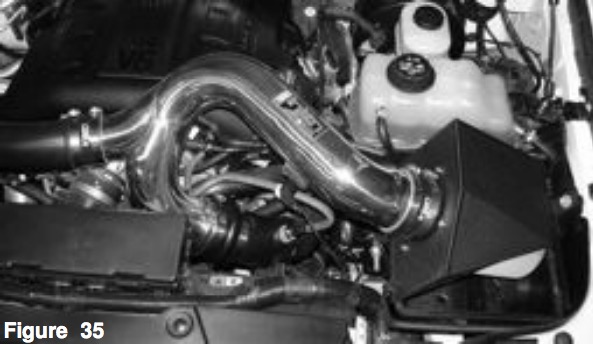
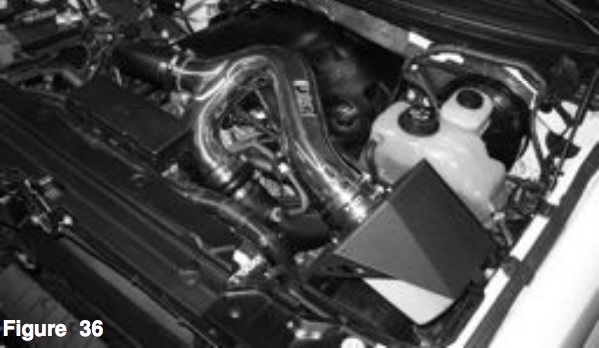
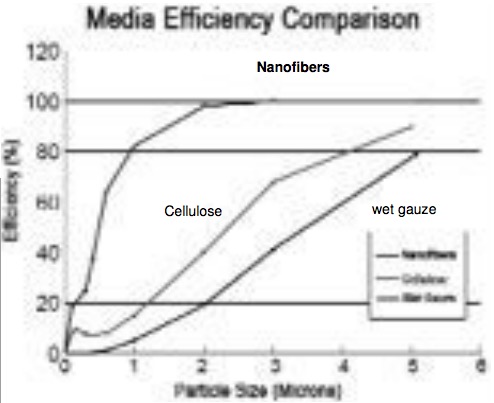
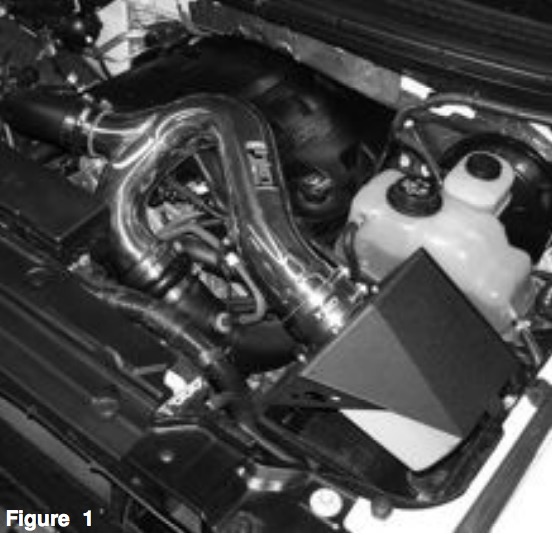
Step 34: Congratulations! You have just completed the installation of the best engineered intake system, featuring Web Nano-fiber dry filter. Periodically, check the system for fitment, this will enhance the life of your Power-Flow system.