 FREE 1 to 3-Day Delivery on Orders $149+ Details
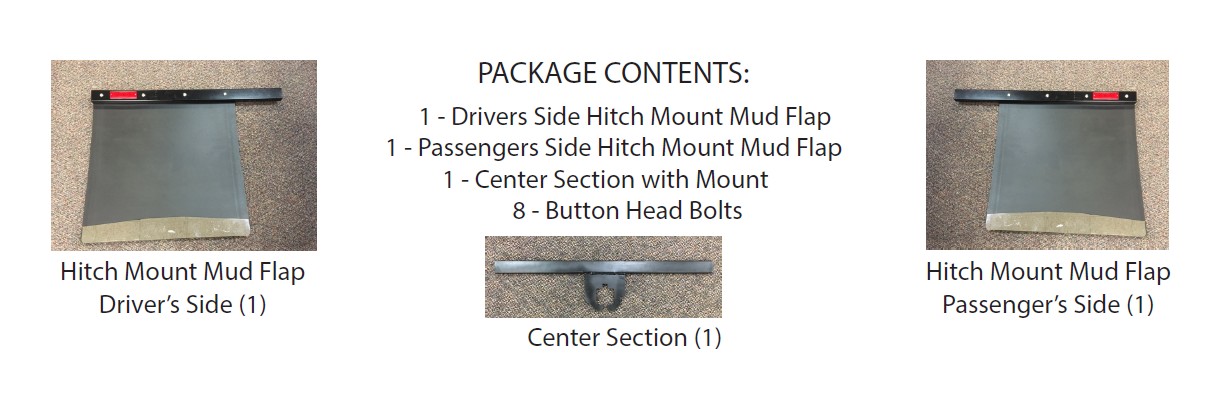
How to Install Husky 2 in. Receiver Hitch Mount Mud Flaps - 74 in. Wide (97-18 All) on your Ford F-150
VEHICLE PREPARATION:
Your vehicle’s mounting area should be cleaned prior to the installation of your new Husky Hitch Mount Mud Flap.
Installation
Read all directions thoroughly prior to the installation of your Hitch Mount Mud Flaps.
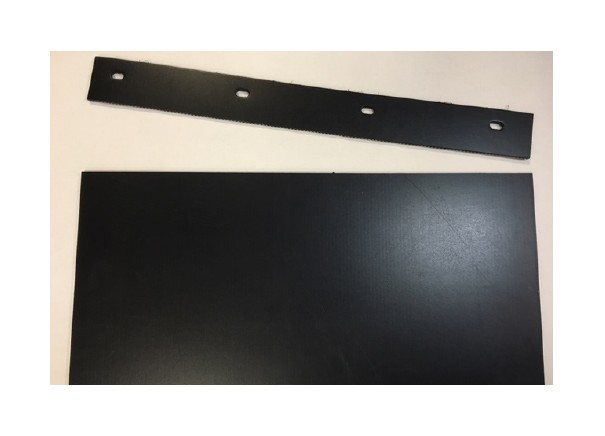
1. Layout the center section and the driver & passenger side mudflaps on a flat surface.
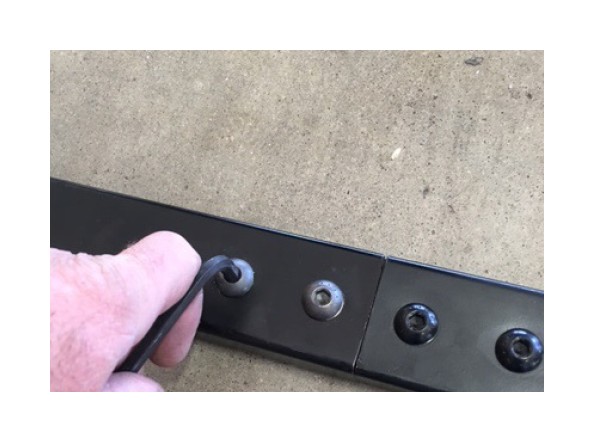
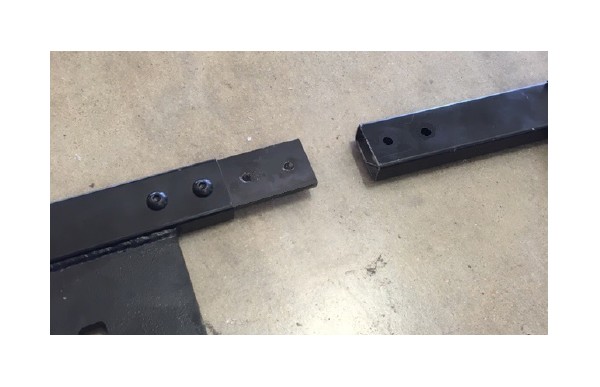
2. Assemble the center section to the driver & passenger side mudflaps using the button head bolts.
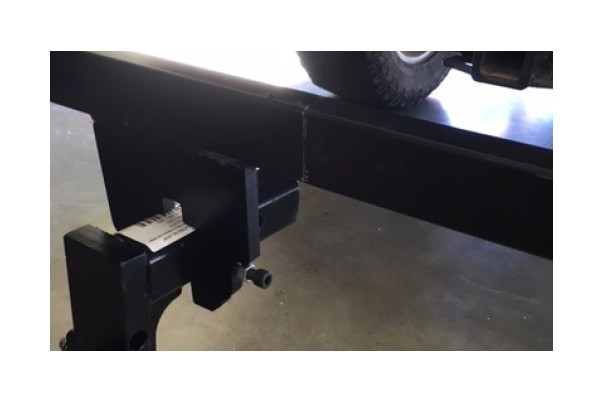
3. Install drop hitch through the Mud Flap center section mounting plate. Insert drop hitch into the vehicles reciever hitch and install a hitch pin with clip.

4. Once installed, position the Hitch Mount Mud Flap the desired distance from the bumper and tighten the mounting flange tension bolt and lock nut to secure.
5. If the Hitch Mount Mud flaps need to be shortened for the ride height of your vehicle, remove the 4-SS bolts and nylock nuts that hold the flap to the mounting tube. Cut of desired length from the top of the flap. Use the cut off portion of the flap as a guide to re-drill the mounting holes for the flap. Re-install the flap to the mounting tube with the SS bolts and nylock nuts.
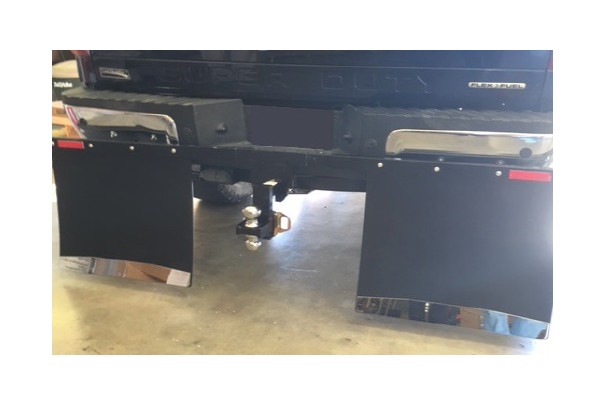
6. You have now successfully installed your Husky Liners Hitch Mount Mud Flap.
Congratulations, You have now successfully installed your new Husky Liners Hitch Mount Mud Flap. If you have any questions please call us at 1-800-344-8759.

