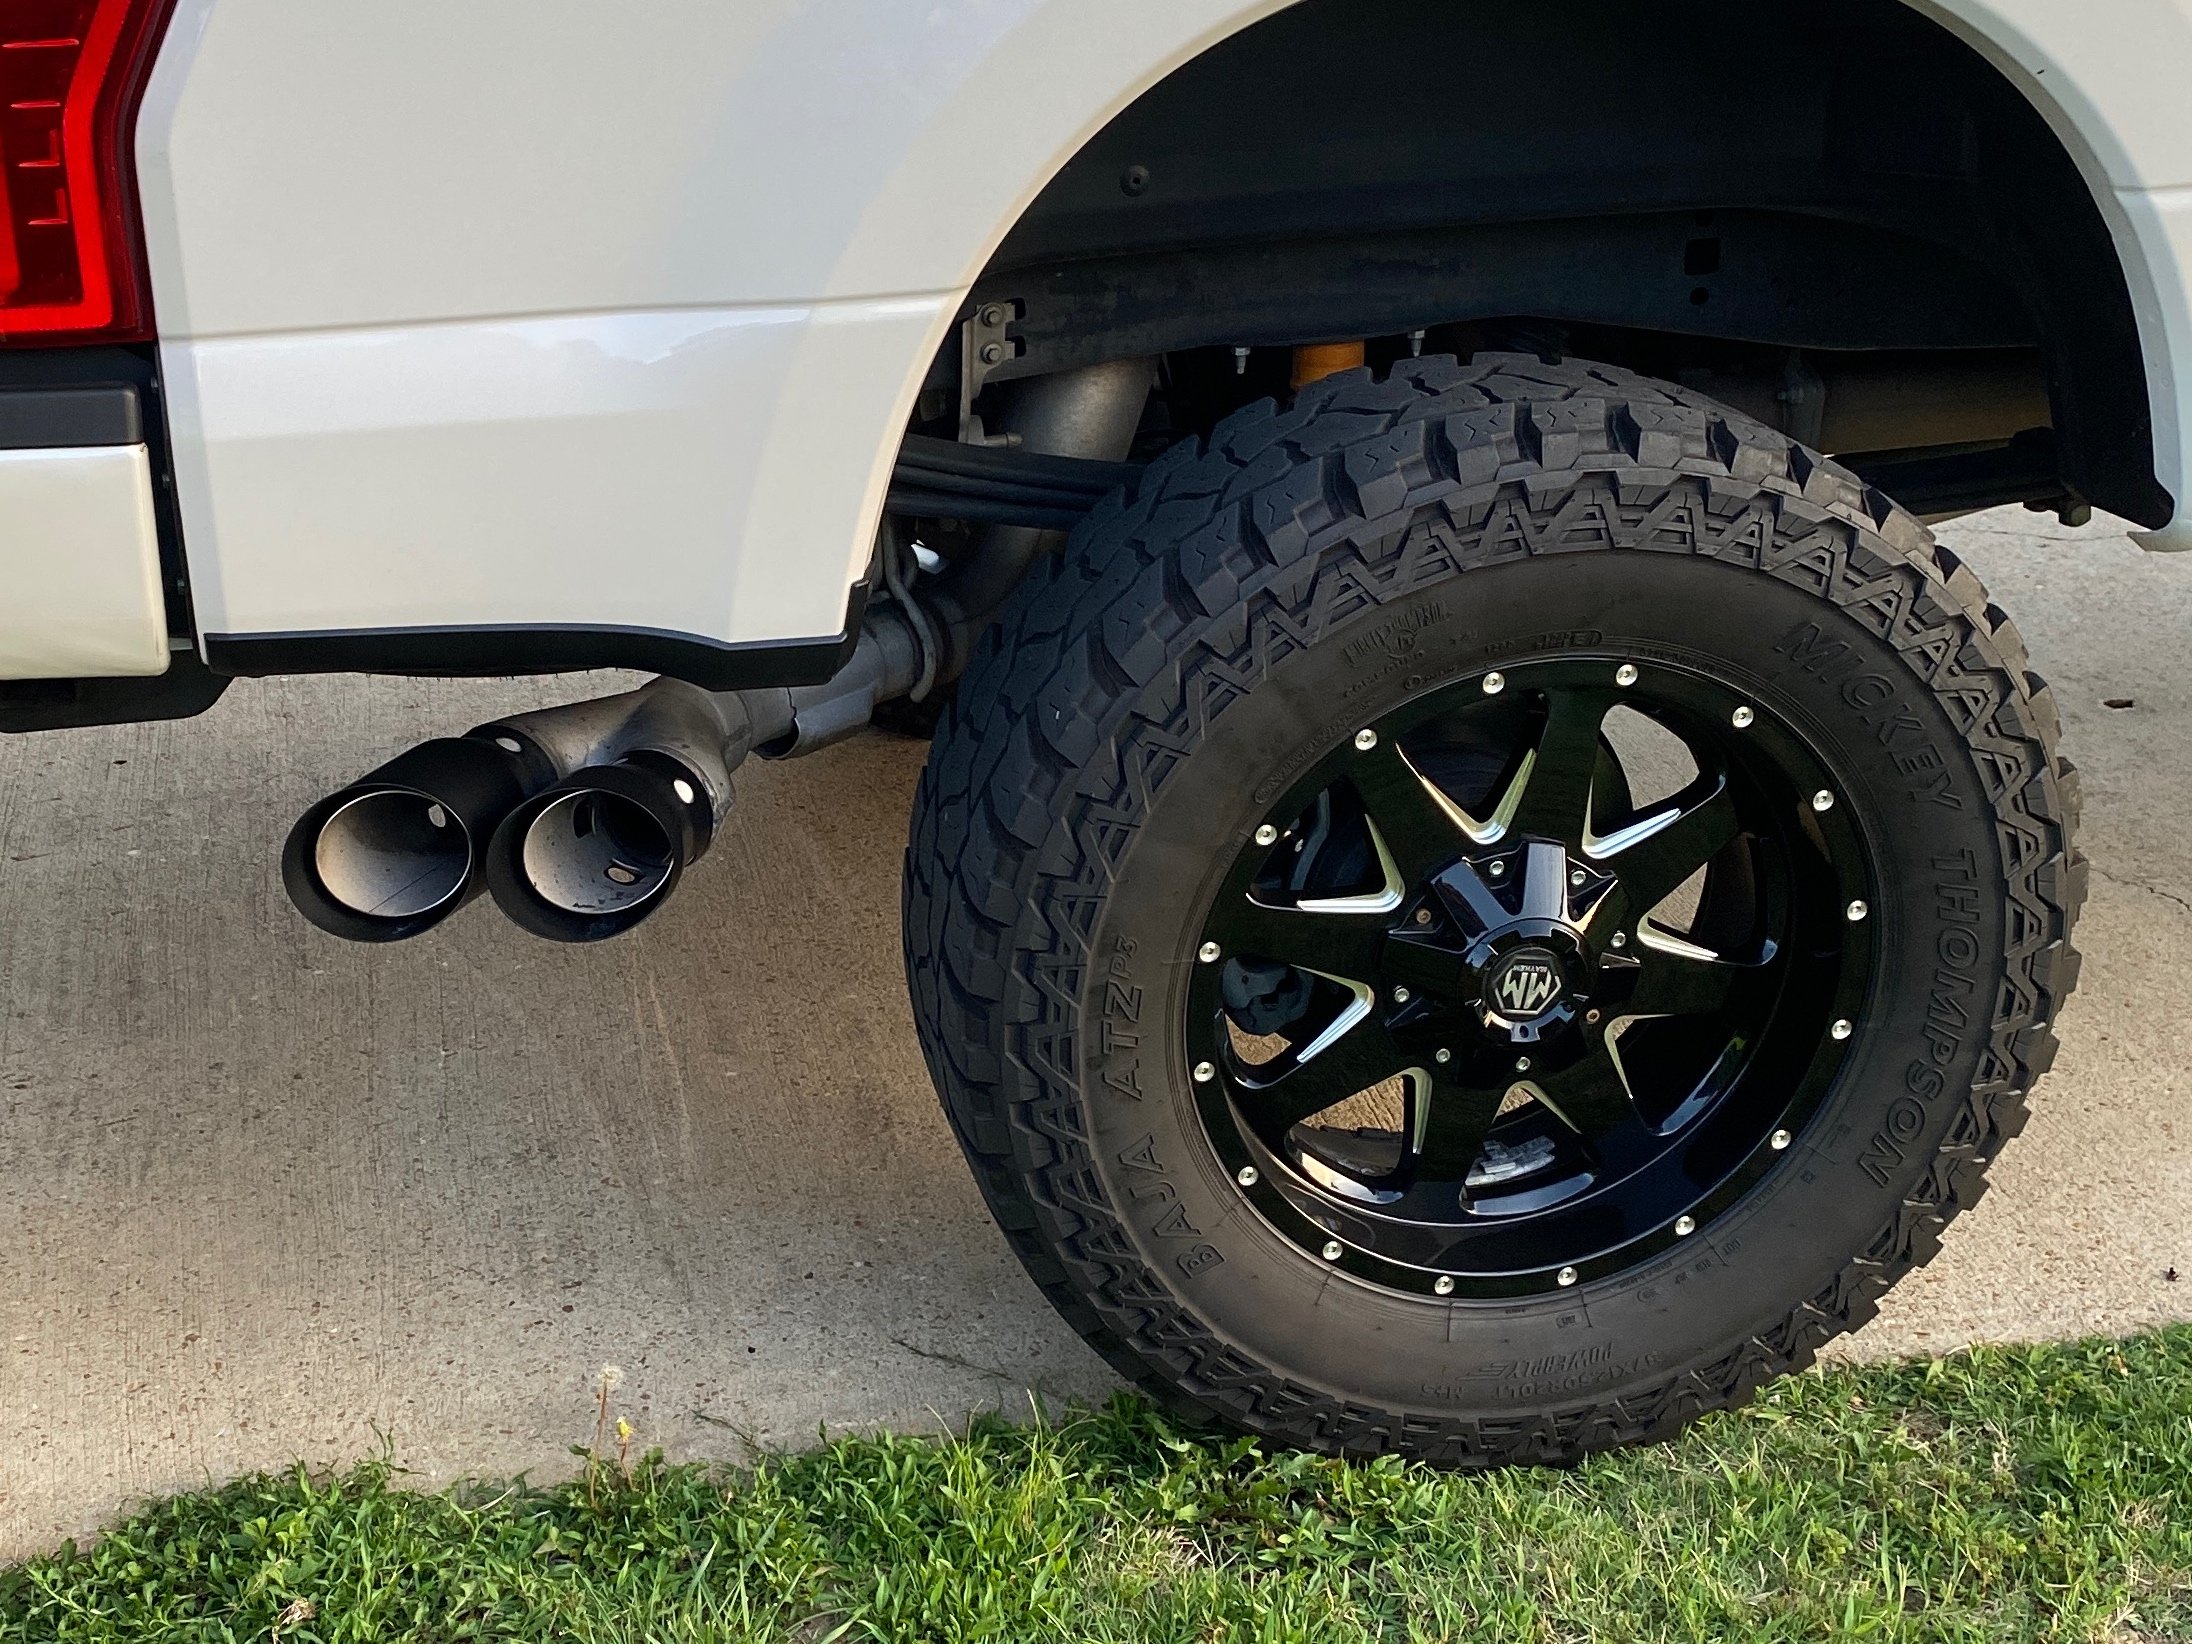
What Are Exhaust Tips and Why Upgrade?
![]() Exhaust tips are the visible extensions that attach to the end of your truck's tailpipe, sitting just inside or beyond the rear bumper. They come in a range of finishes — polished stainless, matte black, carbon fiber, ceramic-coated — and shapes like angled cut, rolled edge, and dual-wall designs.
Exhaust tips are the visible extensions that attach to the end of your truck's tailpipe, sitting just inside or beyond the rear bumper. They come in a range of finishes — polished stainless, matte black, carbon fiber, ceramic-coated — and shapes like angled cut, rolled edge, and dual-wall designs.
From a practical standpoint, upgrading your exhaust tips is one of the fastest ways to clean up the look of your truck's rear end. A factory tailpipe poking out behind the bumper doesn't exactly scream "built on purpose," but a well-chosen set of tips gives the exhaust exit a finished, intentional appearance. Beyond the cosmetic upgrade, tips can also influence the sound character of your exhaust note slightly, depending on the size and design you choose. Do exhaust tips affect the sound? Yes, but the change is subtle. Larger-diameter or resonated exhaust tips can deepen the exhaust note slightly and reduce rasp, while smaller tips may sharpen it. For a dramatic sound change, you'll want a full cat-back or axle-back exhaust system — tips alone are more of a finishing touch than a performance mod.
Types of Exhaust Tips: Clamp-On vs. Weld-On vs. Bolt-On
Before you buy, it's worth understanding the three main attachment methods. Each has trade-offs depending on whether you value convenience, permanence, or a factory look.
|
Method
|
Difficulty
|
Tools Required
|
Permanence
|
Best For
|
|
Clamp-On
|
Easy — beginner-friendly
|
Socket set or Allen wrench
|
Fully reversible
|
Daily drivers, seasonal swaps
|
|
Bolt-On
|
Easy to moderate
|
Socket set, penetrating oil
|
Reversible with effort
|
OEM-style replacements, heavier tips
|
|
Weld-On
|
Advanced — requires welding skill
|
MIG welder, grinder, safety gear
|
Permanent
|
Show trucks, off-road builds, no-rattle guarantee
|
- Clamp-On Tips: The most popular choice for truck owners who want a quick upgrade they can do themselves. A set screw or band clamp tightens the tip around the outside of your tailpipe. Swap them whenever you feel like changing the look. Browse polished exhaust tips or matte black tips for popular clamp-on options.
- Bolt-On Tips: These use existing bolt holes in your tailpipe or exhaust hanger. They're common on trucks with factory-installed tips — you unbolt the old one and bolt on the new one. They sit a bit more securely than clamp-on designs and hold up well to vibration.
- Weld-On Tips: The permanent solution. Welding creates a seamless joint that won't loosen, rattle, or shift. If you're building a show truck or running an off-road rig where vibration is constant, weld-on is the way to go. Check out Carven ceramic black tips and carbon fiber tips for standout weld-on options.
Tools and Materials You Need
Gather everything before you crawl under the truck. Here's what you'll need, broken down by method.
For Clamp-On and Bolt-On Installs:
- Tape measure: To verify your tailpipe outer diameter and tip inlet size
- Socket set or Allen wrench: To tighten the set screw or band clamp (size varies by brand)
- Rubbing alcohol and a clean rag: To clean grease, road grime, and carbon buildup off the tailpipe
- Penetrating oil (bolt-on only): To loosen stubborn factory bolts that may have seized from heat cycling
- Gloves: Work gloves protect your hands from sharp edges and residual heat
For Weld-On Installs:
- MIG welder: A 110V or 220V MIG with stainless wire if you're welding stainless tips
- Angle grinder with flap disc: To prep the weld surface and clean up splatter
- Welding helmet and leather gloves: Non-negotiable safety gear
- C-clamps or vise grips: To hold the tip in position while you tack weld
- High-temp paint (optional): To touch up the weld area after installation
What tools do you need to install exhaust tips? For a standard clamp-on exhaust tip, you only need a tape measure, socket set or Allen wrench, rubbing alcohol, a clean rag, and a pair of work gloves. The entire install takes about 10 to 15 minutes per side with no special skills required.
How To Measure Your Tailpipe for Exhaust Tips
Getting the right fit starts with three measurements. Grab a tape measure and head to the back of your truck.
- Tailpipe Outer Diameter (OD) - This is the most important number. Wrap a flexible tape measure around the outside of your tailpipe at the very end, then divide the circumference by 3.14 to get the outer diameter. Alternatively, use a caliper for a direct reading. The tip's inlet diameter needs to match your tailpipe OD — or be slightly larger so it can slide over and clamp down.
- Desired Outlet Diameter - This is the visible opening of the new tip. A larger outlet gives a more aggressive look and can subtly affect exhaust tone. Common outlet sizes on trucks range from 4 inches up to 8 inches on dual-wall designs.
- Tip Length - Measure the distance from the end of your tailpipe to the edge of your bumper. You want the tip to extend past the bumper slightly — typically 1 to 2 inches — without sticking out so far it looks disproportionate or becomes a shin hazard.
Most trucks run tailpipe sizes of 2.5", 3", 3.5", or 4" depending on the exhaust system. If you're unsure, your owner's manual or a quick measurement will confirm it. For a popular fitment, check out MBRP polished exhaust tips available in common connection sizes.
Step-by-Step Exhaust Tip Installation
How to install exhaust tips: Slide the exhaust tip over your tailpipe after cleaning the surface, align it with the bumper, then tighten the set screw or band clamp with a socket wrench until it's snug and won't rotate. The job takes about 10 to 15 minutes with basic hand tools.
Step 1 — Let Your Truck Cool Down
Exhaust components can stay dangerously hot for 30 minutes or more after you shut the engine off. Don't rush this. Park on a level surface, kill the engine, and give your truck at least 30 minutes to cool. Touching a hot tailpipe can cause serious burns, and a hot pipe will also make it harder to hold the tip steady during fitment.
Step 2 — Clean and Prep the Tailpipe
Once the tailpipe is cool to the touch, wipe it down thoroughly with rubbing alcohol and a clean rag. You're removing carbon soot, road grime, and any oily residue that could prevent the tip from seating properly or cause it to slide under vibration. For bolt-on replacements, spray the existing bolts with penetrating oil and give it 10 minutes to soak before you try to break them loose.
Step 3 — Test Fit the Exhaust Tip
Slide the new tip onto the tailpipe without tightening anything. Check three things: Does the inlet slide over the pipe without forcing it? Is the tip aligned straight with the bumper cutout? Does it extend the right distance past the bumper — typically 1 to 2 inches? If the fit is too loose, some tips include adapter sleeves or shims. If it's too tight, double-check that you ordered the correct inlet diameter.
Step 4 — Secure the Tip
For Clamp-On Tips: Once you're happy with the positioning, locate the set screw or band clamp on the bottom or side of the tip's inlet. Tighten it with the appropriate socket or Allen wrench until the tip is firmly seated and won't rotate by hand. Don't crank it excessively — you want it snug, not stripped. A good rule is to tighten until firm contact, then give it another quarter turn.
For Weld-On Tips: Use C-clamps or vise grips to lock the tip in your desired position. Tack weld at the 12 o'clock and 6 o'clock positions first, then check alignment. If everything looks straight, complete the weld around the circumference. Let it cool naturally — don't quench it with water, which can warp the joint. Finish by grinding down any splatter with a flap disc.
Looking for a clean, angled-cut look? Flowmaster polished exhaust tips are a popular pick for clamp-on installs.
Step 5 — Final Safety Check
Start the engine and let it idle for a couple of minutes. Walk to the rear and check for any exhaust leaks — you'll hear a faint hissing or see soot marks at the joint if the seal isn't tight. Also confirm the tip hasn't shifted from vibration. For clamp-on tips, try to rotate it by hand. If it moves at all, shut the engine off and tighten the clamp another quarter turn. Check clearance to the bumper and any heat shields while you're back there.
Common Exhaust Tip Installation Mistakes To Avoid
![]() Working on a hot exhaust: This is the most common mistake and the most avoidable one. Give your truck at least 30 minutes to cool, even if the tailpipe doesn't feel that hot to the touch. The pipe end stays cooler than the catalytic converter area, which can create a false sense of security.
Working on a hot exhaust: This is the most common mistake and the most avoidable one. Give your truck at least 30 minutes to cool, even if the tailpipe doesn't feel that hot to the touch. The pipe end stays cooler than the catalytic converter area, which can create a false sense of security.- Ordering the wrong inlet size: A tip designed for a 3" tailpipe won't clamp properly onto a 2.5" pipe, even if it physically slides on. Always measure your tailpipe OD before ordering — don't guess based on what "looks right."
- Over-tightening the set screw: Cranking the set screw too hard can dent the tailpipe, strip the screw threads, or crack the clamp. Tighten until firm, add a quarter turn, and stop.
- Ignoring bumper clearance: If the tip sits too close to the bumper — especially a plastic or painted bumper — exhaust heat can discolor or warp the bumper material over time. Leave at least a half inch of clearance.
- Skipping the re-tighten: After 50 to 100 miles of driving, heat cycling can cause clamp-on tips to loosen slightly. Pull over, check the set screw, and re-tighten if needed. It takes 30 seconds and prevents a lost tip on the highway.
Do Exhaust Tips Change Your Truck's Sound?
The honest answer: exhaust tips make a subtle difference, not a dramatic one. Since tips sit at the very end of the exhaust system — after the catalytic converter, resonator, and muffler have already done their work — they don't fundamentally change the volume or tone of your exhaust.
That said, there is a slight effect. A larger-diameter tip can give the exhaust note a marginally deeper, more open quality. Dual-wall tips can add a mild resonance. And a rolled-edge opening will sound slightly different from a slash-cut opening of the same diameter. But if you're expecting a noticeable rumble from tips alone, you'll be disappointed.
For a real sound transformation, we recommend pairing your new tips with a full exhaust system upgrade. A Borla Touring dual exhaust system delivers a refined, deep tone without drone, while a MagnaFlow MF Series dual exhaust system gives you a more aggressive note that turns heads. Both come with their own tips, so you get sound and style in one package.
Exhaust Tip Maintenance and Care
![]() Chrome and polished stainless tips: Use a metal polish or chrome cleaner every few weeks to prevent carbon buildup and water spotting. A quick wipe-down after washing your truck goes a long way. Avoid abrasive pads that can scratch the finish.
Chrome and polished stainless tips: Use a metal polish or chrome cleaner every few weeks to prevent carbon buildup and water spotting. A quick wipe-down after washing your truck goes a long way. Avoid abrasive pads that can scratch the finish.
Matte black and ceramic-coated tips: Clean with a mild soap and water. Skip the metal polish — it can damage or remove the coating. A soft-bristle brush works well for stubborn soot.
Re-tighten schedule for clamp-on tips: Check the set screw after your first 50 to 100 miles, then again at every oil change interval. Heat cycling gradually loosens even well-installed clamps, so a quick 30-second check keeps your tips secure and rattle-free.
Whether you're after a polished look, a blacked-out rear end, or a carbon fiber accent, upgrading your exhaust tips is one of the simplest ways to put your stamp on your truck. Browse our full selection of exhaust tips — we carry a wide range of fits, finishes, and styles for every truck build.
Frequently Asked Questions About Installing Exhaust Tips
Here are answers to the most common questions truck owners ask about exhaust tip installation, sizing, and maintenance.
Do Exhaust Tips Need to Be Welded On?
No, exhaust tips do not need to be welded on. Most aftermarket exhaust tips use a clamp-on or bolt-on design that slides over your existing tailpipe and secures with set screws or a band clamp. Weld-on tips are an option for a permanent, theft-resistant fit, but clamp-on installation is the most common method for DIY truck owners.
How Do You Attach Exhaust Tips Without Welding?
To attach exhaust tips without welding, clean your cold tailpipe with rubbing alcohol, then slide the tip on and align it so any logo faces upward. Tighten the included set screws or band clamp evenly using a socket wrench until snug. Retighten after 50 to 100 miles of driving to ensure the tip stays secure.
Do Exhaust Tips Affect the Sound of Your Truck?
Exhaust tips can slightly alter your truck's exhaust note, but the change is minimal compared to a full exhaust system upgrade. Larger diameter tips may produce a slightly deeper tone, while resonated tips can reduce rasp. For a significant sound change, pair your new tips with an aftermarket muffler or cat-back exhaust system.
Can You Put Exhaust Tips on Any Car or Truck?
You can install exhaust tips on most cars and trucks as long as you match the tip's inlet diameter to your tailpipe's outer diameter. Universal exhaust tips fit a range of pipe sizes, while vehicle-specific tips are designed for exact fitment. Always measure your tailpipe before purchasing to ensure a proper fit.
How Do You Measure Your Tailpipe for Exhaust Tips?
Measure the outside diameter of your tailpipe using a tape measure or calipers at the straight section near the end. Common truck tailpipe sizes range from 2.5 to 4 inches. Also measure your bumper cutout width to confirm the new tip's outlet diameter will fit without contacting the bumper.
What Is the Difference Between Clamp-On and Weld-On Exhaust Tips?
Clamp-on exhaust tips slide over your tailpipe and secure with set screws or a band clamp, making installation and removal easy without special tools. Weld-on tips are permanently attached using a welder, providing a rattle-free, permanent fit. Clamp-on tips are ideal for quick DIY upgrades, while weld-on tips require welding skill but deliver the most secure connection.
How Long Does It Take to Install Exhaust Tips?
Installing clamp-on exhaust tips typically takes 10 to 15 minutes with basic hand tools. The process involves measuring your tailpipe, cleaning the surface, sliding the tip on, and tightening the clamp or set screws. Weld-on tips require additional time and welding equipment, usually 30 to 60 minutes.
What Tools Do You Need to Install Exhaust Tips?
For clamp-on exhaust tips, you need a tape measure, socket set or Allen wrench, rubbing alcohol, a clean rag, and work gloves. For weld-on tips, you also need a MIG welder, welding helmet, and leather gloves. Most clamp-on installations require no specialty tools.