 FREE 1 to 3-Day Delivery on Orders $149+ Details
How to Install SLP PowerFlo Axle-Back Exhaust System - Split Rear Exit on your Sierra
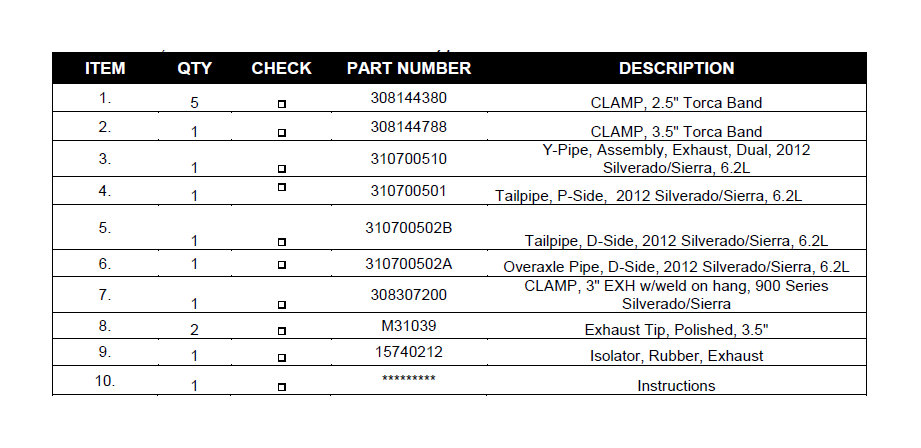
PACKING LIST
Before installation, use this check list to make sure all necessary parts have been included.
NOTE: THIS SYSTEM WILL WORK ON VEHICLES LOWERED 0”-3”
WARNING: SLP Recommends allowing the vehicle to cool (not running) for five hours before beginning installation.
INSTALLATION INSTRUCTIONS – #31099A
1 Raise and fully support the vehicle (a vehicle lift is recommended but not required).
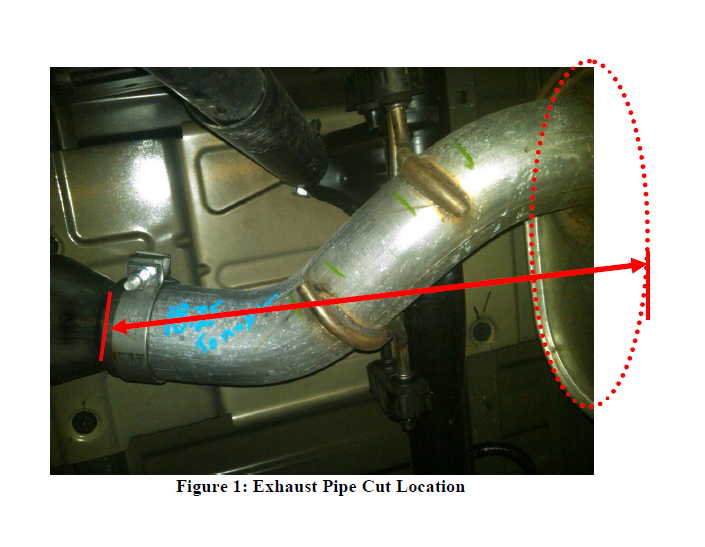
2 Begin by supporting the muffler and rear section of pipe, and then carefully cut the tailpipe 18.25” back from the center of the bottom seam of the muffler straight back to the bottom of the pipe. Make a mark here, and cut the pipe square. See figure 1.
3 Using a pry bar remove the exhaust hanger from the rubber isolator at the rear section of the tailpipe (leave the hanger on the vehicle for use later). Then carefully remove the rear section of pipe. Deburr the end of the muffler outlet pipe.
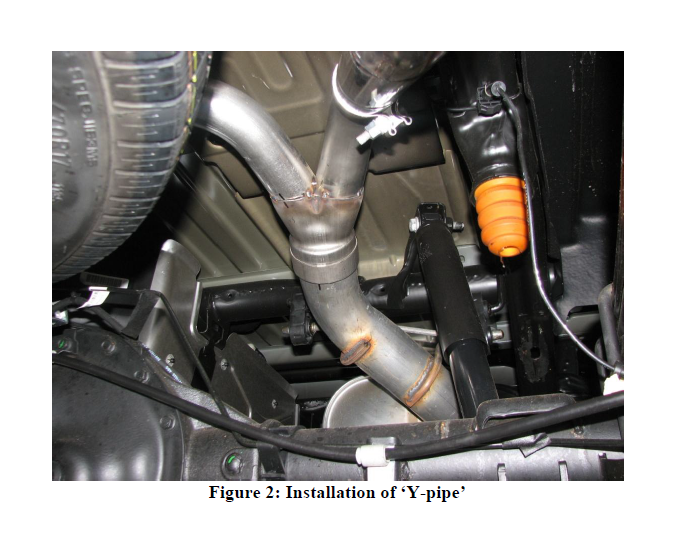
4 Slide the 3.5” torca clamp onto the large end of the ‘Y-pipe’, and slide onto the freshly cut muffler outlet. Gently snug the clamp but DO NOT FULLY TIGHTEN. See figure 2.
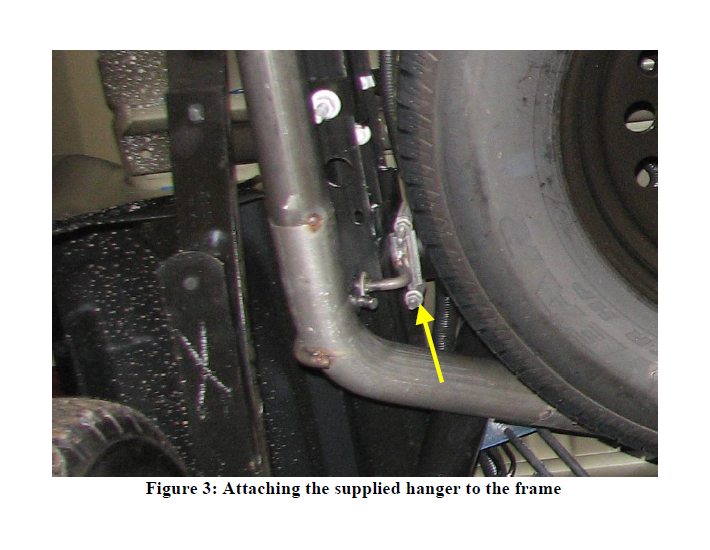
5. Next bolt the supplied clamp hanger onto the round frame rail to the left of the spare tire. Install the supplied rubber isolator onto the hanger. See figure 3.
6 Next, slide a 2.5” Torca clamp onto the driver’s side over-axle pipe inlet. Then carefully route the pipe over the axle and insert into the ‘Y-pipe’. Slide another 2.5” Torca clamp onto the DS tailpipe inlet, and insert into the DS overaxle pipe. Insert the DS tailpipe hanger into the rubber isolator. Be sure to allow adequate clearance from the spare tire and body of the vehicle. Gently snug the clamps but DO NOT FULLY TIGHTEN.
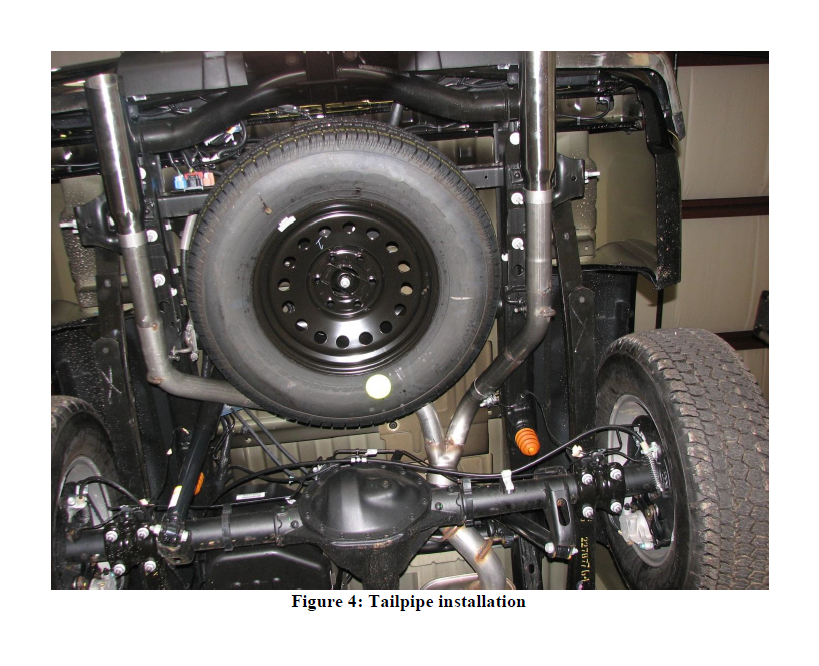
7 Install the passenger’s side tail pipe onto the over-axle pipe with a 2.5” Torca clamp and insert the pipe hanger into the rubber isolator. Snug the clamp but do not fully tighten. See figure 4.
8 Next, install the two SLP high polish tips onto the outlet of each tailpipe and secure with the 2.5” Torca clamps provided.
9 Adjust the system from front to rear making sure all exhaust components are clear and free of contact to any wiring or body parts and then fully tighten all clamps. Be sure there is adequate clearance from the spare tire as well.
10 The installation is now complete! ENJOY!


