 FREE 1 to 3-Day Delivery on Orders $149+ Details
How to Install Gibson 3 in. / 2.5 in. Dual Sport Stainless Cat-Back Exhaust System - Dual Side Exit
Installation Time
3 hours
Tools Required
- 13mm socket/wrench
- 1/2 drive ratchet
- 15mm socket/wrench
- 10mm socket/wrench
- 9/16mm socket/wrench
- 1/2mm socket/wrench
- floor jack
- WD-40
Part I: Removing the Factory Exhaust System
- If you factory exhaust system has a significant amount of rust, spay the bolts/nuts with penetrating oil prior to starting the work. Also spray the rubber exhaust hangers to help in removal later.
- Locate the exhaust clamp at the front of the muffler. Using a 15mm socket or wrench, loosen the bolt on the clamp and slide the clamp forward.
- At the front of the head pipe is a flange where it meets the factory y-pipe. Using a 13mm socket or wrench, remove the bolts from the flange.
- While not required, removing the exhaust hanger in front of the muffler aids in removal of the factory exhaust system. To remove the hanger from the frame, use a 10mm socket or wrench.
- With some help, slide the entire exhaust system toward the rear of the truck. The factory exhaust will come out of the rubber hangers. Then tilt the exhaust and rotate while moving it forward and to the passenger side of the truck.
- With the factory exhaust removed, if you removed the exhaust hanger, be sure to remove it from the factory exhaust so you can reinstall it with the new exhaust.
Part II: Installing the New Exhaust
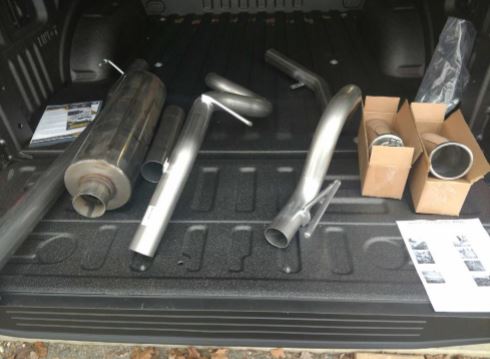
- Lay out new exhaust to ensure all parts were included including new hardware.
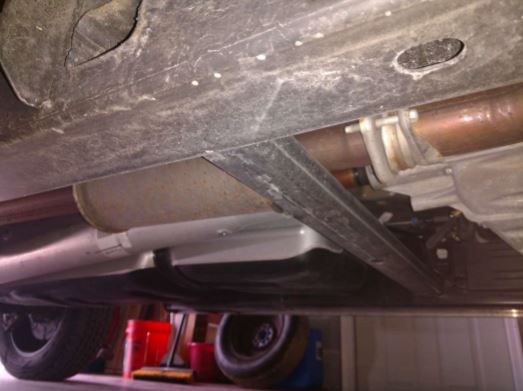
- If you removed the exhaust hanger in Part 1, reinstall it onto the frame with a 10mm socket or wrench.
- Install the new head pipe by placing the hanger into the rubber grommet and aligning the flange with the factory y-pipe.
- Using a 9/16 socket or wrench, start the new bolts ensuring there is a flat washer on both sides, then lock-washer, then the nut. DO NOT FULLY TIGHTEN YET.
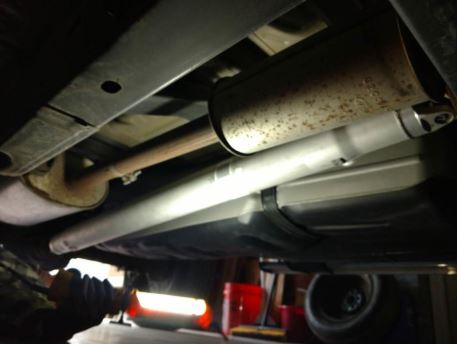
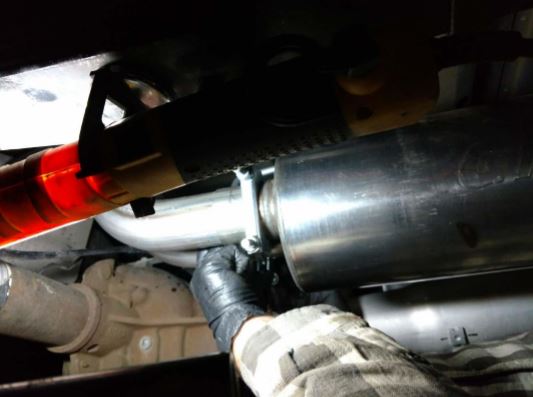
- Then, place the new muffler onto the head pipe inserting approximately 1 ½ to 2 inches. Because the new muffler does not use an exhaust hanger, use a floor jack to hold up the muffler.
- Place a 3” exhaust clamp provided by Gibson onto the joint between the head pipe and muffler. DO NOT FULLY TIGHTEN YET.
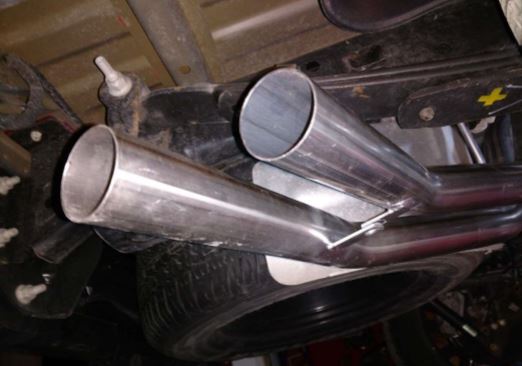
- Place the Driver’s side rear 2.5 inch tail pipe over the axle and insert into the exhaust hanger, then the muffler.
- Place a 2.5” exhaust clamp over the tail pipe where it meets the muffler. DO NOT FULLY TIGHTEN YET.
- Place the Passenger’s side rear 2.5 inch tail pipe over the axle and insert into the exhaust hanger, then the muffler.
- Place a 2.5” exhaust clamp over the tail pipe where it meets the muffler. DO NOT FULLY TIGHTEN YET.
- Using the provided nut and bolt, ensure the tabs on the two rear tail pipes are aligned with the driver’s side tab on the bottom. Insert the bolt, lock washer, and nut using a 9/16 socket or wrench. DO NOT FULLY TIGHTEN YET.
Part III: Tightening all Joints
- Start at the front of the truck and tighten the flange where the head pipe meets the factory y-pipe. There is no torque spec for these but ensure you have a good seal to prevent exhaust leaks.
- Tighten the clamp over the joint where the head pipe meets the muffler.
- Tighten each of the clamps where the tail pipes meet the muffler.
- Tighten the bolt in the tabs between each of the tail pipes.
Part IV: Installing Exhaust Tips
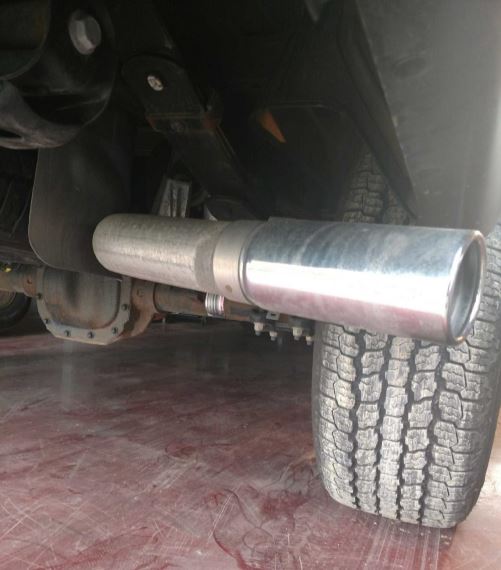
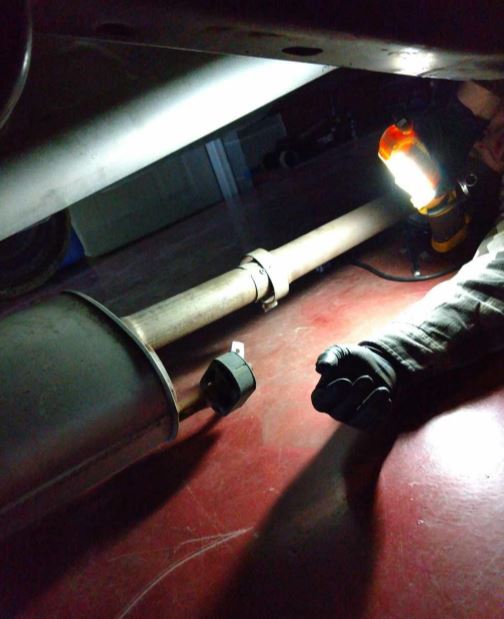
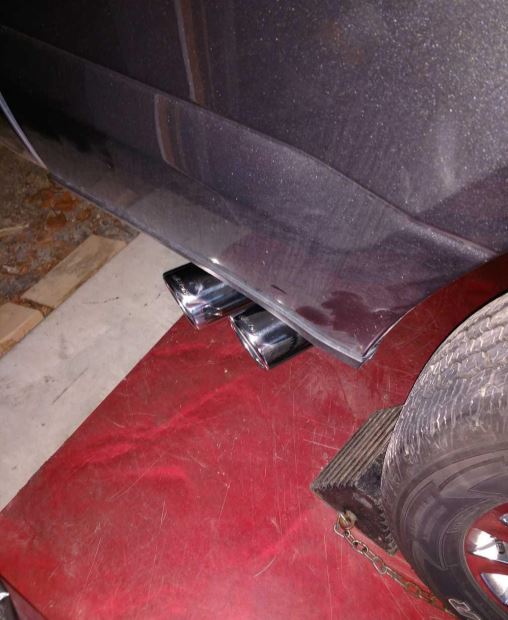
- Each tip has a bolt/nut kit with it from Gibson. Place the tip with the word “GIBSON” on top onto the 2.5 inch tail pipe. Once it is in your desired location, place the bolt through the clamp at the rear of the tip along with a nut. Tighten using a 1/2 socket or wrench.
- Repeat the process for the second rear tail pipe.
After Picture
Installation Guide created by AM Customer Geoff C. on 02/28/2017

