FREE 1 to 3-Day Delivery on Orders $149+ Details
How to Install Ford Performance by Borla Sport Cat-Back Exhaust w/ Chrome Tips - Split Rear Exit on your F-150

Shop Parts in this Guide
Please visit www.fordracingparts.com for the most current instruction information
! ! ! PLEASE READ ALL OF THE FOLLOWING INSTRUCTIONS CAREFULLY PRIOR TO INSTALLATION. AT ANY TIME YOU DO NOT UNDERSTAND THE INSTRUCTIONS, PLEASE CALL THE FORD PERFORMANCE TECHLINE AT 1-800-367-3788 ! ! !
OVERVIEW:
The use of a floor hoist is recommended for this installation. If you do not have access to one, use a hydraulic floor jack and jack stands to raise the vehicle.
! ! ! CAUTION: JACK STANDS MUST BE USED ON A LEVEL SURFACE AND BE SECURELY SEATED. FAILURE TO DO SO MAY RESULT IN PERSONAL INJURY OR VEHICLE DAMAGE ! ! !
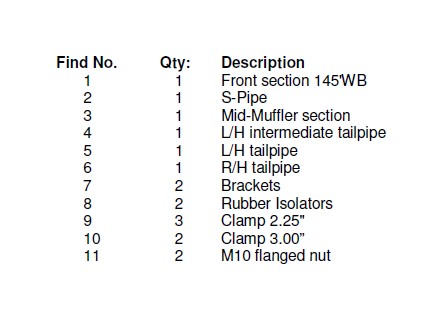
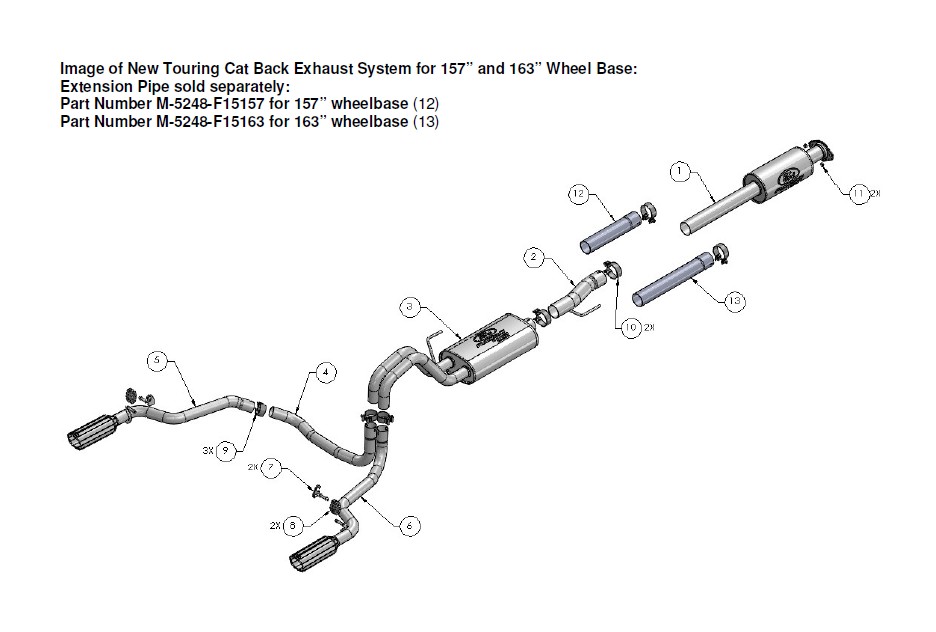
Base Kit Includes:
NOTE:
1. Determine the wheel base of your 2015 F-150.
2. Immediately inventory your kit to ensure all of the necessary parts are included.
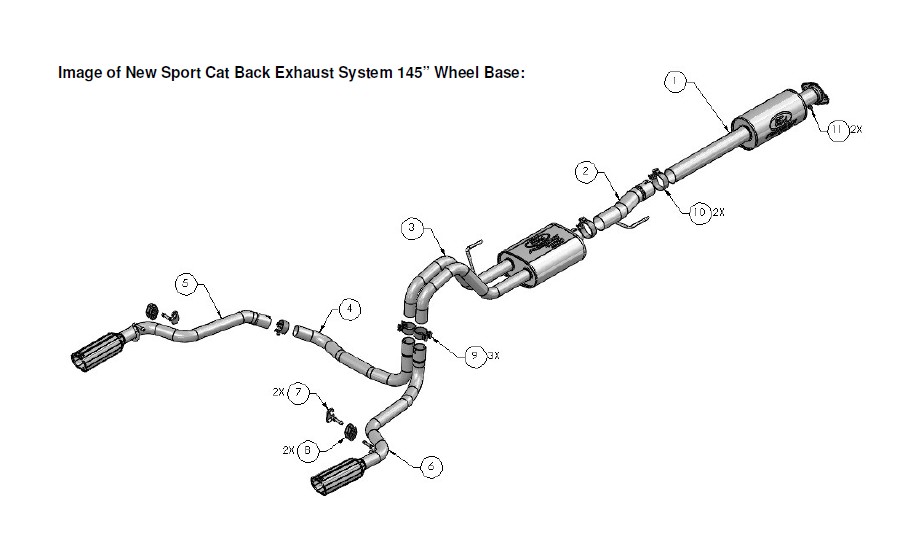
3. Sport systems have a smaller mid-muffler.
4. For the 141” and 122” wheelbase see last page before installing.
NOTE: Touring system not available for 122” wheelbase.
REMOVAL INSTRUCTIONS:
STEP 1: With the vehicle in NEUTRAL, position it on a hoist.
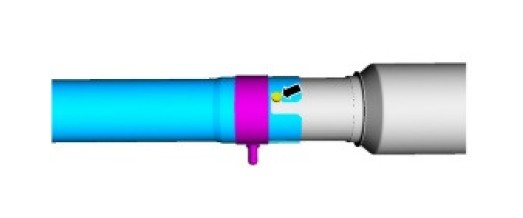
STEP 2: Loosen the clamp.
Torque: 35 lb.ft (48 Nm)
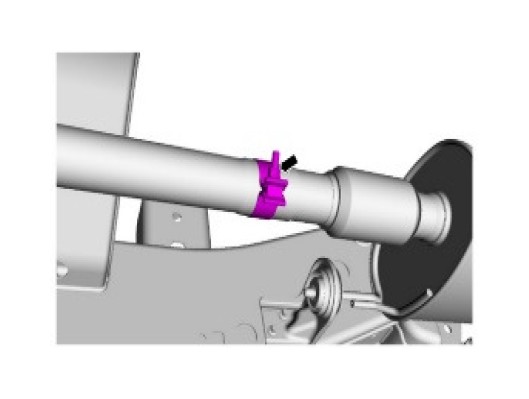
STEP 3: Release the locator tab out of the muffler inlet pipe.
STEP 4: Remove the bolts and the muffler inlet pipe.
Torque: 30 lb.ft (40 Nm)
STEP 5: Slide the muffler and tailpipe rearward out of the isolators and then forward to remove.
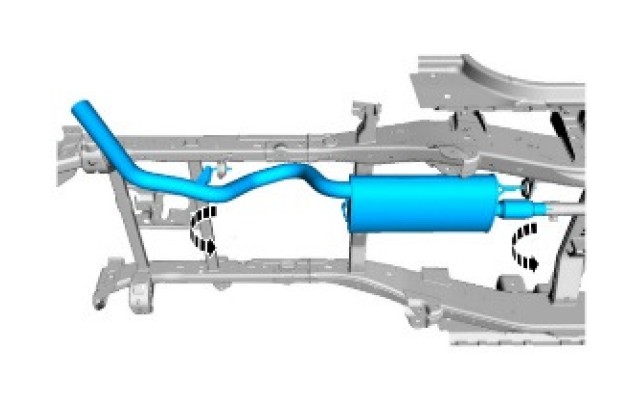
INSTALLATION INSTRUCTIONS:
STEP 1: Install the front muffler loosely.
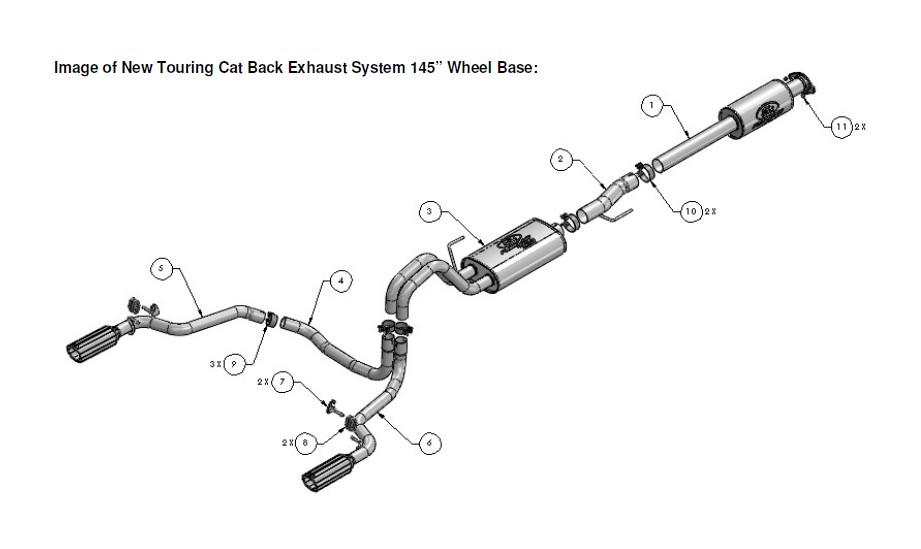
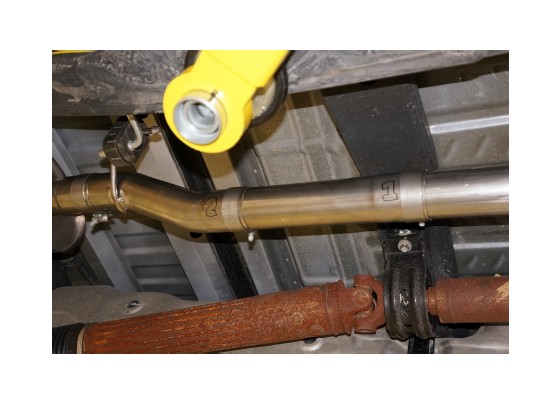
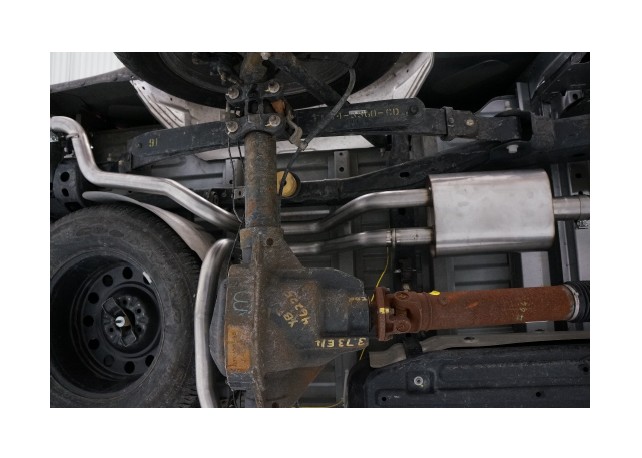
STEP 2: Install the proper “Mid Pipe” for your wheel base. Be sure to slip a clamp onto the pipe, clamp to be tightened later.

STEP 3: Install the short “S” pipe with hanger. Hanger to the rear of vehicle.
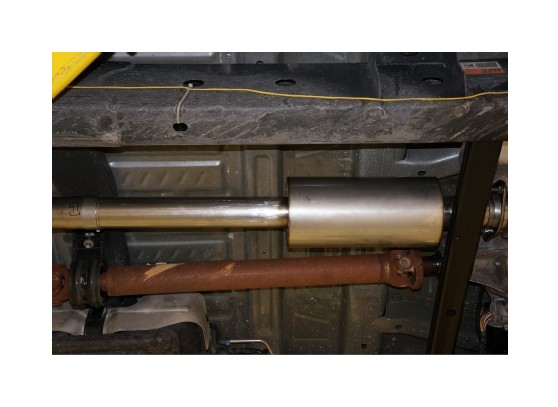
STEP 4: Install the mid-muffler onto the hanger and slip into S-pipe.
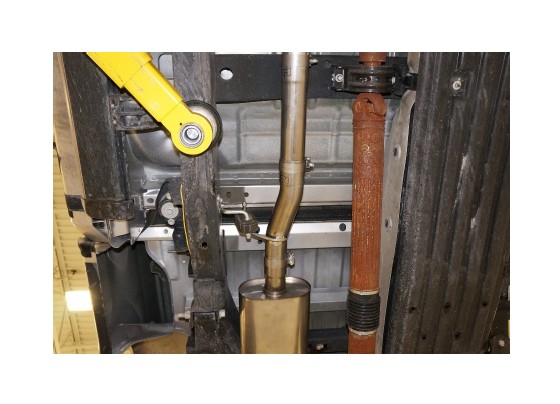
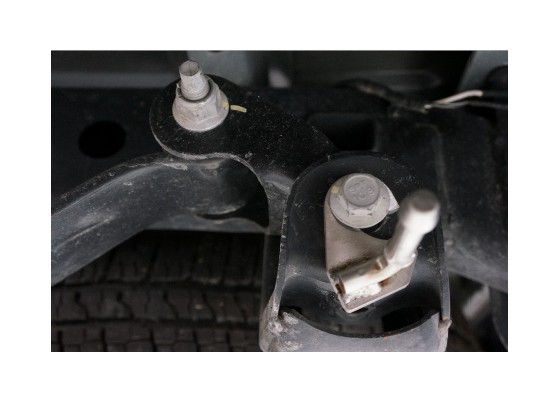
STEP 5: From your kit find the Brackets with isolators. These will be installed onto the lower rear leaf spring shackle bolt.
STEP 6: To install these hangers you will need a 21mm and a 24mm socket to loosen the lower shackle bolt without removing it. (Back shackle bolt out approximately ¼”) Slip the new hanger onto the bolt just behind the bolt head.

STEP 7: Once installed be sure to torque the shackle bolt to 235 Nm (173 lb-ft)
STEP 8: Using a 15mm socket begin tightening the exhaust clamps that are installed to this point. Position the clamp bolts to the top of the pipes to avoid the potential ground clearance issues. Ensure the mid-muffler is positioned in a way that it sits parallel to the bottom of the truck.
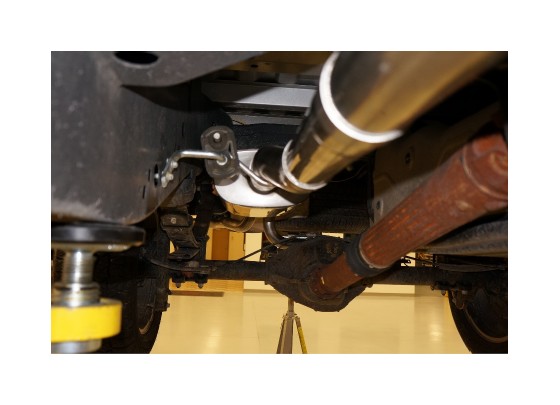
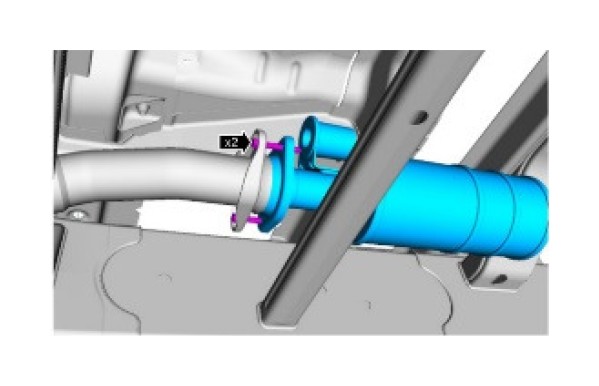
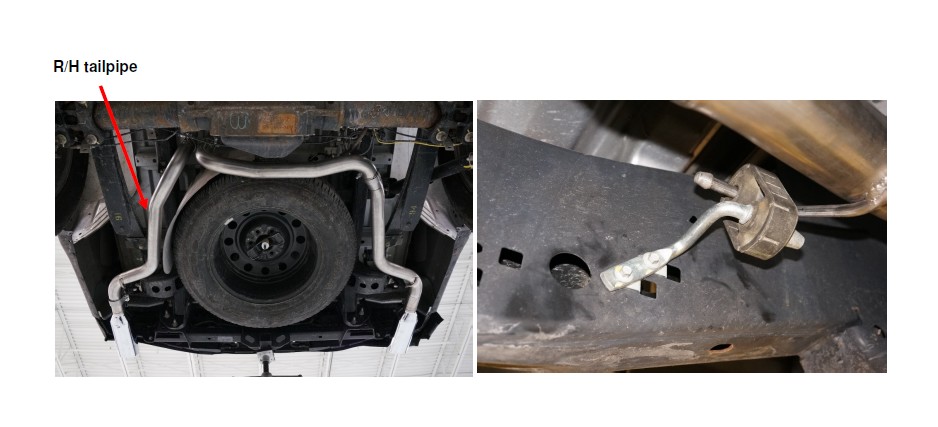
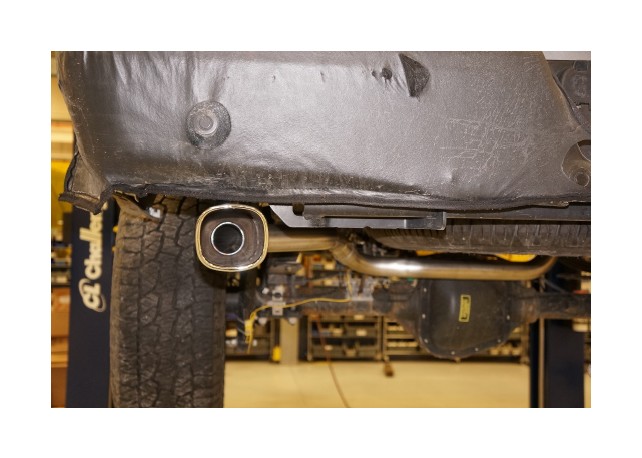
STEP 9: Locate the right side tail pipe, again be sure to slip the clamp onto the pipe prior to installing the tail pipe. Install one of the rubber exhaust isolators onto the hanger as shown in the second picture.
STEP 10: Install the left side intermediate pipe and tail pipe. Slide the clamps over the pipes prior to installing.
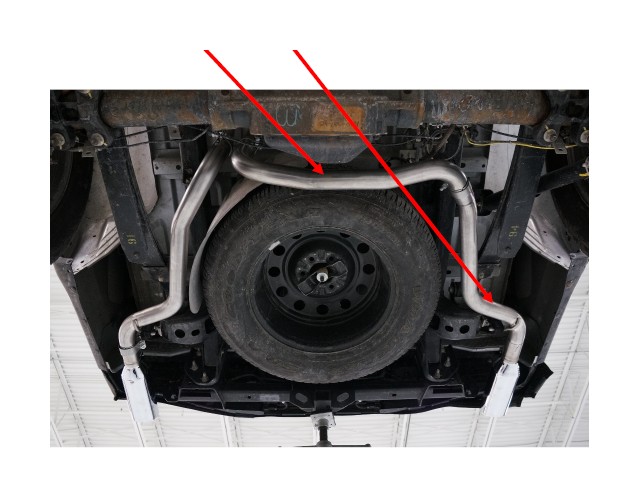
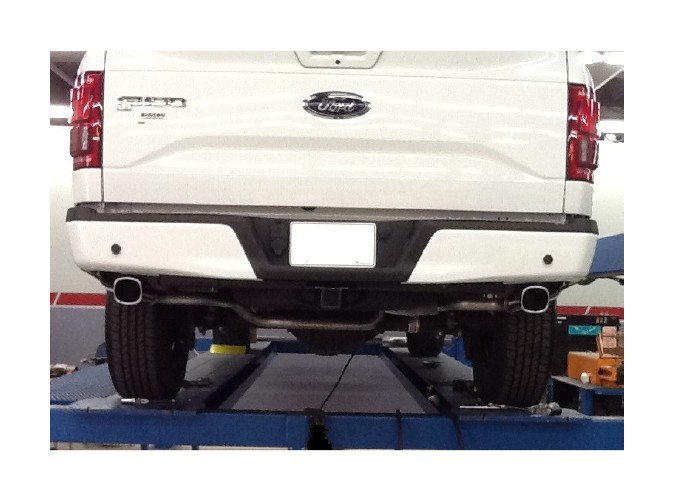
STEP 11: Align the right side tail pipe and tip and tighten.
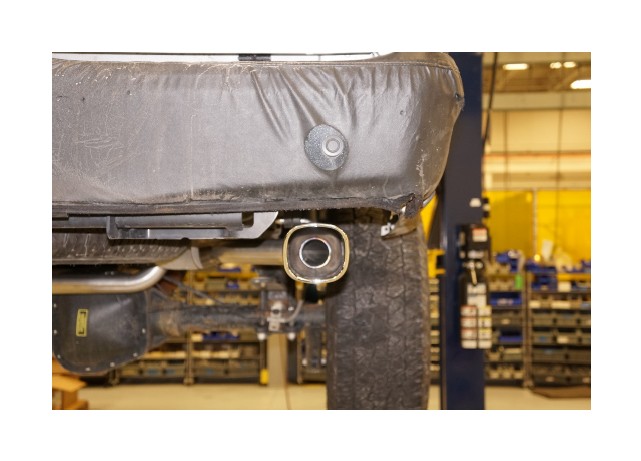
STEP 12: Align the left side tail pipe and tip and tighten.
STEP 13: Once you are satisfied with your fitment torque all clamps to 40nm. (30 lb-ft)
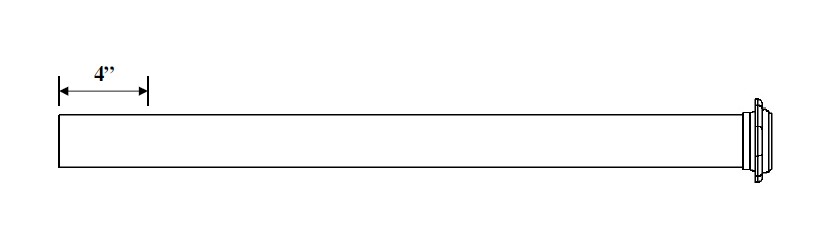
NOTE: For vehicles with a 141” wheelbase. Cut 4” off front pipe.
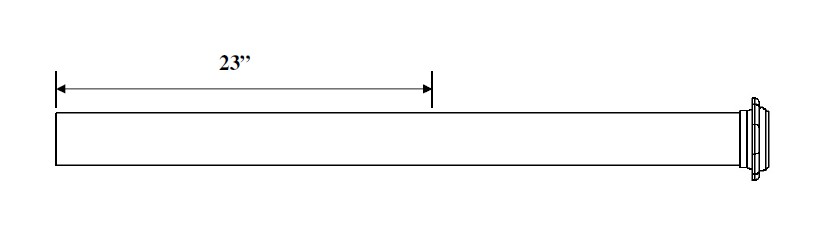
NOTE: For vehicles with a 122” wheelbase. Cut 23” off front pipe.