FREE 1 to 3-Day Delivery on Orders $149+ Details
How to Install Flowmaster Force II Stainless Steel Cat-Back Exhaust - Single Side Exit on your F-150
Removal:
1) Using a hacksaw or sawsall, cut the stock tailpipe off where it exits the muffler. (This step is not mandatory, but will make removal easier.)
3) Separate the three rubber hangers on the muffler and tailpipe from their rubber mounts on the vehicle. Remove the tailpipe and set aside.
4) Support the muffler with a stand. Remove the clamp at the connection just behind where the two converter pipes merge together. Because this connection may be significantly crimped by the clamp, it may be necessary to heat or slice open this connection for ease of removal.
5) Remove the muffler and set aside.
Installation:
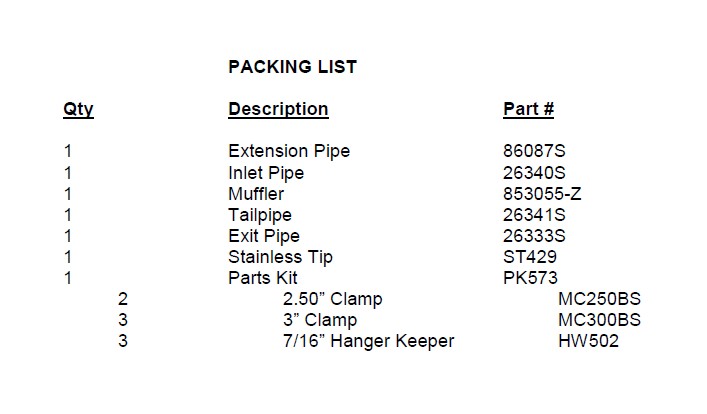
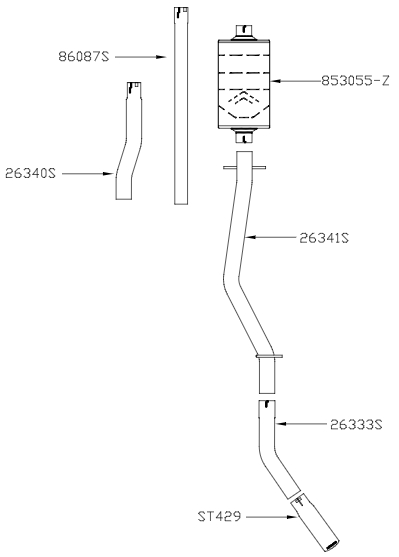
1) Identify your wheelbase length to determine extension pipe requirement. For 120” WB, the 86087S pipe will not be used. For 139” WB, trim 18” off the end of the 86087S. For 157” WB, use the 86087S as provided.
2) Place the extension pipe #86087S (if required) in position on the pipe from the catalytic converter. Install a clamp but do not tighten at this time.
3) Place the inlet pipe assembly #26340S in position over the extension pipe installed in step 2. Install a clamp but do not tighten at this time.
4) Slide a 3” clamp onto the inlet neck of the muffler #853055-Z. Then place the muffler onto the inlet pipe and support with a stand. Tighten the clamp just enough to hold in position, while still allowing for adjustment.
6) Slide a 3” clamp onto the muffler outlet neck. Place tailpipe #26341S into position over the axle and insert the hangers at the front and rear of the pipe into the rubber mounts on the vehicle and slide into the muffler outlet. Tighten the clamp just enough to hold, while still allowing for adjustment.
7) Place a 3” clamp onto the slip-fit of exit pipe #26333S and slide onto the back of tailpipe #26341S. Tighten the clamp just enough to hold, while still allowing for adjustment.
8) Place the stainless tip #ST429 onto the end of the exit pipe and adjust to the desired location. Then tighten the tip enough to hold, but still allow for adjustment.
9) Adjust the position of all the pipes and muffler to provide a satisfactory fit. A minimum of 3/4” clearance around all parts of the system must be maintained; while keeping suspension travel and vibration in mind. After adjustments have been made, securely tighten all clamps and install the 2 7/16” hanger keepers onto the hanger rods.
10) For a more secure installation, we recommend welding all slip-fit connections.