 FREE 1 to 3-Day Delivery on Orders $149+ Details
How to Install Fab Fours Winch Bumper on your F-150
Installation Time
2 hours
Tools Required
- Socket Wrench with Extension
- Breaker Bar
- 3/4” & 18mm Sockets
- 5/32” & 1/8” Allen Keys
- Flat and Phillips Head Screw Drivers
- 3/4”, 7/16”, & 3/8” Open End Wrench
- Floor Jack and wood block

Shop Parts in this Guide
I. Overview
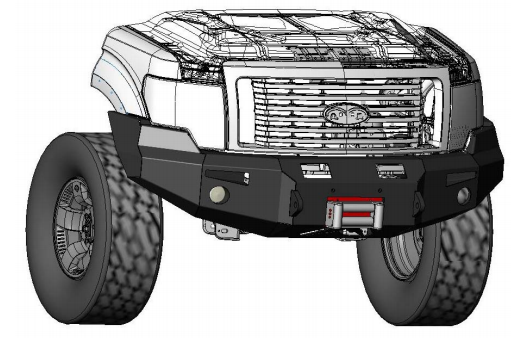
Congratulations on your new purchase of the industries’ best and most stylish Front Winch Bumper available for the 2009 Ford F150! This Bumper has been engineered for strength while keeping the weight down.
Your Front Bumper designed in 3-D from digitized data, CNC laser cut, fabricated, and powder coated… all in the U.S.A.
Enjoy the fit and finish of a quality Ford F150 Front Winch Bumper from Fab Fours Inc.
III. Removal of Stock Bumper
A. Disconnect the factory fog light harness and tie up out
of harm’s way.
B. Open Hood.
C. Remove bolt holding hood release mechanism using a
10mm wrench.
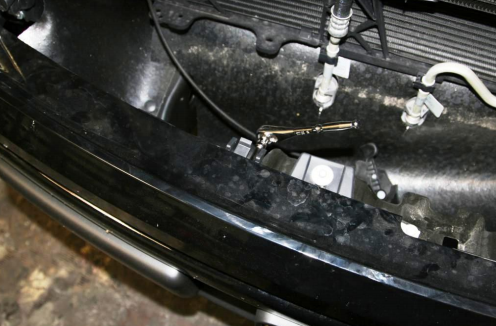
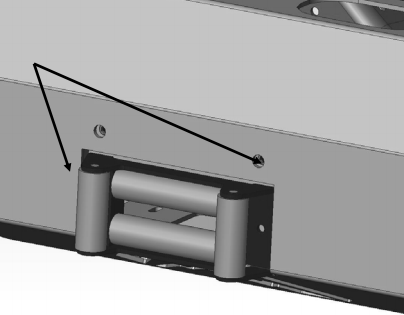
D. Remove 2 bolts holding the center section of the plastic
valance using a 10mm socket or wrench. See Image Below.
E. Remove 5 plastic tree clips holding the rubber dust shield to the bottom edge of the bumper.
F. Remove the 4 nuts (2 per side) holding the front bumper to the frame ends using a 21mm socket.
G. Using two people remove the bumper from the front of the vehicle.
H. Remove the tow hooks from either side of the frame using a 15mm socket.
I. Remove the 4 bolts per side from the fender well opening going up through the painted plastic valance and into the fender using a 10mm socket, extension, and
possibly a knuckle.
J. Using a 10mm ratcheting wrench remove the two bolts holding the plastic painted valance sub-structure from just below the headlight on each side.

K. Remove the painted plastic valance by pulling outward
and rotating away from the vehicle.
L. Your Truck is now ready for the install of your new Fab Fours Front Bumper!
IV. Lights and Wiring Installation
A. Install fog lamp brackets onto inner light pockets using two bolts and nuts per side and attach running light to bracket as shown using two bolts, washers, and nuts per side. Verify that light adjustment screw is facing
downward before tightening fully. Connect Harness once bumper is installed.
B. With the lights installed to the bumper clip the fog harness female connectors over each of the of the contact on the fog light bulb. Ensure that the rubber boot is sealed around the fog light housing and that the drain spot is pointed down.
V. Front Winch Bumper Installation
NOTE: The Following Installation steps apply to the installation of the Front Winch Bumper. PLEASE READ THE ENTIRE MANUAL BEFORE ATEMPTING
INSTALLATION! Ignoring these steps will increase your probability of scratching the vehicle during product Installation!
A. Remove the Bumper from the shipping carton. Lay all items out on a blanket to prevent damage to the powder coating.
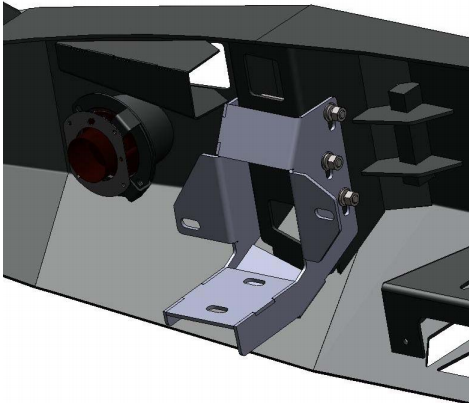
B. Using the supplied 7/16-14 hardware loosely install the mounts to the bumper as shown below.
C. OPTIONAL: If installing winch and roller fairlead (neither provided) into bumper, do it at this time. Bottom bolts (not provided) go through fairlead, then into winch. Thread 7/16” cap screws through hole in front bumper and
into winch body.
D. NOTE: Front Mount Winches should be bolted to FRONT FACE of the bumper in four places, and can be bolted to winch tray if so desired with two additional
fasteners. Bottom Mount winches are bolted to the bottom portion of the winch tray.
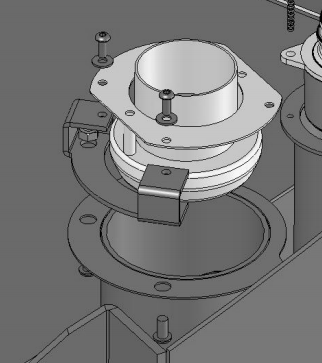
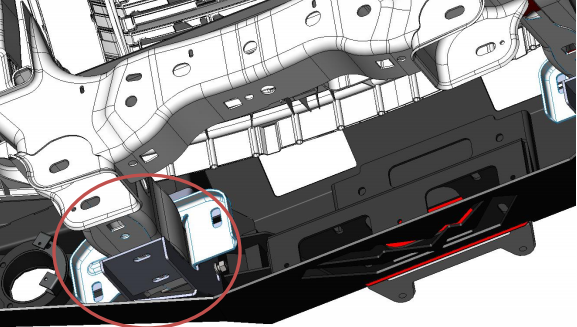
E. With the help of some friends, and/or the use of a floor jack and a wood block, lift the bumper into place using the factory tow hook hardware through the bottom of the frame mount, in addition to the supplied ½-13 hardware through the front of the mount and the frame. Do Not Fully Tighten. See Image Below.
F. Adjust the bumper to achieve good visual alignment as follows:
1. Adjust in/out, up/down, and “castor” with the intermediate mount to bumper bolts. Allow 0.5” Gap from all painted surfaces for Frame Flex.
2. Adjust side to side with the intermediate mount to frame bolts allowing an even gap on either side of the fender.
Note: A Floor Jack and block of wood come in handy for this as well.
G. Tighten all fasteners; beginning with frame mounts. Then tighten all mount-to-bumper fasteners.
H. Reinstall the Factory Hood Release mechanism into the bracket welded to the back edge of the bumper.
I. Tap into Factory Harness on each side of the truck to supply the Fog Lights. Cut wiring short if possible. Using the following color code.
OEM (Power) Brown→Red Fab Fours
OEM (Ground) Black →Black Fab Fours
J. Verify proper operation of lights.
VI. Maintenance/Care
Periodically check and tighten all fasteners.
Stripped, fractured, or bent bolts or nuts need to be replaced.
After washing of the vehicle make sure to fully dry all surfaces

