


Installation Time
(approx) 45 Minutes
Difficulty Level:
Light to Moderate mechanical skill required.
Installation Guides
No guide available for this part yet.
 FREE 1 to 3-Day Delivery on Orders $149+ Details
$309.99 pair
Save with Open Box
From $139.50
CONFIRM THIS FITS YOUR VEHICLE!
Saved - View your saved items
We're sorry. We couldn't save this product at this time.
or use


4WD Front Auto-Locking Hub Actuator (15-20 4WD F-150)
 13
13
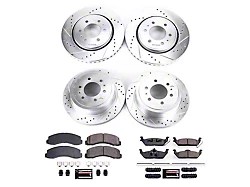
PowerStop Z23 Evolution Sport 6-Lug Brake Rotor and Pad Kit; Front and Rear (18-20 F-150 w/ Electric Parking Brake; 19-20 F-150 Raptor)
 278
278

PowerStop Z36 Extreme Truck and Tow Carbon-Fiber Ceramic Brake Pads; Front Pair (10-20 F-150)
 155
155
Features, Description, Reviews, Q&A, Specs & Installation
Premium Wheel Assembly. The Front Wheel Bearing and Hub Assembly Set provides essential support for wheel rotation while maintaining proper alignment and stability. It helps reduce steering wheel vibration, uneven tire wear, and noise, contributing to a smoother and safer driving experience.
Durable Construction and Appearance. Manufactured using high-quality materials engineered to meet or exceed OEM standards, each assembly features precision tapered bearings and a robust housing designed for long-lasting performance. Finished with a durable protective coating to resist corrosion and wear over time.
Installation Ease. Designed for straightforward replacement with no drilling required, this set allows professional mechanics and experienced enthusiasts to complete installation efficiently using standard tools.
Warranty Coverage. Backed by a limited lifetime warranty covering manufacturing defects, ensuring lasting reliability and customer confidence.
Application. Specifically engineered to fit 2017-2020 4WD Ford F-150 Raptor trucks. Not compatible with non-Raptor F-150 trims or 2WD configurations.
CA Residents:  WARNING: Cancer and Reproductive Harm - www.P65Warnings.ca.gov
Installation Info
Installation Time
(approx) 45 Minutes
Difficulty Level:
Light to Moderate mechanical skill required.
Installation Guides
No guide available for this part yet.
What's in the Box

