FREE 1 to 3-Day Delivery on Orders $149+ Details
How to Install E & G E-Power Heavy Mesh Upper Grille Insert - Gloss Black (09-14 All, Excluding Raptor) on your Ford F-150
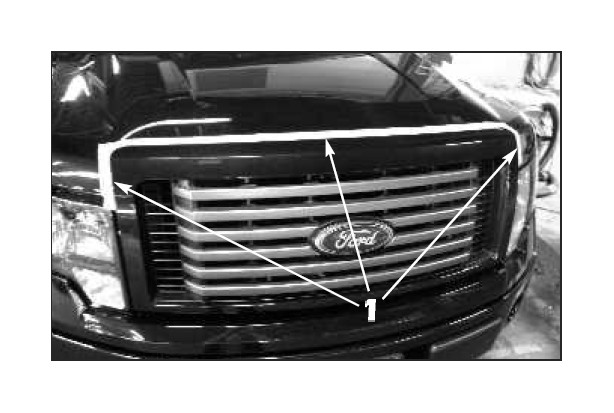
1. Apply masking tape to the painted edge of the hood surrounding the grille as shown.
2. Open the hood and use a 10mm socket and ratchet to remove the outer two (2) hex nuts securing the top of the factory grille to the hood.
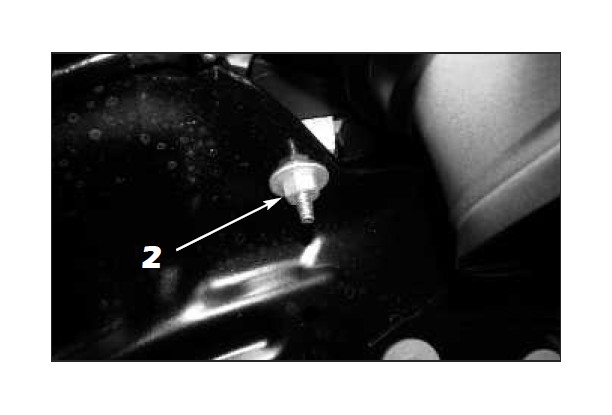
3. Use a 10mm socket and ratchet to remove the inner four (4) hex nuts securing the top of the factory grille to the hood.

4. Use a 10mm socket and ratchet to remove the lower two (2) hex bolts securing the bottom of the factory grille to the hood support brackets.

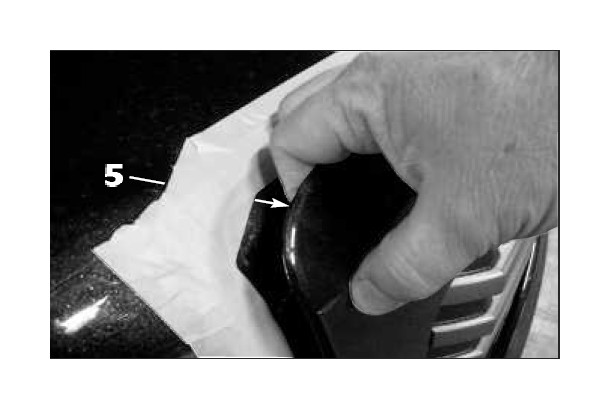
5. Pull out on either upper corner of the factory grille and pull firmly enough to unclip the top edge. There are a total of 5 retaining clips across the top edge.
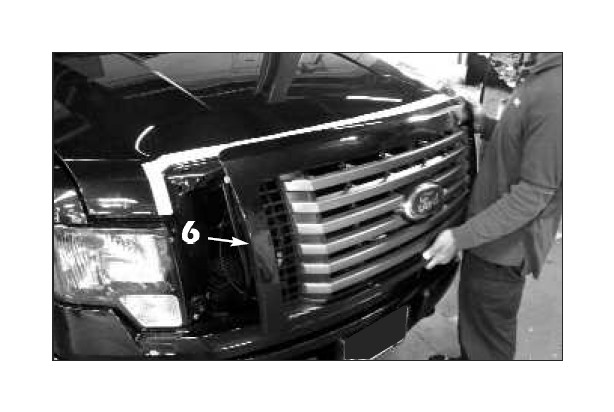
6. Carefully remove the factory grille from the hood.
7. Apply masking tape to the painted or chromed factory grille sur- round and the factory emblem if the emblem is to be reused.
8. Remove the 10mm hex speed nuts securing the emblem to the fac-tory grille.

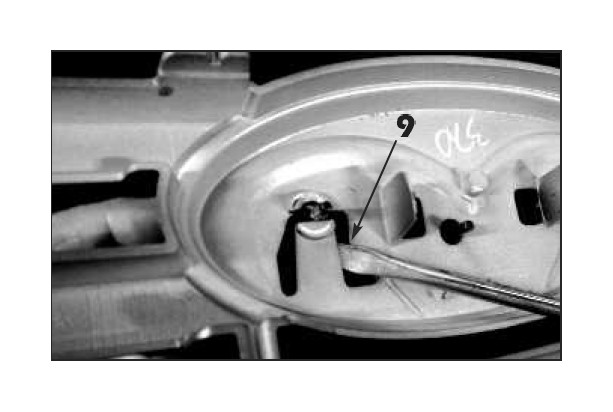
9. Use a flat blade screwdriver to pry up onto the emblem retainers (as shown) and pull the emblem off of the factory grille.
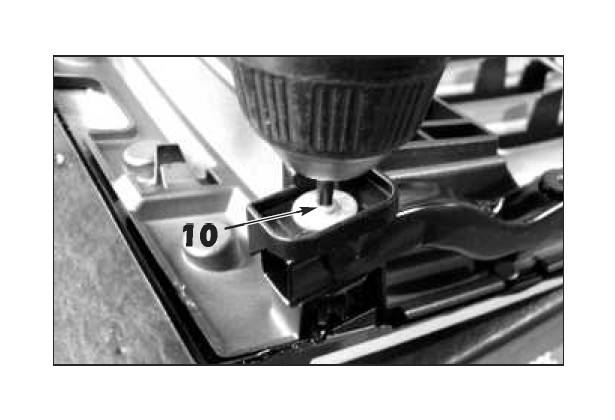
10. Use a torx T-25 bit to remove the lower metal reinforcement from the bottom of the factory grille.
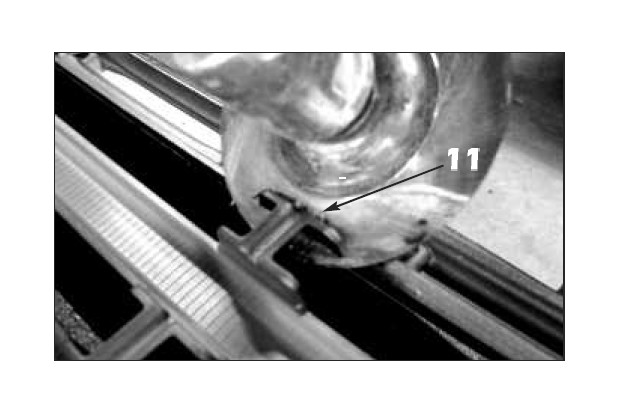
11. Use a vibrating saw or a jig saw to cut through the factory grille across the bottom supports (as shown at a 45 degree angle).
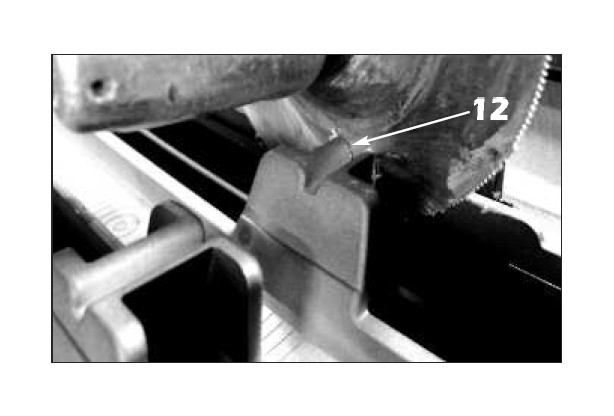
12. Use a vibrating saw or a jig saw to cut through the factory grille across the upper supports (as shown at a 90 degree angle).
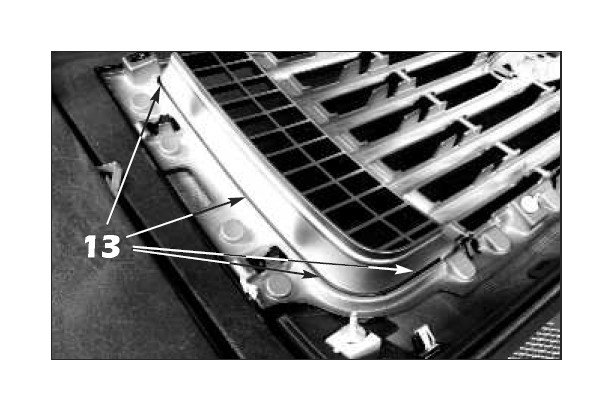
13. Use a sharpie to draw a line around the side sections of the factory grille. This is where you will cut through the grille insert to seper-ate it from the factory grille surround.
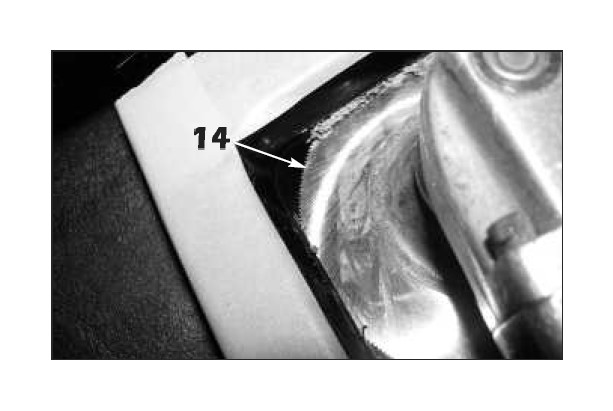
14. It may be necessary to cut through the grille from the front at the corners if using a vibrating saw. Once completely cut through, re-move the center section of the factory grille.
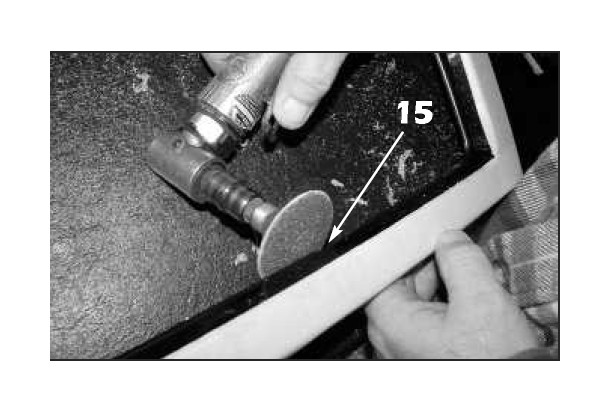
15. Use a disc grinder to smooth the inside edge of the factory grille surround, making sure there are no rough edges that would be visible through the mesh grille.
16. Reinstall the metal reinforcement removed in Step 10.

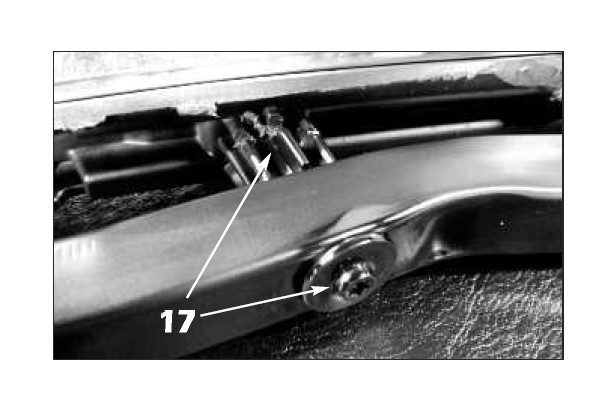
17. Use flat or semi-gloss black paint to black out the factory torx screw heads and the mounting bosses. They will be visible through the mesh grille. Remove the protective masking tape from the fac-tory grille surround at this time.
18. Align the modified factory grille surround over the back of the E&G E-Power mesh grille and align the outer corner U-shaped grille re-tainers and install #8-32 ESNA half nuts. Tighten until the grille begins to make contact with the factory grille surround only at this time.

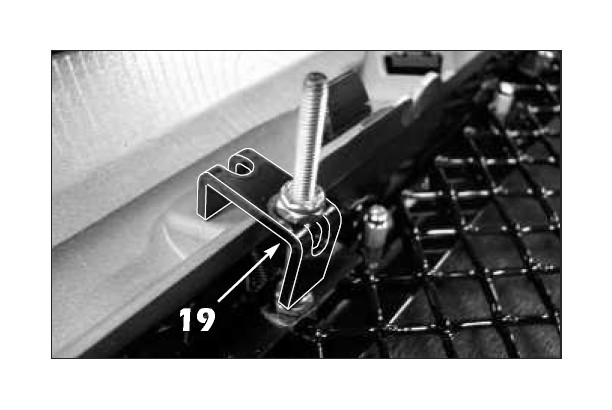
19. Align the U-shaped grille retainers and #8-32 ESNA half nuts onto the top mounting studs. Tighten only until the grille begins to make contact with the factory grille surround at this time.
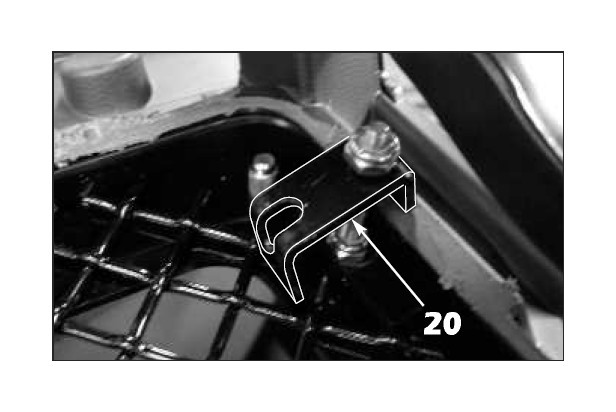
20. Align the U-shaped grille retainers and #8-32 ESNA half nuts onto the lower outer corner studs. Tighten only until the grille begins to make contact with the factory grille surround at this time.
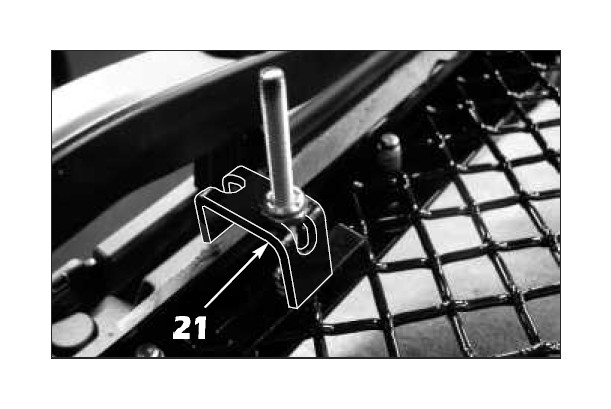
21. Install the U-shaped grille retainers and #8-32 ESNA half nuts onto the studs across the bottom of the grille. Tighten only until the grille begins to make contact with the factory grille surround at this time.
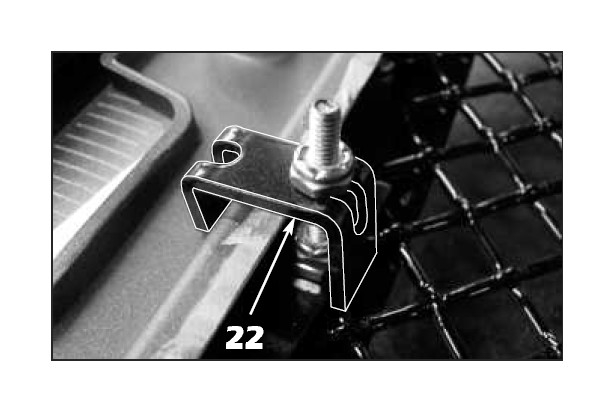
22. Install the U-shaped grille retainers and #8-32 ESNA half nuts onto the studs on the sides of the grille. Once all the grille retainers have been installed, finish tightening all ESNA half nuts.
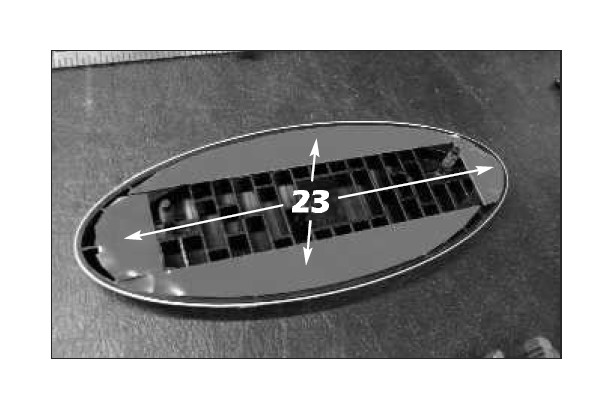
23. Install the supplied .045" x 1" double faced tape to the back of the factory emblem.
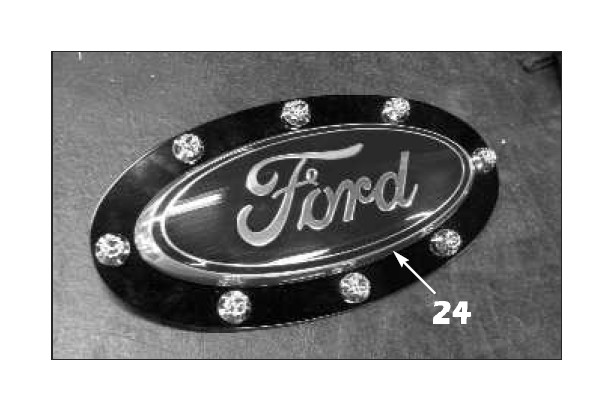
24. Peel off the backing from the double faced tape and align the em-blem onto the emblem mounting plate and press it firmly enough to set the tape.
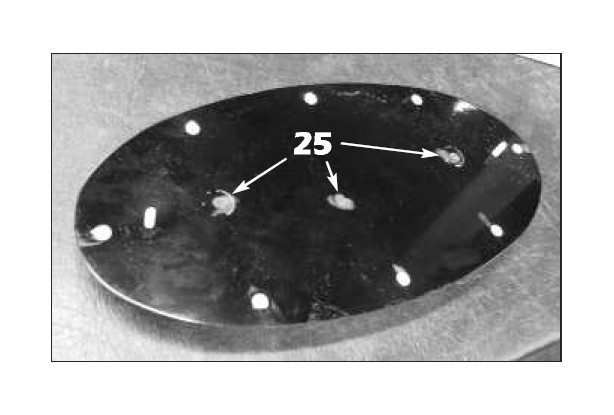
25. Grind flush the original mounting studs and the alignment pin from the back of the emblem that protrude through the emblem mounting plate.
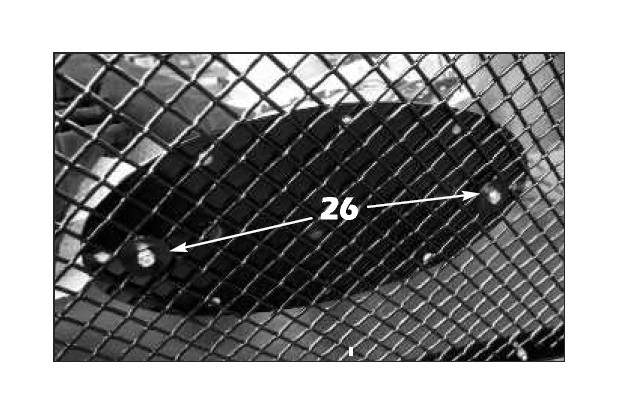
26. Carefully align the emblem assembly, centering it onto the mesh grille and install the supplied large black plastic washers and #8-32 ESNA half nuts.
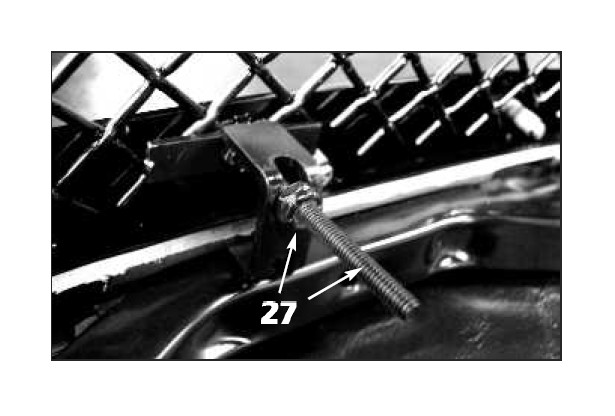
27. Paint all studs and ESNA nuts that could be visible through the mesh grille with flat or semi-gloss black paint prior to grille installa-tion.
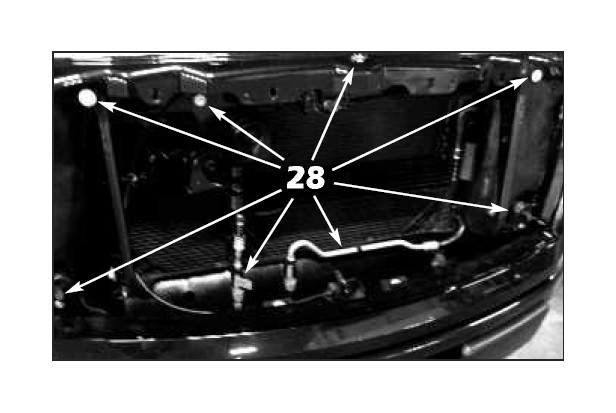
28. Paint everything inside the factory grille opening not already black that could be visible through the mesh grille with flat or semi-gloss black paint prior to grille installation.
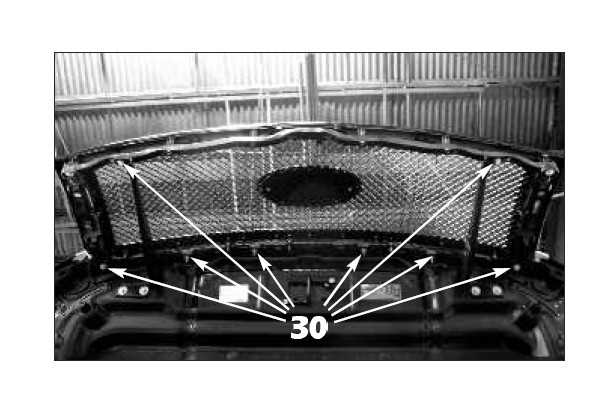
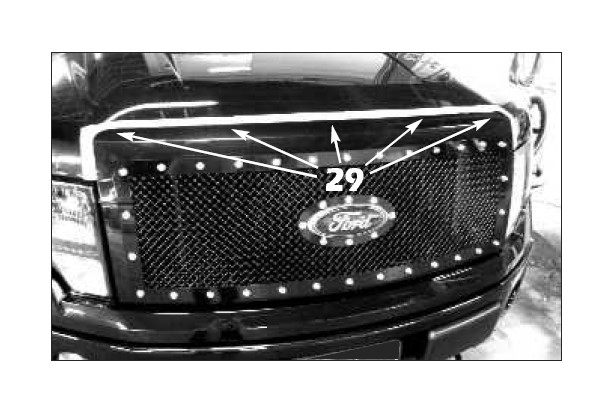
29. With the help of an assistant, align the assembled grille back onto the hood, making sure all oif the upper alignment clips fit back into the slots across the top edge of the hood. Push firmly to seat the factory clips. Remove the protective masking tape across the top edge of the hood at this time.
30. Reinstall the factory 10mm hardware removed previously to finish the grille installation.