FREE 1 to 3-Day Delivery on Orders $149+ Details
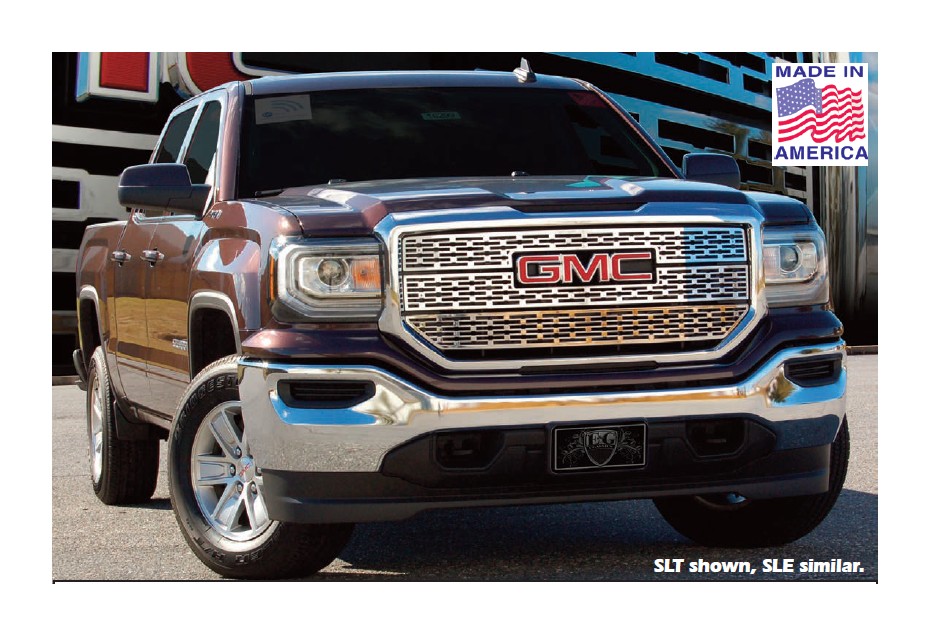
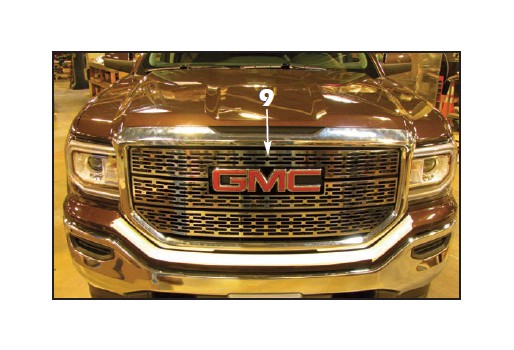
How to Install E & G Denali Style Upper Overlay Grille - Chrome (16-17 Sierra 1500 SLT) on your GMC Sierra
1. Apply masking tape to the painted filler between the grille and the bumper to help protect the paint finish.
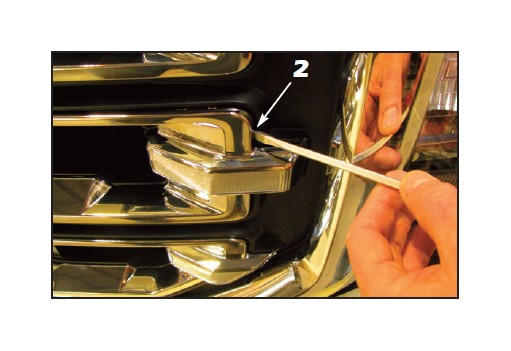
2. Using a small flat blade screwdriver, begin prying out the factory chrome mouldings starting at the sides.
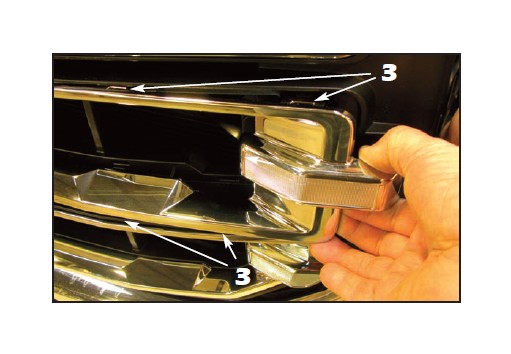
3. Continue to pull the mouldings off the factory grille. The mouldings will either unclip or the mounting tabs will break off. These mouldings are not reused.
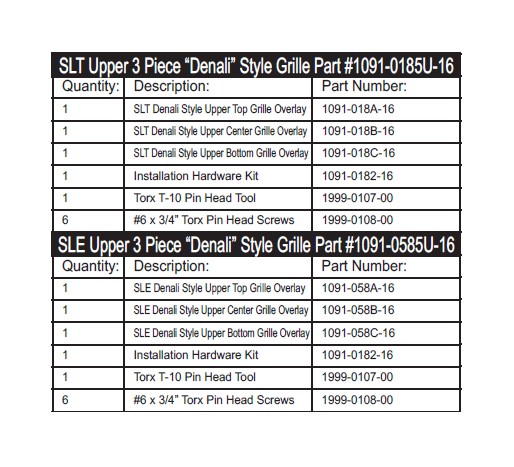
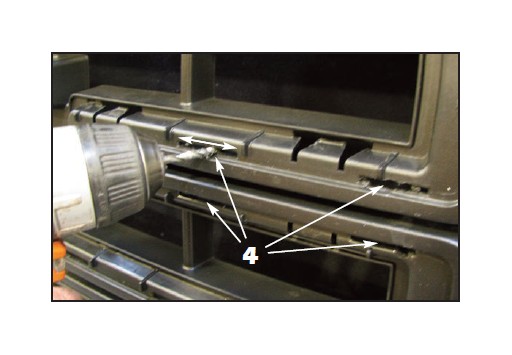
4. For “SLE” grilles only: Use a 5/32” drill bit to enlarge the factory mounting slots (where shown, each side) prior to E&G grille section alignment.
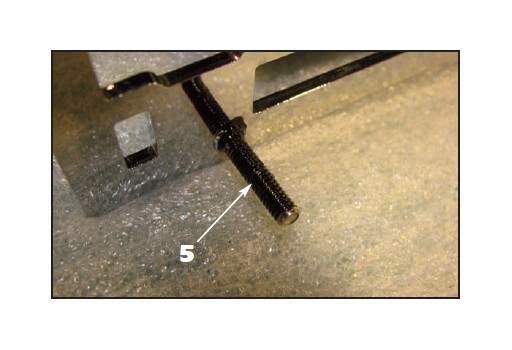
5. Paint all of the lower studs on all three grille sections with black paint to help conceal them once the grille sections are installed.
6. Begin aligning the upper grille bottom section first. Align the center two studs where the factory retaining clips are located. Insert a small flat blade screwdriver to pry the tab away from the stud and press in on the grille to begin seating the studs. Work from the center out, alternating from bottom to top studs.
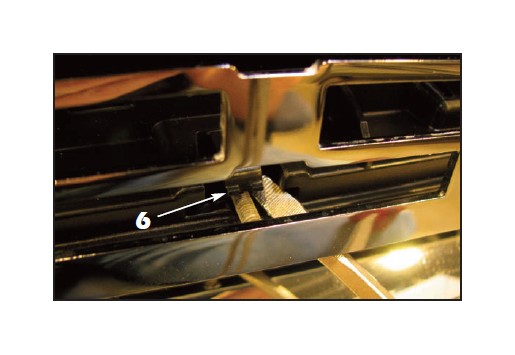
7. Continue aligning the studs with the retaining clips. Move the clips as needed to press the grille tightly against the factory insert. Make sure that once the upper grille bottom section is pressed into place that it is perfectly centered inside the factory chrome surround.
8. Install the upper grille center section using the same procedure outlined in Steps 6 and 7. Make sure that the edges of the grille align with one another. You can use a small secton of wood or plastic and insert it into any of the grille openings and tap the wood or plastic with a mallet to adjust the side to side gap (alignment).
9. Install the upper grille top section using the same procedure out lined in Steps 6 and 7.
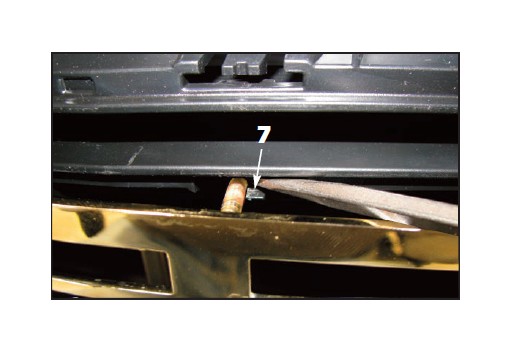
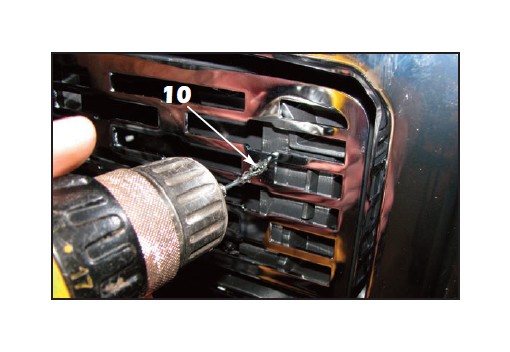
10. Once properly aligned with the factoy grille surround, use a 1/16” drill bit to drill through the six (6) mounting holes in the E&G grilles. Drill through the center of the holes, do not allow the drill bit to touch the E&G grille. Apply a rust preventing sealer to the hole in the grille as a precautionary measure against rust.
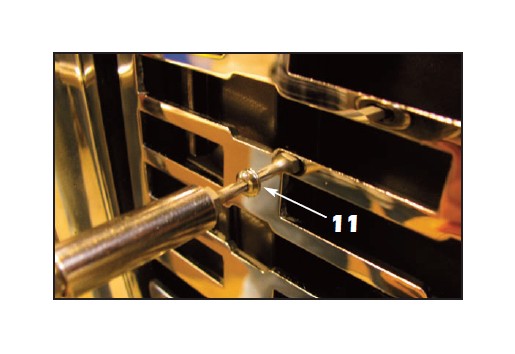
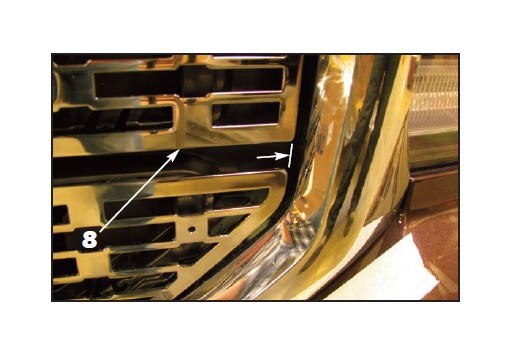
11. Install the supplied #6 x 3/4” Torx pin head screws to secure the outer edges of the E&G grilles and finish the installation. Do not overtighten or you could indent the grilles at the screw locations or strip out the holes in the factory plastic grille.