 FREE 1 to 3-Day Delivery on Orders $149+ Details
How to Install SLP Exhaust Hanger for PowerFlo Cat-Back Exhaust System on your Sierra
PACKING LISTBefore installation, use this check list to make sure all necessary parts have been incl
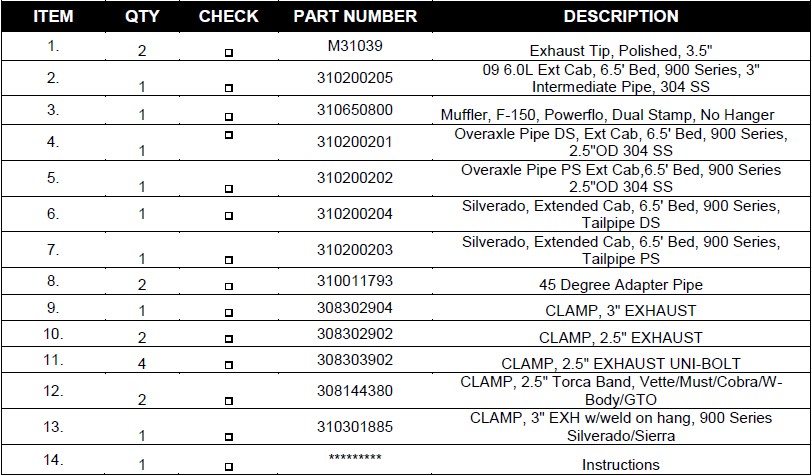
INSTALLATION INSTRUCTIONS – #31047
1 Raise and fully support the vehicle (a vehicle lift is recommended).
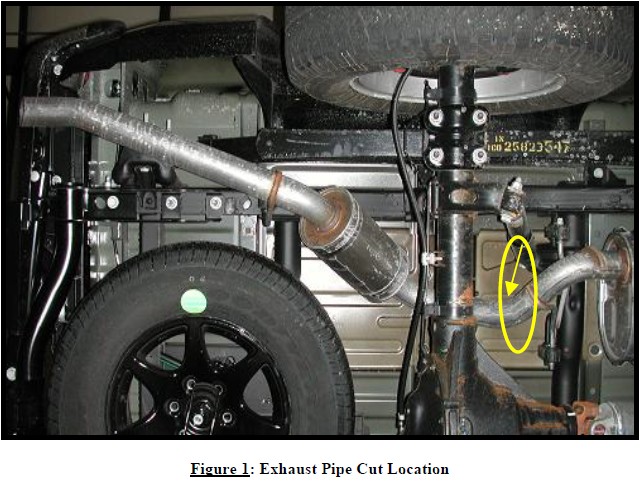
2 Begin by supporting the muffler and then carefully cut the pipe at the rear of the muffler… See figure 1.
3 Using a pry bar remove the exhaust hanger from the rubber isolator at the rear section of pipe and then carefully remove the section of pipe avoiding damaging the brake lines…See figure 2.

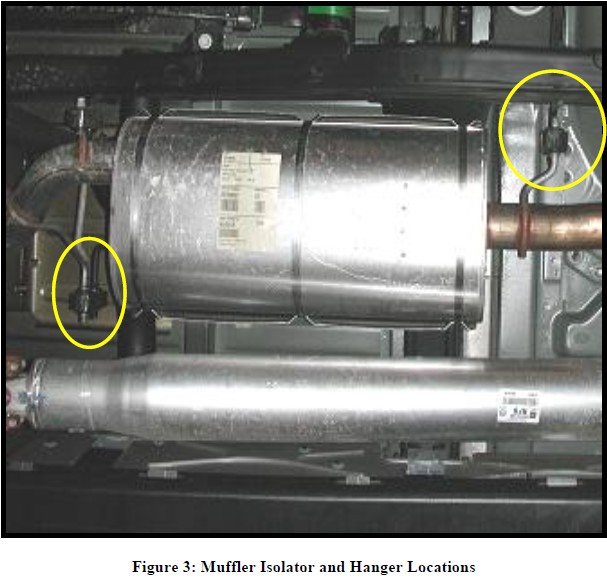
4 While the muffler is still supported, once more using a pry bar, remove the rubber isolators from the front and rear of the muffler… See figure 3.
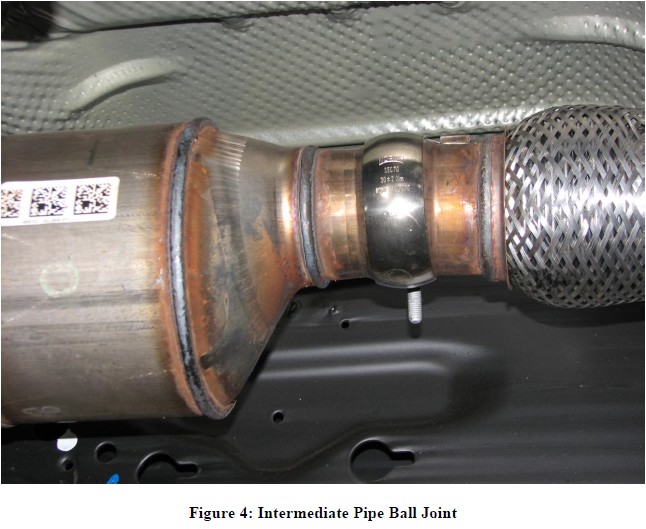
5 Remove intermediate pipe hanger from rubber isolator. Remove the spherical clamp from the front section of the intermediate pipe and remove the assembly from the vehicle. You may need to bend the tab on the clamp to remove it. Set it aside as you will reuse this clamp… See figure 4.
6 Insert the new intermediate pipe hanger onto the rubber isolator and then connect the CAT to the new intermediate pipe using the stock spherical clamp set aside in the previous step.
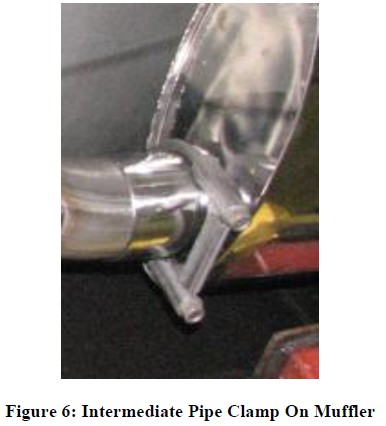
7 Slide the 3” guillotine clamp onto the end of the intermediate pipe and then install the muffler on the intermediate pipe. Do not fully tighten the clamp yet, only tighten enough to hold the muffler in place… See figure 6. **NOTE** If you were required to purchase the supplementary clamp hanger 31047H, install this hanger onto the intermediate pipe in order to connect to the factory hanger on the vehicle.
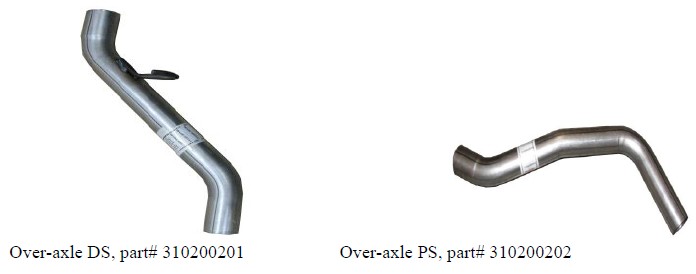
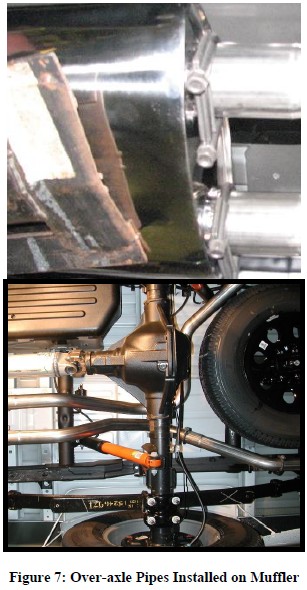
8 Next, slide a 2.5” guillotine clamp onto the driver’s side over-axle pipe inlet. Then carefully route the pipe over the axle and slide the pipe onto the outlet pipe of the muffler. Tighten the clamp to hold the pipe in place but not so tight as to not allow for adjustment. Do this step in the same manner for the passenger side pipe… See figure 7.
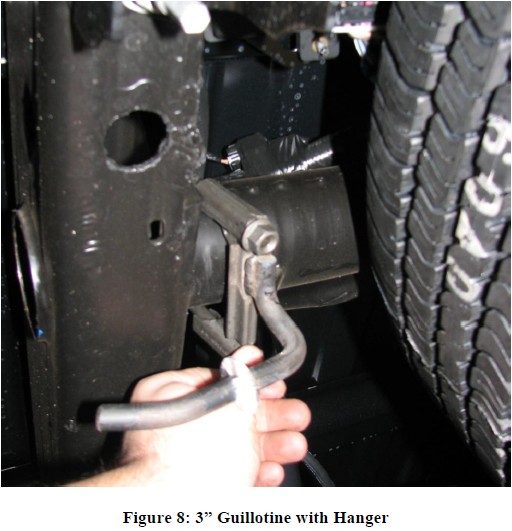
9 Next bolt the supplied 3” clamp hanger onto the driver’s side of the crossover frame tube and install one of the rubber isolators previously removed onto it… See figure 8.
10 Install the driver’s side tail pipe onto the over-axle pipe with the supplied 2.5” uni-bolt clamps and insert the pipe hanger into the rubber isolator from the 3” clamp hanger.
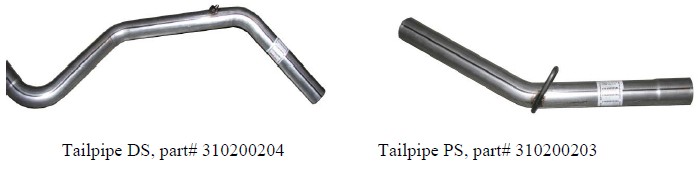
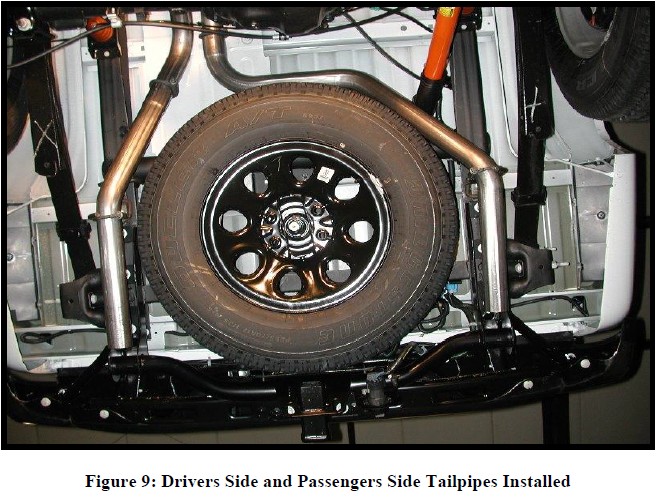
11 Repeat step 10 for the passenger’s side. The P-Side uses the factory hanger and rubber isolator to hang the SLP pipe… See figure 9.
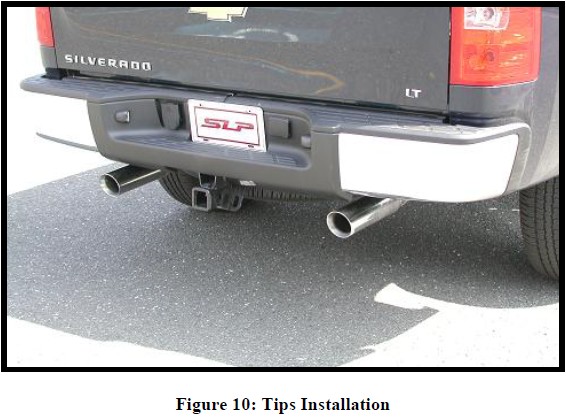
12 Next, install the two SLP high polish tips onto the outlet of each tailpipe and secure with the 2 ½” band clamps provided…See figure 10.
13 Adjust the system from front to rear making sure all exhaust components are clear and free of contact to any wiring or body parts and then tighten all clamps. Make sure guillotine clamps are tight enough, as they need to squeeze the two pipes together.
14 The installation is now complete! ENJOY!
NOTE: Included with this system are two optional 45° adapter pipes that will allow you to position your tips at a 45° angle instead of straight back. To use these adapters, both the driver side tailpipe extension and passenger side tailpipe need to be cut back 8”. Then slip the adapter on and use the 2 1/2” uni-bolt clamps to clamp into place.


