FREE 1 to 3-Day Delivery on Orders $149+ Details
How to Install Corsa APEX DryFlow Metal Cold Air Intake (15-17 2.7L EcoBoost) on your Ford F-150

Shop Parts in this Guide
- Corsa Performance APEX Series Cold Air Intake with DryTech 3D Dry Filter (15-17 2.7L EcoBoost F-150)
- Corsa Performance APEX Series Cold Air Intake with DryTech 3D Dry Filter (15-16 3.5L EcoBoost F-150)
- Corsa Performance APEX Series Cold Air Intake with MaxFlow 5 Oiled Filter (15-20 2.7L EcoBoost F-150)
- Corsa Performance APEX Series Cold Air Intake with MaxFlow 5 Oiled Filter (15-16 3.5L EcoBoost F-150)
Please take time to read and understand these installation instructions.
CORSA recommends that the installation of this system be performed by a qualified service center or professional installer who has the necessary equipment, tools and experienced personnel. However, if you decide to perform this install the use of an additional person may be required.
CAUTION: Never work on a hot engine bay. Allow time for the vehicle to cool.
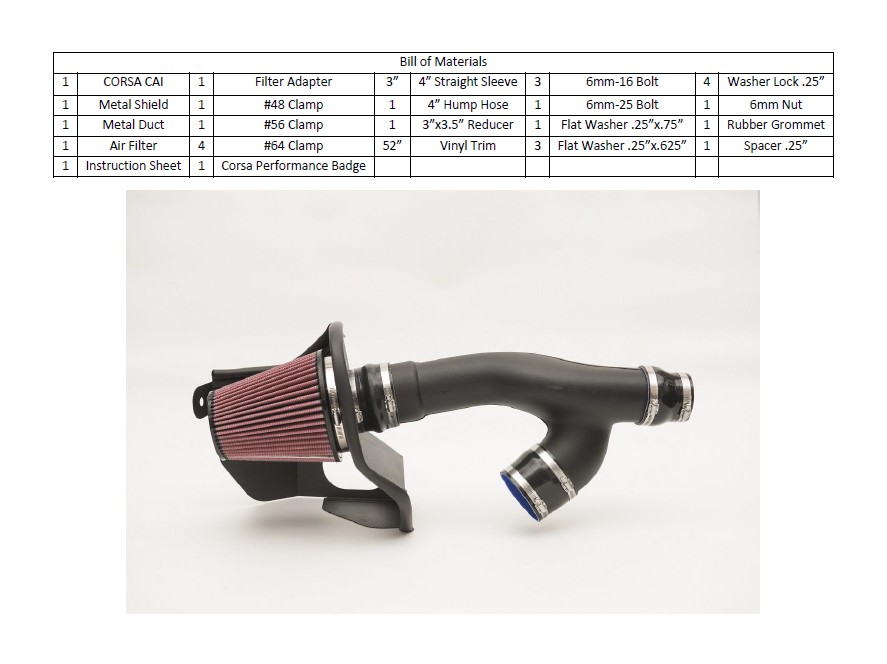
Please confirm that all parts are present according to the bill of materials before beginning the in
Installation Instructions:
Locate your vehicle’s battery and disconnect the negative battery cable, this resets the computer and clears old air flow data to prevent CEL errors.
1. Before you begin the install you must disconnect the negative battery cable. Failure to disconnect the battery may cause a check engine light or damage your engine.
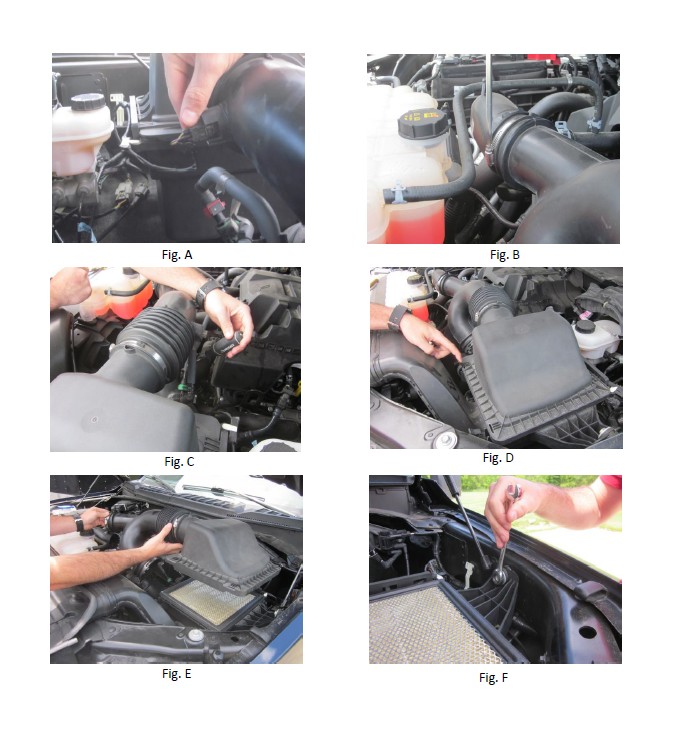
2. Disconnect harness from the air temperature sensor. (Fig A)
3. Loosen clamp on top and bottom intake tubes. (Fig B,C)
4. Unclip air box lid and remove duct/lid assembly as one piece. (Fig D,E)
5. Using a 13mm wrench, remove the bolt holding the air box to the vehicle. Remove the rubber grommet and metal washer and save for install of Corsa heat shield.(Fig F)
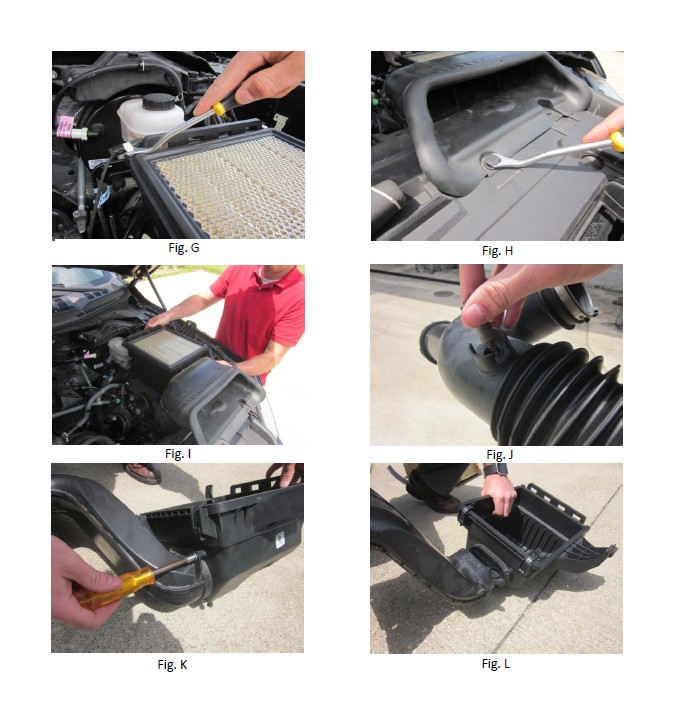
6. Remove the two plastic wire retention clips from back of air box. (Fig G)
7. Remove the two plastic clips from the factory air scoop. (Fig H) Save the plastic clips for Corsa heat shield install.
8. Remove the bottom box assembly by pulling up and out. (Fig I)
9. Remove the air temperature sensor from the factory air duct. (Fig J)
10. Using an 8mm nut driver or socket, remove the factory air scoop from the bottom of the air box.(Fig K,L)
WARNING: Over tightening hardware may alter the integrity of the CORSA air intake system.
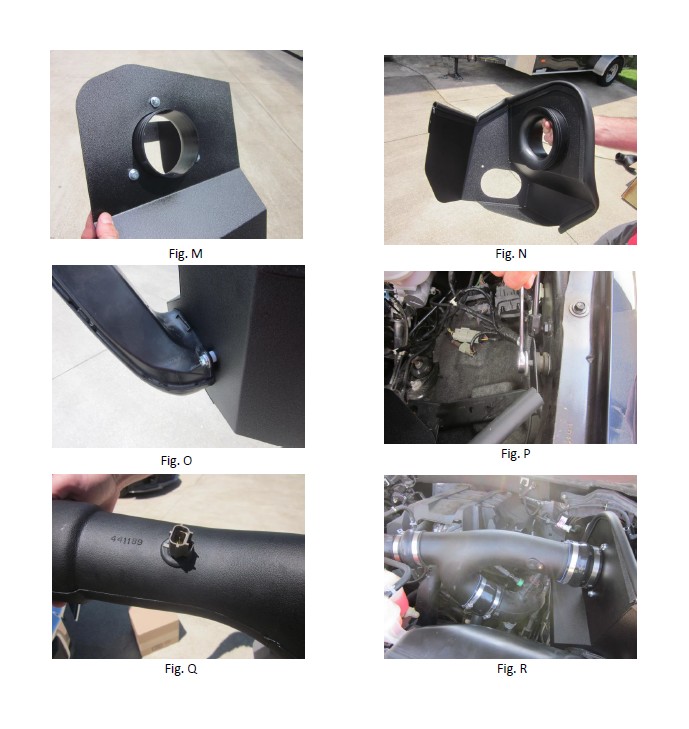
11. Bolt filter adapter to heat shield using supplied 6mm bolts, lock washers, and flat washers. (Fig M)
12. Install trim on Corsa heat shield. Add a relief cuts where necessary to allow trim to form around sharp bends. (Fig N)
13. Install stock air scoop to bottom of Corsa heat shield using the 6mm-25 bolt, .25” spacer, lock washer, flat washer, and 6mm nut. (Fig O)
14. Insert heat shield into vehicle. Bolt side of heat shield to vehicle using the factory 13mm bolt and rubber washer from step 5. (Fig P) 15. Insert air temperature sensor into Corsa air duct. (Fig Q)
16. Slide two #64 clamps onto the 4” straight sleeve and place onto factory intake tube. Place 2 #64 clamps on the 4” hump hose and slide onto filter adapter. Slide one #48 clamp and one #56 clamp onto the silicone reducer and place onto factory air duct. Once all hoses are in place, install Corsa air duct. Position duct and tighten clamps accordingly. (Fig R)
17. Plug in air temperature sensor. (Fig S)
18. Reinstall factory plastic pins from step 7. (Fig T)
19. Install filter onto filter adapter and tighten. (Fig U)
20. Place Corsa Performance badge on heat shield or any other desired location. (Fig V)
21. Reattach the negative battery cable and recheck all connections before driving and retighten the clamps after 500 miles. (Fig W)
*Check that this air intake complies with your Federal, State and Local laws. We recommend saving your stock system.
BEFORE ROAD TESTING
1. Start engine, leaving the transmission in park and securing the parking brake.
2. Make sure to look and listen for any unusual noises or air leaks. Repair problems if needed.
3. Once completed it will be necessary to check periodically, after a few heat cycles, for realignment and tightening of all connections.
CARE AND CLEANING
Check the reusable filter periodically and remove any excessive dirt build-up by tapping the filter on the ground and brushing off the loosened dirt. Clean the MaxFlow 5 (Blue) filter by using a two stage cleaning kit to thoroughly clean and re-oil the filter. Re-oil every 10,000-15,000 miles without cleaning to improve filtering in sand and dirt. Clean only when dirt is very excessive or at or before 40,000 miles. For DryFlow 3D (Red) filters remove excess dirt by tapping the filter on the ground. Vacuum clean for a quick clean. Rinse DryFlow 3D filters with water every 50,000 miles and allow to dry completely prior to re-installation. Do Not Oil!
FOR REPLACEMENT FILTERS REFERENCE #5160/5161 & CALL 440-891-0999 OR TOLL FREE 1-800-486-0999