 FREE 1 to 3-Day Delivery on Orders $149+ Details
How to Install SLP Harmonic Balancer/Underdrive Pulley on your Silverado
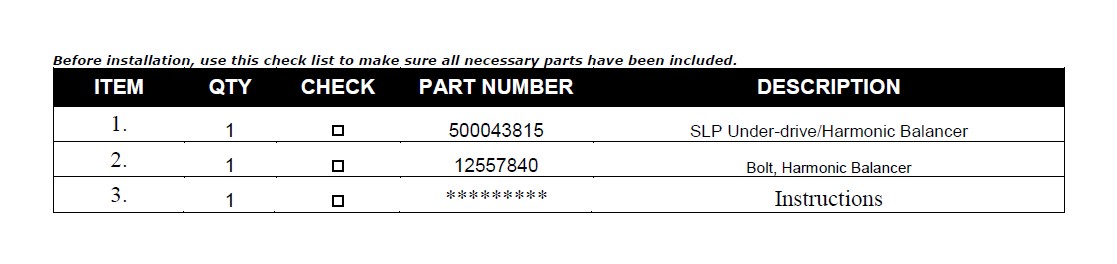
PACKING LIST
WARNING: SLP Recommends that this installation procedure be completed by a professional automotive technician. Improper installation can lead to severe engine damage and possible bodily harm.
WARNING: SLP Recommends allowing the vehicle to cool (not running) for five hours before beginning installation.
WARNING: Too avoid the chance of electrical shock or damage to your vehicle’s electrical system; disconnect both the negative and positive batter leads (in that order) at the battery.
INSTALLATION INSTRUCTIONS – #100230
NOTE: Requires New Serpentine Belts
2010 Camaro
Main Belt: Gates K060827 or 82.7" Equivalent
Accessory Belt: Gates K040353 or 35.3" Equivalent
4.8/5.3/6.0 Truck/SUV and TBSS
Main Belt: Dayco 5060895 or 89.5" Equivalent (When the vehicle is equipped with an Overdrive
Alternator, use Dayco 5060882 or 88.2" Equivalent).
Accessory Belt: Dayco 5040345 or 34.5" Equivalent.
*****NOTE***** The keyway in the SLP pulley is designed for both stock and aftermarket crankshafts. The stock crankshaft does not have a key but the sealant on the backside of the GM bolt provided will stop any oil from coming out of the front of the crankshaft snout. There is no need for any additional sealant or gaskets when installing on a stock crankshaft.
1 Raise and fully support the vehicle (a vehicle lift is recommended).
2 Install a suitable flywheel holding tool.
3 Remove the crankshaft balancer bolt. (Do not discard this crankshaft bolt as it will be used during installation of the new SLP Balancer.)
4 Use a suitable balancer remover/puller tool to remove the stock balancer from the crankshaft.
5 Installation of the new balancer involves a four stage tightening process. The first pass ensures that the balancer is installed completely onto the crankshaft. The second, third and fourth passes tighten the NEW bolt to the proper torque.
6 The used crankshaft bolt is used only during the first pass of the new balancer installation procedure. The NEW crankshaft balancer bolt is used to tighten as described below in the second, third and fourth passes of the balancer bolt tightening procedure.
7 Install the new balancer onto the end of the crankshaft as straight as possible prior to tool installation.
8 Use a suitable crankshaft balancer installer and front oil seal installer to install the new balancer.
9 Install the USED crankshaft bolt and tighten the bolt to 240 ft-lbs.
10 REMOVE the USED crankshaft bolt.
11 The nose of the crankshaft should be recessed 2.4-4.48mm (.094-.176 in) into the balancer bore.
12 Install the NEW crankshaft balancer bolt.
13 Tighten the crankshaft balancer bolt a first pass to 37 ft-lbs
14 Tighten the crankshaft balancer bolt a second pass to 140 degrees using a suitable angle meter.
15 The installation is now complete.


