FREE 1 to 3-Day Delivery on Orders $149+ Details
How to Install Borla True Dual Stinger S-Type Cat-Back System & BorgWarner Turbo Upgrade Kit
***** Please compare the parts in the box with the bill of materials provided *****
to assure that you have all the parts necessary for this installation.
These instructions have been written to help you with the installation of your Borla Performance Turbo Upgrade Kit. Please read this document completely
before beginning the installation of your system.
To ensure this part number fits your specific model year, please visit our website for the latest model year listings at www.BORLA.com
Thank you for purchasing a Borla Performance Turbo Upgrade Kit System.
Borla Performance Turbo Upgrade Kit Systems (PN’s 251004, 251005, 251006) are designed for the Ford F-150 equipped with a 3.5L engine, automatic transmission.
Borla Performance Industries recommends that an turbot shop or professional after market parts installer, who has all the necessary equipment, tools and experienced personnel needed for proper installation, should perform the installation of this system. However, if you decide to perform the installation, we recommend someone should help you. Ensure the installer uses all under car safety precautions including eye protection.
Please take time to read and understand the following…
By installing your Borla Performance Turbo Upgrade Kit, you indicate that you have read this document and you agree with the terms stated below.
It is the responsibility of the purchaser to follow all installation instruction guidelines and safety procedures supplied with your Borla Performance Turbo System.
Borla Performance Industries assumes no responsibility for damages occurring from misuse, abuse, improper installation, impro per operation, lack of responsible care, or all previously stated reasons resulting from incompatibility with other manufacturer’s products and/or systems.
Included with your Borla Performance Turbo System is a warranty card. Please read it carefully before you begin any work on your vehicle. If you should have any questions regarding our warranty policy, installation, or any other matter pertaining to your new Bor-la Performance Turbo System, please give us a call at the number provided on the warranty card.
Caution!!! Never work on a hot exhaust system. Serious injury in the form of burns can result If the vehicle has been in use and the exhaust system is hot, allow vehicle to cool for at least 1 hour. Always wear eye protection when working under any vehicle.
Note: It is our recommendation that you use a hoist or hydraulic lift to facilitate the installation of your new Borla Performance Turbo System.
Taking all under car safety precautions, lift the vehicle using a hoist or hydraulic lift. Once this has been done, you may begin the removal of your old turbo system from your vehicle.
Note: Before removing the original turbo system from your vehicle, please compare the parts you have re-ceived with the bill of materials provided on the previous page to assure that you have all the parts necessary for the installation of your new Borla Performance Turbo System.
Note: With a used vehicle, we suggest a penetrating spray lubricant to be applied liberally to all turbo fasteners and allowing a significant period of time for the chemical to lubricate the threads before attempting to disassemble.
Original Turbo System Removal and Borla Performance Installation
Note: With a used vehicle, we suggest a penetrating spray lubricant to be ap-plied liberally to all turbo fasteners and allowing a significant period of time for the chemical to lubricate the threads before attempting to disassemble.
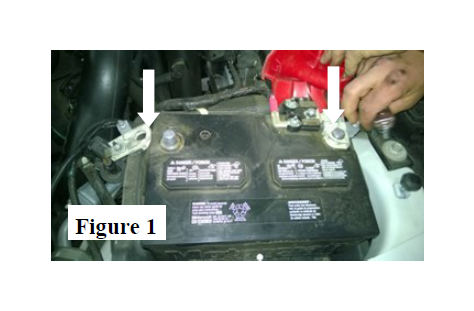
1. Disconnect Battery, remove ground connection first, then the posi-tive terminal. (See Fig.1)
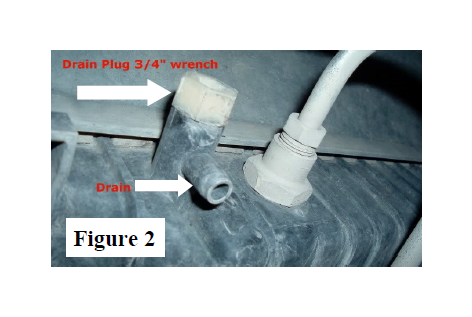
2. Drain coolant from the engine cooling system WM section 303-03.
(See Fig. 2)
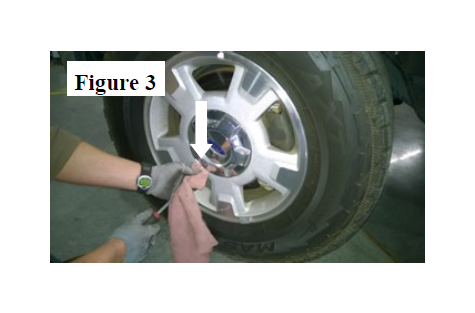
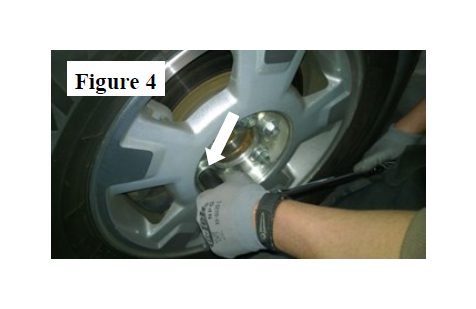
3. Remove lug nut to access wheel lugs, remove front wheel. (See Fig.
3 & 4)
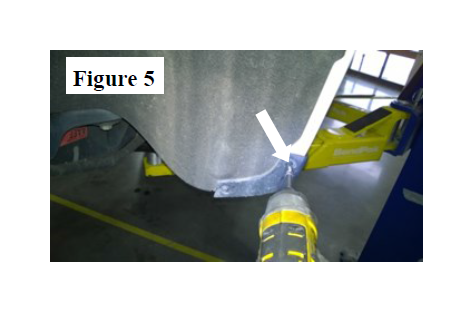
4. Remove inner fender lining, unbolt the trim piece and carefully remove
the plastic clips holding the inner fender in place. (See Fig. 5)
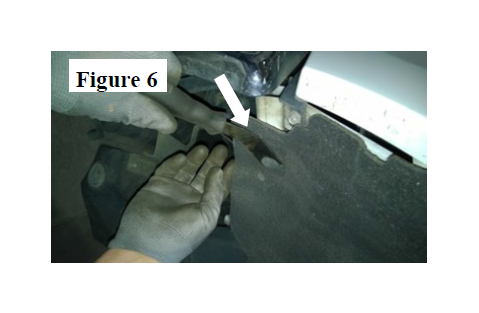
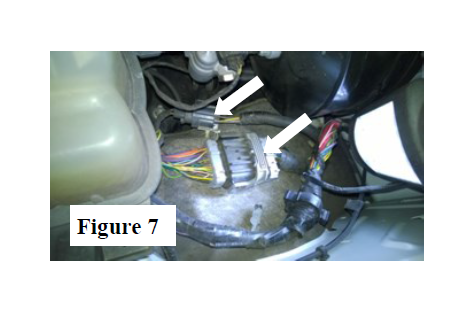
5. Detach the wire harness attached to the inner fender inside the engine
compartment. (See Fig. 6 & 7)
Original Turbo System Removal and Borla Performance Installation
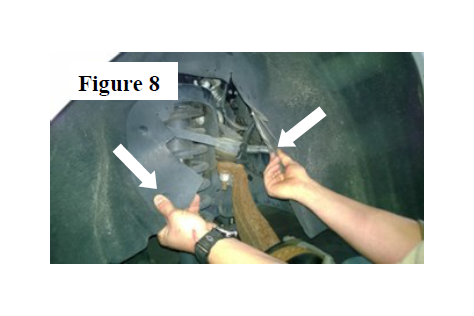
1. Carefully pull the lining lose, start at the rear, then the middle and
finally front outside corner to enable complete removal. (See Fig. 7
& 8)
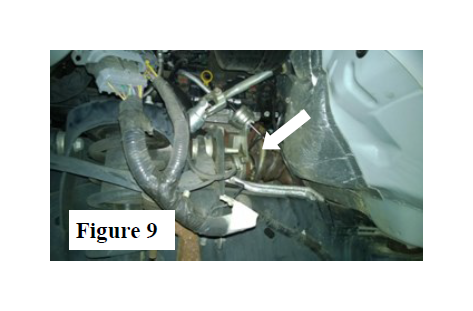
2. You will now have visual of the turbo and tool access. ( See Fig. 9)
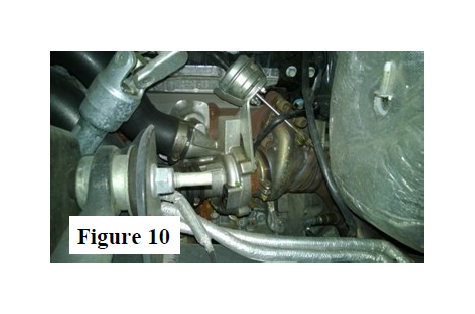
3. (See Fig. 10)
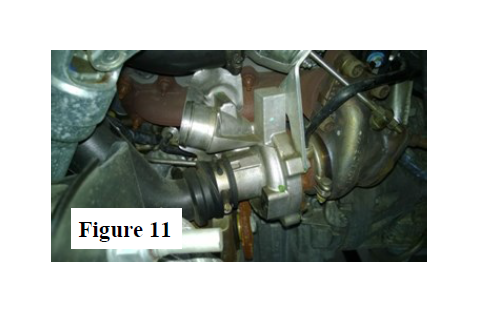
4. Remove exhaust system if you have purchases the complete Kit,
there is a separate Borla Instruction sheet for the exhaust system.
(See Fig. 11)
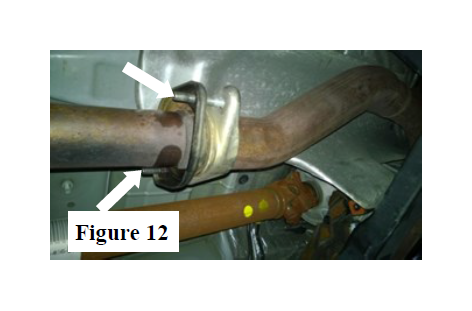
5. Lubricate hangers, bolts, nuts and robber isolator will make removal
easier. (See Fig. 12)
Original Turbo System Removal and Borla Performance Installation
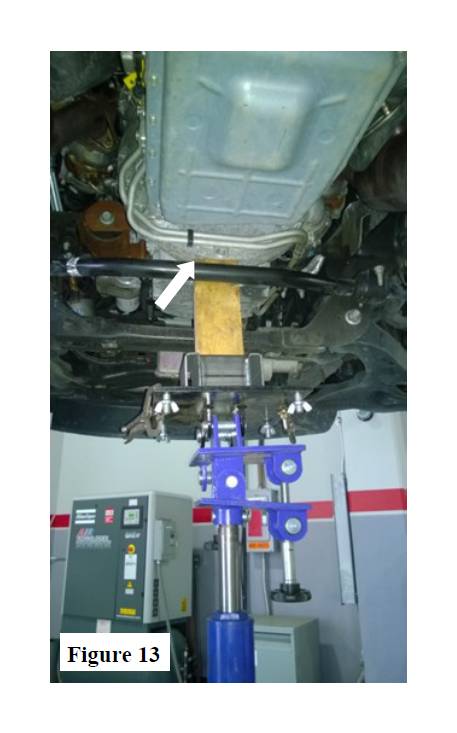
1. To remove the Y-pipe assembly, the rear transmission mount and cross member needs to be removed. This will require a transmission jack or similar to support the weight of the transmission. (See Fig. 13)
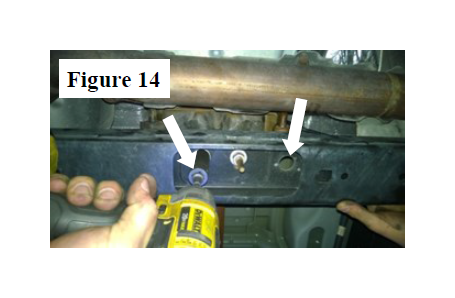
2. Unbolt rear transmission mount cross member. ( See Fig. 14)
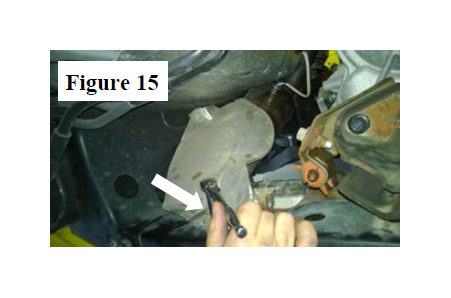
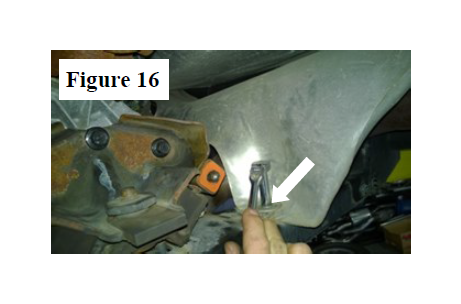
3. Remove heatshields. (See Fig. 15 & 16)
Original Turbo System Removal and Borla Performance Installation
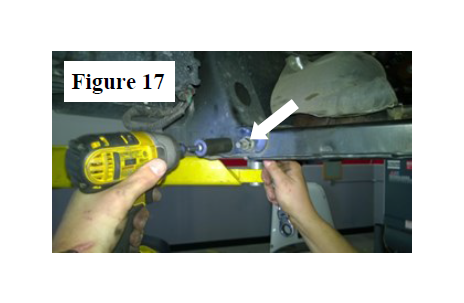
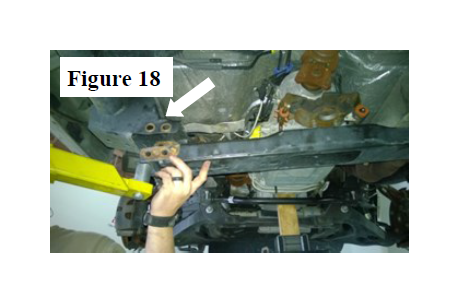
1. Remove cross member. (See Fig. 17 & 18)
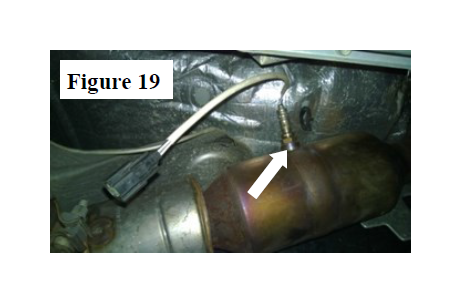
2. Remove 02 sensors. ( See Fig. 19)
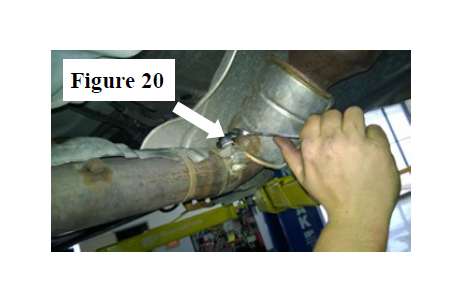
3. Unclamp to enable separation of the joint in the Y-pipe. (See Fig. 20)
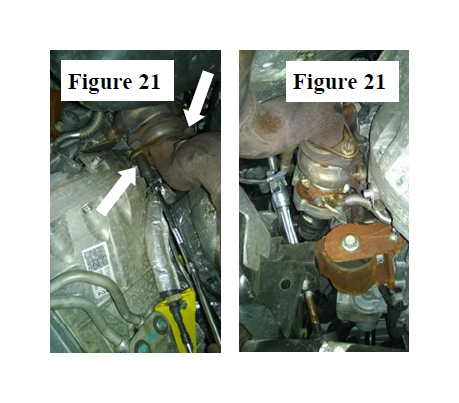
4. (See Fig. 21)
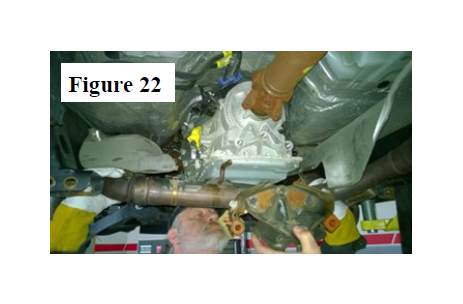
5. Unbolt rear trans mount. (See Fig. 22)
Original Turbo System Removal and Borla Performance Installation
1. Separate the joint in the Y-pipe. (See Fig. 23)

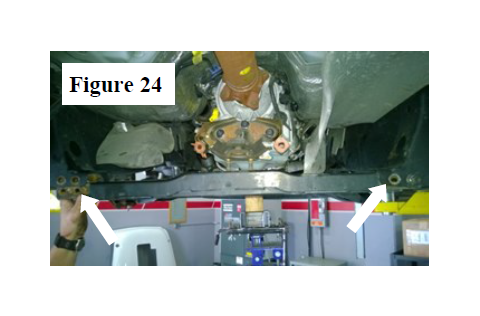
2. Reinstall cross member install rear trans mount to cross member first this is a safety precaution. ( See Fig. 24)
3. Remove starter. (See Fig. 25)

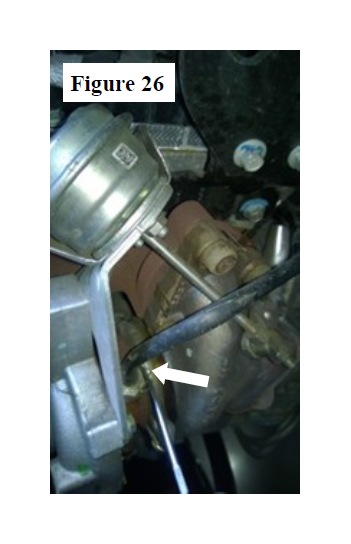
4. Remove oil drain /oil feed by unbolting the two bolts. (See Fig. 26)xxxxxxxxxxxxxxxxx
Original Turbo System Removal and Borla Performance Installation
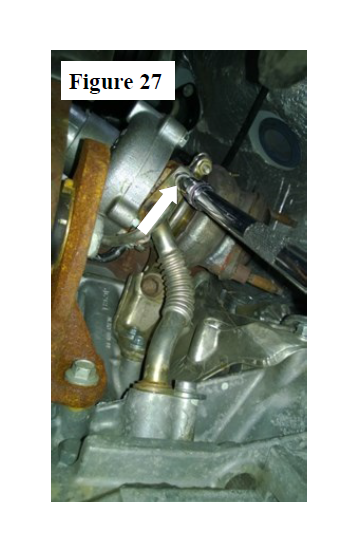
1. Remove waterline there are specialty tools jiffy-tite quick disconnect tool available from several sources. ( See Fig. 27)
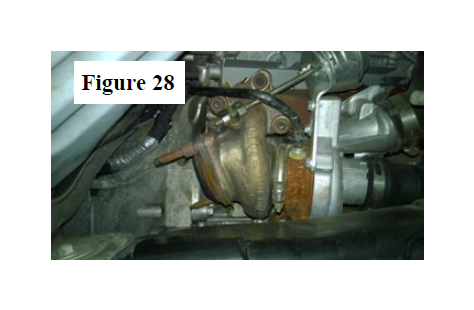
2. ( See Fig. 28)
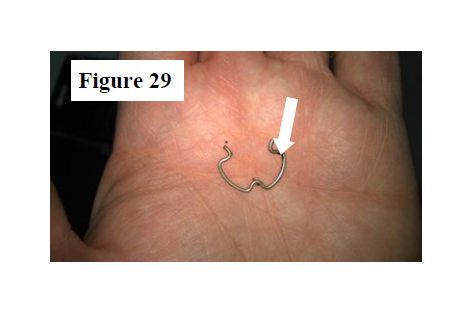
3. Small pick may be used for this purpose as well. (See Fig. 29)
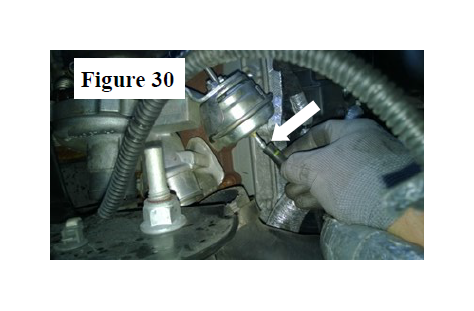
4. Disconnect rubber hose from wastegate actuator. (See Fig. 30)
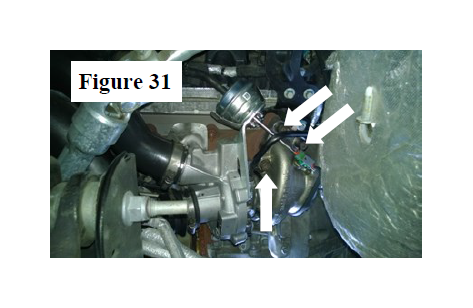
5. Unbolt 3 bolts holding turbocharger to manifold. (See Fig. 31)
6. Reinstallation of upgrade turbo is essentially the reversal of the re-moval process, however, it is helpful to attach the inside water line fitting to the turbo first, then the outside water line fitting, before the turbo mounting bolts are tightened. It my be easier to leave the lock-ing clip for the water limes in place, then pushing the water line down until it locks in.
7. The upgrade turbos will need the heatshields and the discharge from the old turbo, if you decide to use new flanges and bolts these can be obtained from your Ford dealer.
8. Use high-temp anti seize paste on the two downpipe studs (W716667-S900) before re-installation. Downpipe studs should be torqued to 30lb-ft when fastening the Downpipe flange to the turbo-charger.
Congratulations!!! You have completed the installation of the world famous Borla Performance Turbo Upgrade Kit System.