FREE 1 to 3-Day Delivery on Orders $149+ Details
How to Install Borla Stinger S-Type Cat-Back Exhaust - Split Rear Exit on your Ford F-150
Tools Required
- 3/8” Drive Ratchet,
- 3/8” Drive Extension 3”,
- 15mm Deep Well Socket,
- Pry Bar,
- Spray Lubricant

Shop Parts in this Guide
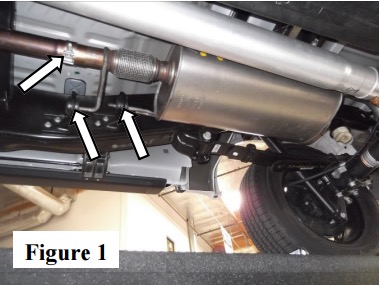
Step 1: Unbolt the clamp located in front of the muffler assembly and remove the hangers from rubber isolators. (See Fig. 1)
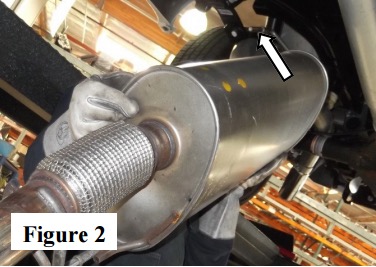
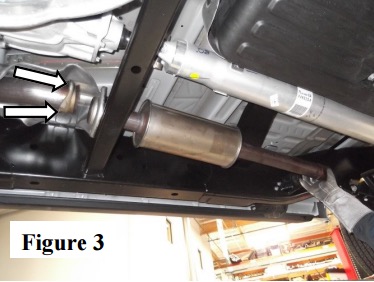
Step 2: Using a muffler stand or an additional person to support the exhaust system, loosen and slide the clamp behind the OE muffler. Remove the hangers from the rubber isolators and remove the exhaust system from the vehicle. (See Figs. 2 & 3)
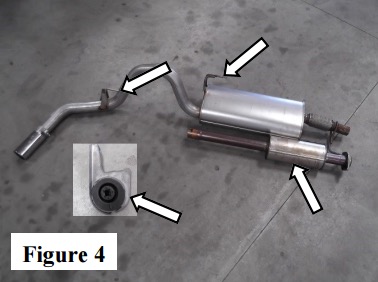
Step 3: Remove the original isolator bracket from vehicle and transfer to your new Borla system. (See Fig. 4)
Step 4: Remove spare tire from vehicle.
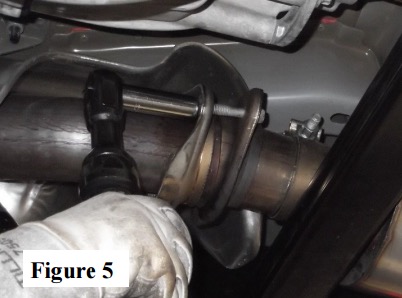
Step 5: Place Front Muffler Assembly using the original hardware. (See Fig. 5) Lightly tighten the bolts.
Step 6: Place a clamp over the expanded end of the Mid Pipe Assembly and insert the inlet to the Front Muffler Assembly. Do not tighten the clamp
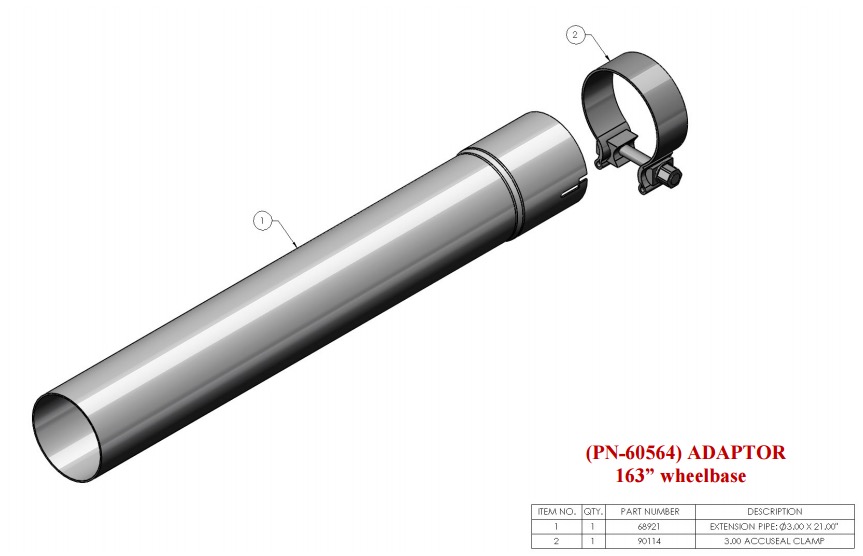
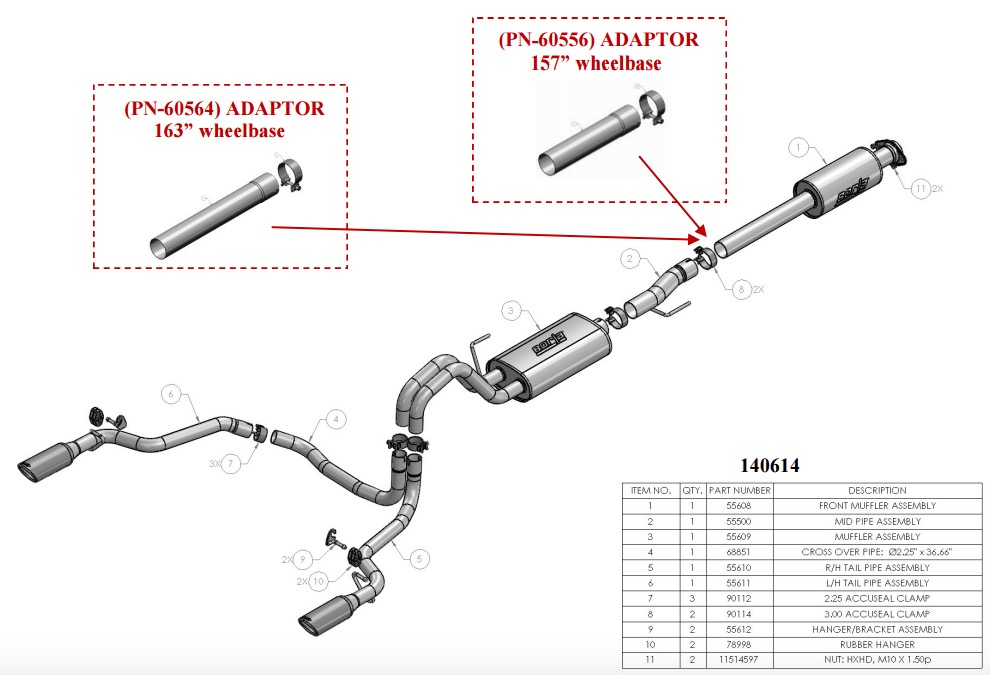
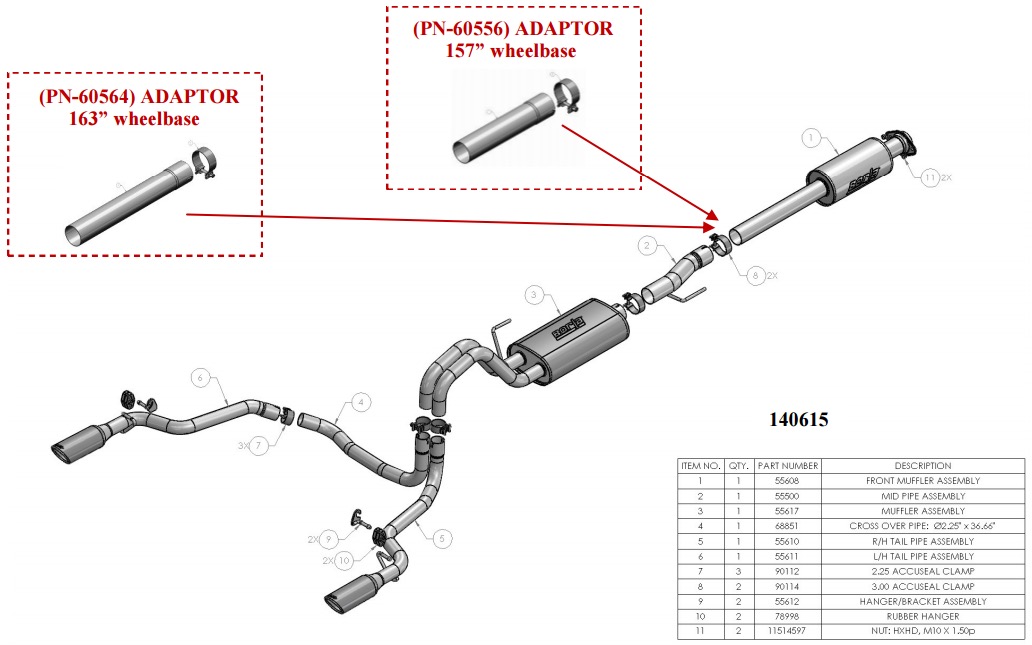
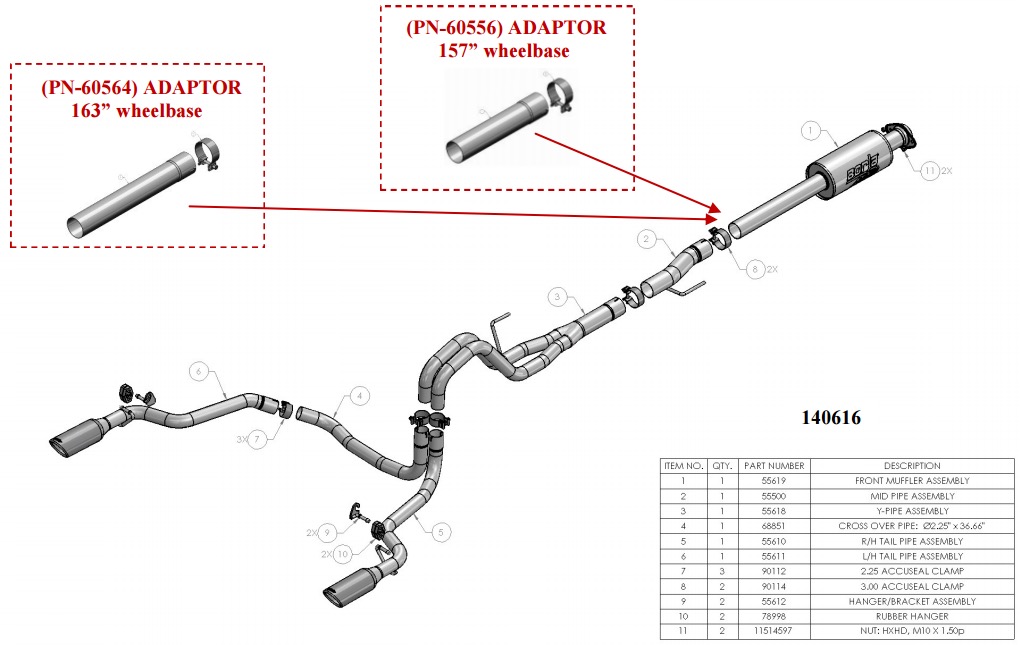
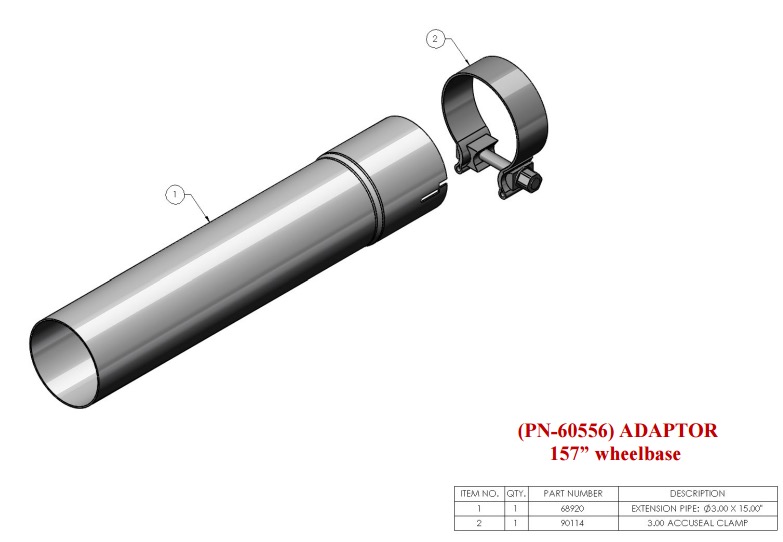
Step 7: Install Adaptor Pipes 60556 or 60564 (if required). Place a clamp over the expanded end of the Extension Pipe and insert into outlet of the Front Muffler Assembly. Do not tighten the clamp.
Step 8: Place a clamp over the expanded end of the Mid Pipe Assembly and insert the inlet into the outlet of the Front Muffler Assembly or Extension Pipe. Insert the hangar into the rubber isolator. Do not tighten the clamp.
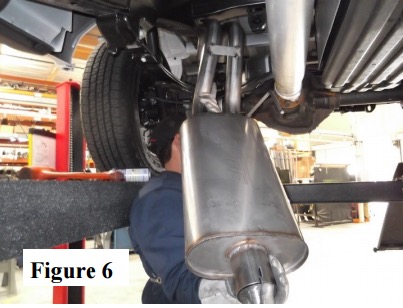
Step 9: Place a clamp over the expanded end of the Muffler Assembly and insert the inlet into the Mid Pipe Assembly. Insert the hangar into the rubber isolator. (See Fig. 6) Do not tighten the clamp.
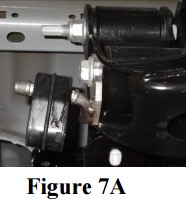
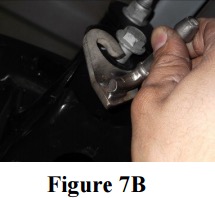
Step 10: Install Hanger Bracket Assembly to left-side and right-side frame rails. (See Figs. 7A & 7B)
Step 11: Place a clamp over the expanded end of the R/H Tail Pipe Assembly and insert inlet to the right-side outlet of the Muffler Assembly. Insert hangar into installed right-side-side Hangar Bracket Assembly. Do not tighten the clamp.
Step 12: Place a clamp over the expanded end of the Cross Over Pipe Assembly and insert inlet to left-side outlet of the Muffler Assembly. Place a clamp over the expanded end of the L/H Tail Pipe Assembly and insert inlet to the Cross Over Pipe Assembly. Insert hangar into installed left-side Hangar Bracket Assembly. Do not tighten the clamps
Step 13: Once position has been determined to be correct, tighten the Accuseal clamps to 32-35 ft. lbs.
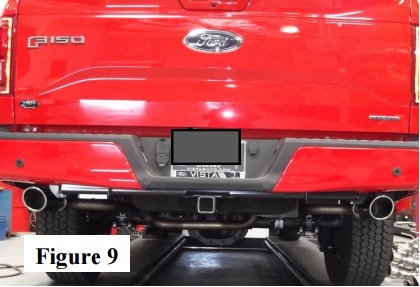
Step 14: Before starting your vehicle, make sure to check all wires, hoses, brake lines, body parts and tires for safe clearance from the exhaust system. (See Fig. 9)
Step 15: Start vehicle and check for any leaks. If any leaks are found, determine cause (such as loose or incorrectly positioned clamp) and repair as necessary.
Step 16: Reinstall spare tire to vehicle.