 FREE 1 to 3-Day Delivery on Orders $149+ Details
How to Install Black Horse Off Road Adjustable Roof Cross Bars - Silver (07-18 Sierra 1500) on your GMC Sierra

Shop Parts in this Guide
Before Installation
• Please read the instruction completely for easy installation, which will also help you to avoid scratches or other potential damages to your appealing car.
• The figures here are for reference only and may have differences with the actual product you received, however they share the same assembly way.
Care and Cleaning
• Mild soap may be used also to clean the Product.
• Please periodically check and retighten all the hardware and clean the investment for a refresh look.
INSTALLATION INSTRUCTIONS
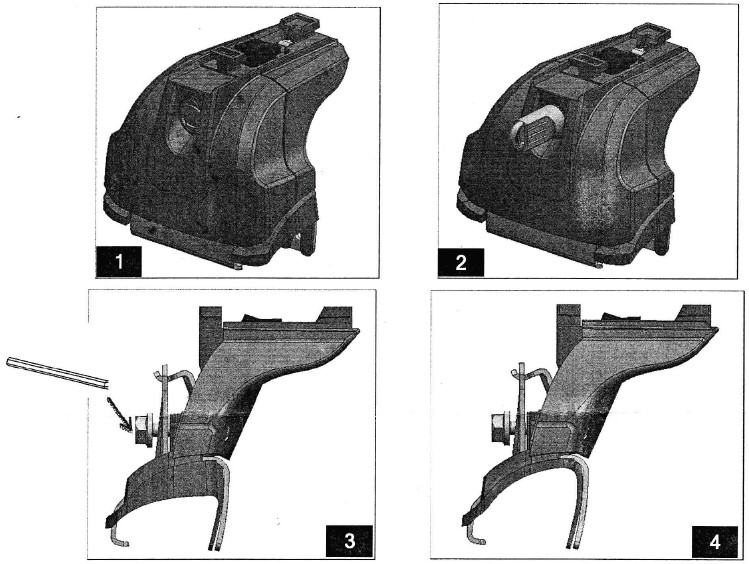
Step 1: Try to attach cross bar brackets and find if they could match your car, If it doesn't, it is necessary to replace plastic gasket to No:2
As bellow picture 2, use Key Cl to release the cover; use 07 alien wrench S=5 to remove the bolt for the replacement of gasket and restore the cover back after that.
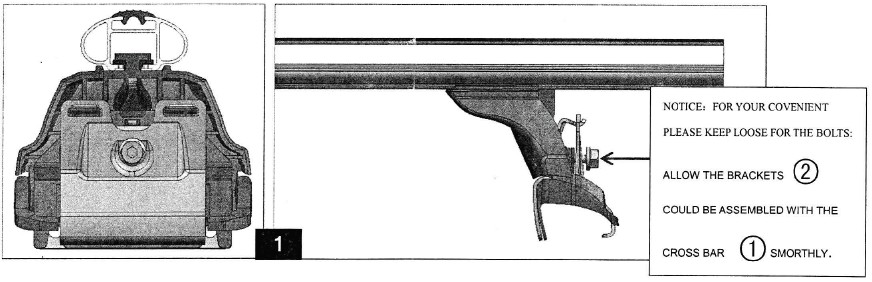
Step 2: As bellow picture, assemble brackets together with the cross bar

Step 3:
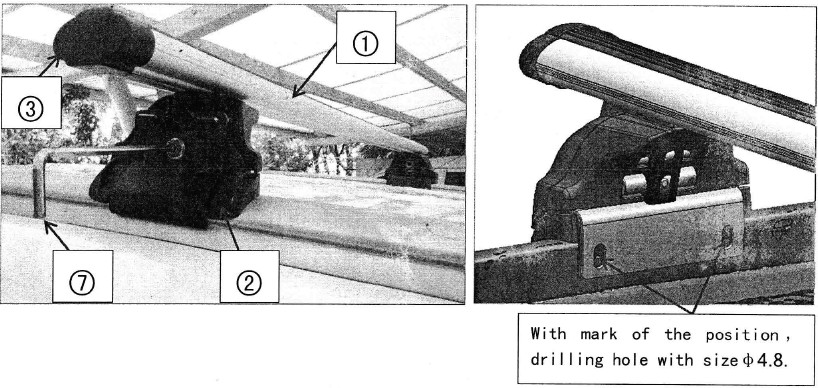
3-1, Adjust distance of two cross bar on the roof and place it to perfect position according to its size:
3-2, Using U alien wrench S=5 to fasten the bolts on the brackets for the cross bar fixing; find screwing hole from behind of the brackets and place a mark on it by using pen.
3-3. Release the bolts on the brackets and take off the cross bar; drilling hole with size (1)4.8 to 8 place on the roof which has been marked by pen.
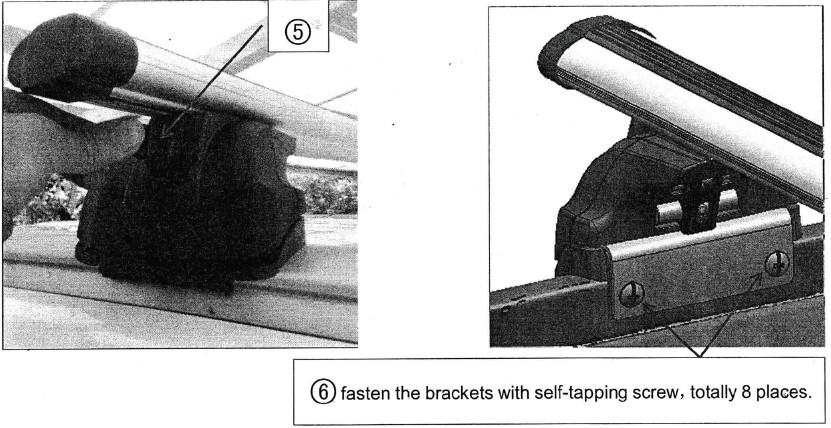
3-4. Place the cross bar on the roof and adjust it to correct position according to the hole that we drilled;
use U alien wrench S=5 to fasten those screws on the brackets and replace the plastic cover back with the key
3-5. Place plastic cover O3 to both end of the cross bar and fasten the cross bar by using 0 self-tapping screw ST6*16 as bellow picture shown.
3-6, Please keep good preservation to the key 0 and 0 alien wrench S=5.
3-7. Installation completed
NOTE
Any damages and losses caused by improper installation and application, goes beyond our quality warranty.


