FREE 1 to 3-Day Delivery on Orders $149+ Details
How to Install BBK Underdrive Pulleys on your Ford F-150
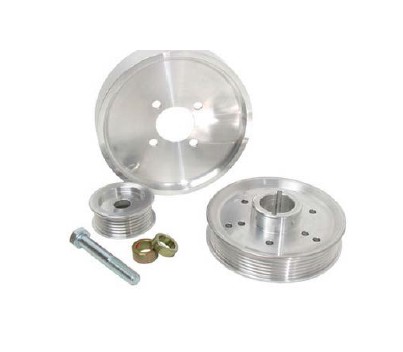
NOTE: 15550 fits 6 and 8-Rib applications. 6-rib applications will simply use the outer 6 ribs of the new pulleys.
IMPORTANT!!! See page 4 for Water Pump Identification!!!
STEP 1: Disconnect the negative battery terminal.
STEP 2: Loosen the alternator nut. (This will require an air impact gun) Do not remove!!! Loosen the (4) bolts for the water pump pulley. Do not remove!!!
Remove Serpentine Belt
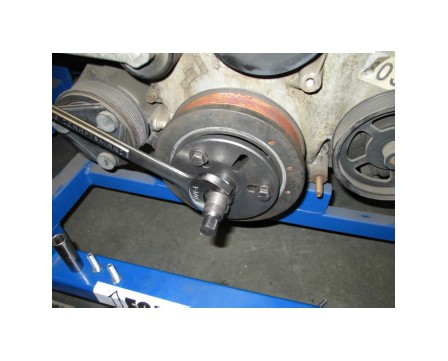
STEP 3: On truck models, the engine fan is threaded onto the water pump shaft end- it must be unthreaded in a normal counter clock-wise direction using a large wrench on the hex-nut portion of the fan clutch where it meets the water pump pulley. Additionally you will need a tool which attaches across 2 of the water pulley bolts and allows you to put resistance in the direction of the fan nut while breaking the nut free- otherwise the water pump will simply rotate while trying to remove.
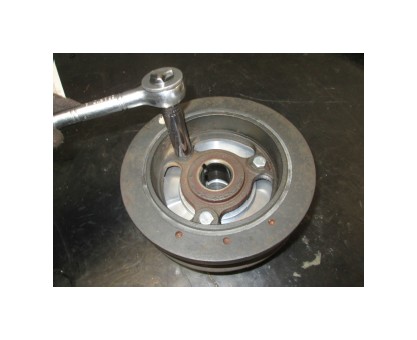
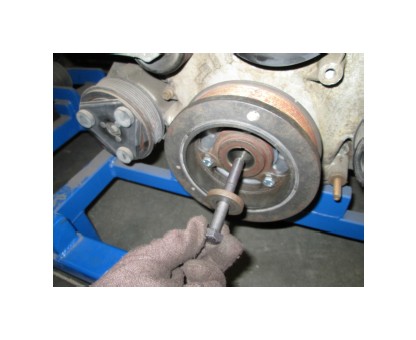
STEP 4: Remove the center bolt and washer from the factory pulley/dampener. Remove the alternator pulley and water pump pulley. Use a 3 prong harmonic dampener puller to remove the factory pulley/balancer. HINT: Hold the pulley with one hand when removing it. This will keep the pulley/dampener from falling to the ground when it clears the end of the crank shaft.
STEP 5: Install the hub of the factory harmonic balancer pulley into the counter bore of the BBK Pulley. Align the threaded hole in each pulley together. Install and hand tighten the (3) ¼ x 1-1/4” bolts. The factory pulley does not completely sit into the under-drive at this point. Carefully tighten the (3) bolts equally in small increments to draw the (2) pulleys together. Remove the (3) ¼” bolts.

STEP 6: Apply a hi-temp silicon sealer to the (2) pulley assembly keyway. Place the pulley assembly onto the crankshaft. (Align pulley keyway with crankshaft key).
STEP 7: Re-install the (3) ¼” hex bolts using locktite and tighten to 10-12 ft/lbs.
STEP 8: Attach the pulley assembly to the crankshaft using the new bolt provided and the original crank bolt washer. Use locktite or equivalent on the bolt and torque to 60 ft/lbs. Install the new water pump pulley using the original hardware. Also use locktite.
STEP 9: On truck models, reverse step 3 in order to re-attach the fan.
STEP 10: Install the alternator pulley with appropriate 1 of 2 supplied spacers to allow proper belt alignment and attach with original hardware.
STEP 11: Re-install the belt. Consult a shop manual for proper procedure. NOTE!!! Inspect the belt prior to re-installing. If evidence of wear exists, replace it with a new belt.
STEP 12: Tighten the alternator nut using an air impact gun. Tighten the water pump bolts evenly.
STEP 13: Re-connect the negative battery terminal and start the engine and check belt for proper alignment.
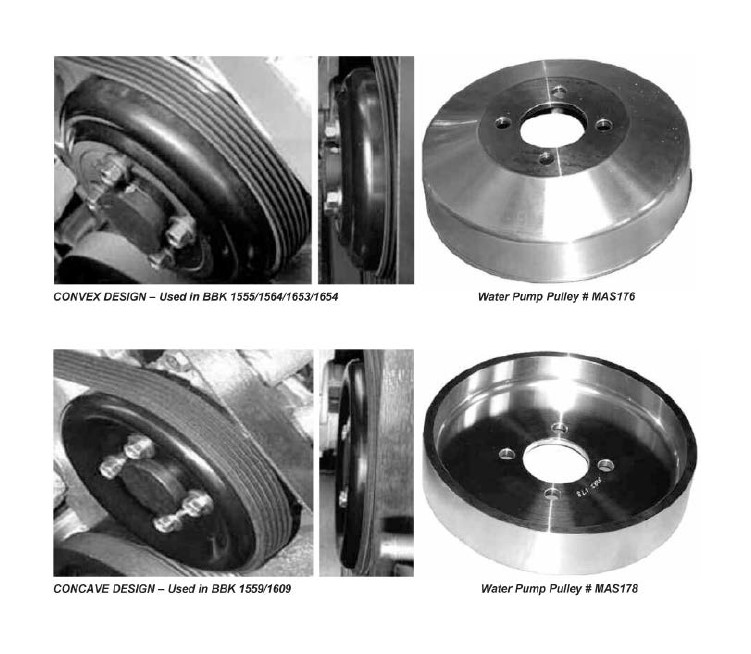
Identification Guide for 4.6L Water Pump Pulleys
Visually identify which water pump pulley you have before installing regardless of model year. The early water pump pulley had a convex or “bowed-out” face and the pulley on the later water pump has a concave or “pressed-in face”. There is no exact changeover date for the pump and pulley. Supposedly the water pump changeover occurred in January 2000, but we have seen cars with identical January build dates and different water pumps and pulleys. We have also seen the early design pulleys used on a few 2002 models.
Refer to the pictures below to determine which pulley design you have. Since there is no definitive answer as to the time line or model years.