FREE 1 to 3-Day Delivery on Orders $149+ Details
How to Install Barricade Xtreme Heavy Duty Brush Guard - Polished Stainless on your F-150
1. Remove contents from box, verify all parts listed are present and free from damage. Carefully read and understand all instructions before attempting installation. Note: anti seize must be used on all stainless steel fasteners to prevent from galling.
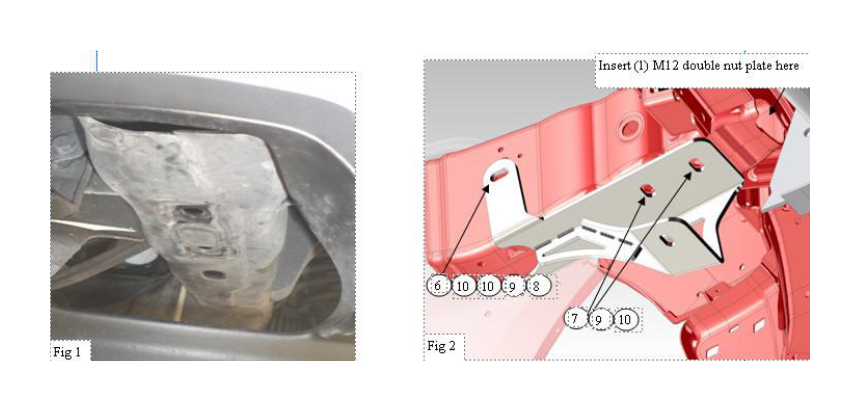
2. Starting from the front of the vehicle remove the factory hardware that mount the tow hook to the frame. Once the tow hooks are removed set them aside, they will be reinstalled on the vehicle (if your vehicle is not equipped with tow hooks skip this step) (Fig 1).
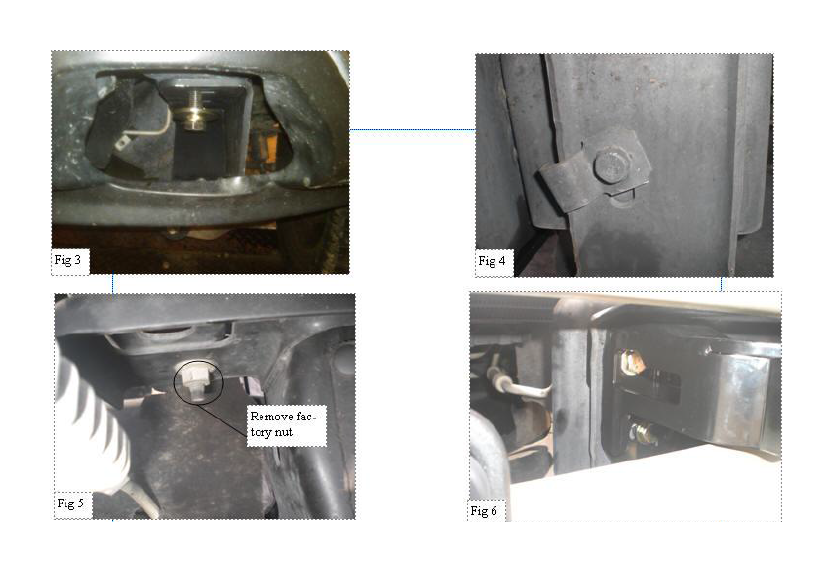
3. Remove the factory nut plate that is used to install the tow hooks and replace them with the (2) M12 nut plates that are in the hardware kit. Starting at the drivers side take the lower mounting brackets and align it with the nut plate and align the upper mounting point around the frame. Attach the bracket to the nut plates using (2) M12 hex head bolts, (2)
M12 lock washers, and (2) M12 x 37mm flat washers (Note : If vehicle is equipped with tow hooks and you would like to re use them place them over the lower mounting bracket then attach as stated previously) . Locate the factory hole on the outside and inside of the frame rail and insert (1) M12 x 130mm hex head bolt, and (1) M12 x 37mm flat washer through the frame attach to the other side using (1) M12 x 37mm flat washer, (1) M12 lock washer and (1) M12 hex nut. Do not fully tighten at this time. Repeat this step for the passenger side (Fig 2 and 3)
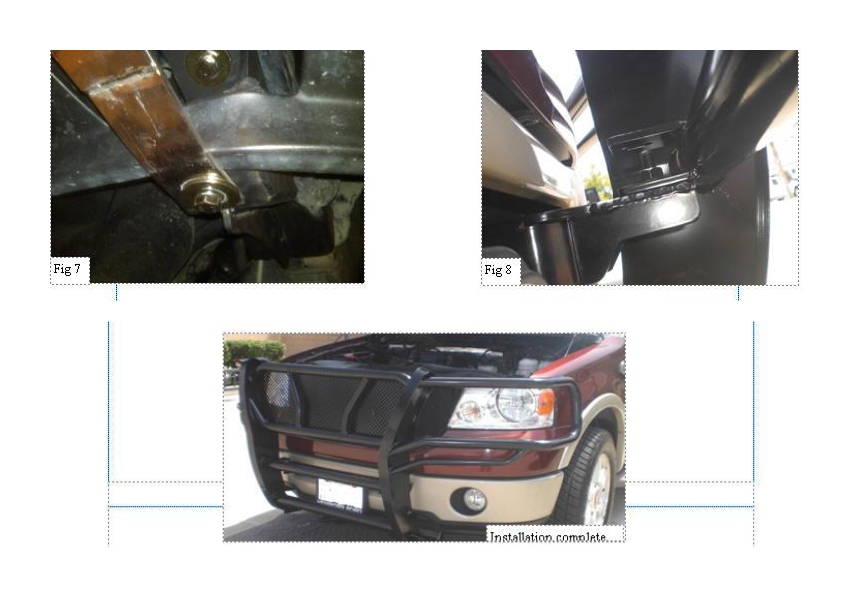
4. Next move to the upper opening in the bumper and remove the factory hardware shown in (Fig 4 and 5) Note: when the nut is removed there is a metal locking washer on the bolt, the bolt must be pried free to be removed. Once removed align the drivers side upper mounting bracket to the existing holes in the frame. Before attaching the upper mounting brackets to the frame for the upper mounting hole a support plate must be placed behind the frame before being attached (fig 5) ( for 04– 05 model years the bracket will attach to the frame with the upper mounting hole and middle mounting holes in the bracket, for 06-08 model years the bracket will attach to the frame using the upper and bottom mounting holes in the bracket). Attach the upper mounting bracket to the frame using (2) M12 hex head bolts (2) M12 x 24 mm flat washers, (2) M12 x 37mm flat washers, (2) M12 lock washers, and (2) M12 hex nuts. Repeat this step for the passenger side. Do not fully tighten at this time. (Fig 6)
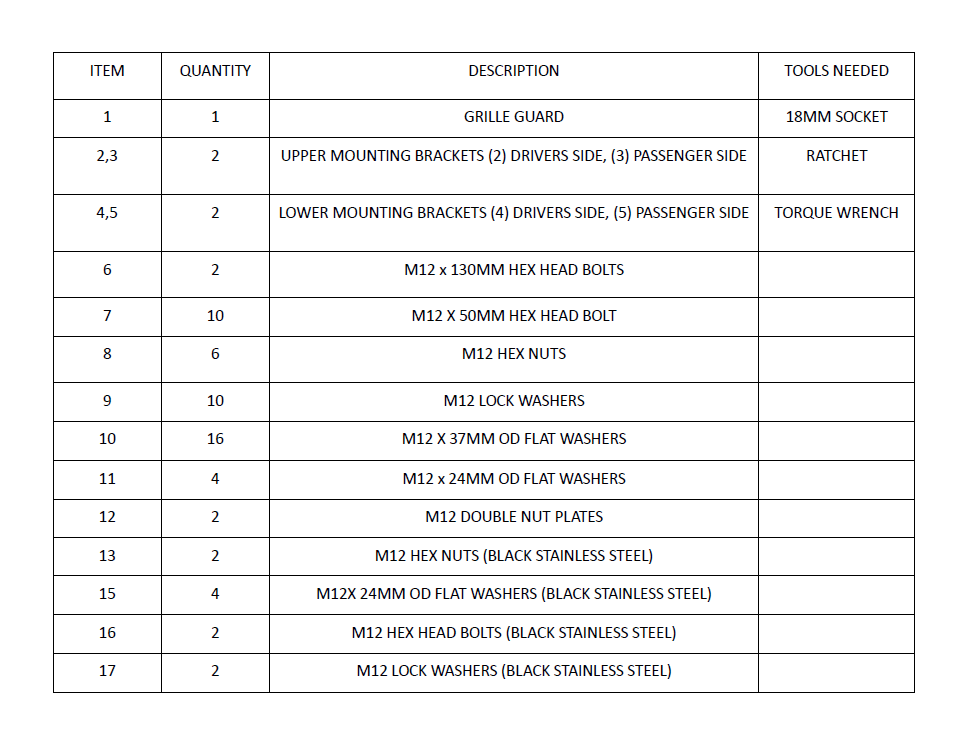
5. With assistance take the grille guard and align it with the mounting brackets. Attach the grille guard to the lower mounting brackets using (2) M12 hex head bolts, (4) M12 flat washers, (2) M12 lock washers, and (2) M12 hex nuts . Do not fully tighten at this time. Next attach the grille guard to the upper mounting brackets using (2) M12 hex head bolts (stainless), (4) M12 x 24mm flat washers (stainless), (2) M12 lock washers (stainless), and (2) M12 hex nuts (stainless) (Fig 7 and 8)
6. Align and adjust grill guard as needed then tighten all hardware at this time. Torque all M12 hardware to 55 ft lbs
CARE INSTRUCTIONS
• REGULAR WAXING IS RECOMMENDED. DO NOT USE ANY TYPE OF POLISH OR WAX THAT MAY CONTAIN ABRASIVES
• STAINLESS STEEL PRODUCTS CAN BE CLEANED WITH MILD SOAP AND WATER. STAINLESS STEEL POLISH SHOULD BE USED TO POLISH SMALL SCRATCHES.
• GLOSS BLACK FINSHES SHOULD BE CLEANED WITH MILD SOAP AND WATER