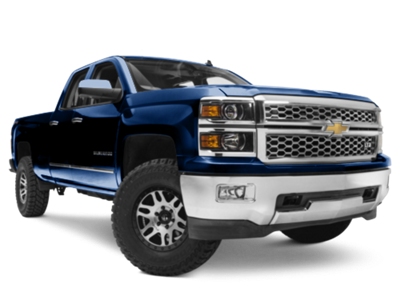
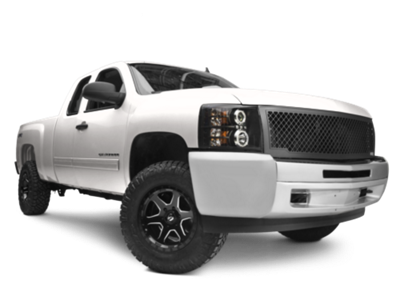
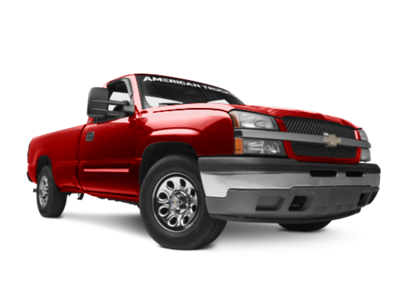
Talk to a Silverado 1500 Sales Tech
1-888-706-1096
M-F 8:30A-11P, Sat-Sun 8:30A-9P
$20K Sweeps! 10 Chances to Win! Enter Daily >

Barricade XD Running Boards (07-13 Silverado 1500 Extended Cab)

Item S116886
Verify parts fit and get product recommendations.
Silverado 1500 Sales Techs: Connect Now M-F 8:30A-11P, Sat-Sun 8:30A-9P
$0.00
On Sale

$399.99 (pair)

FREE Shipping Market Price $520.99 You Save 23% ($121.00) Up to 10% off for Military & First Responders! See Details

Will this fit your Vehicle?

Select a different vehicle Help?
Update or Change Vehicle
Ship to: Ashburn - 20149
Sorry, please enter a valid US or CA postal code
We're sorry, zip can't be updated at this time.
Recommended Install Shops
How It Works
Install Shops are available near Ashburn - 20149

Add Local Shop Installation

Total cost of service $175.00
    Create a list
    Add to New List

    Saved - View your saved items

    We're sorry. We couldn't save this product at this time.

    or use

      Product Videos

      Hey guys, it's Sara with americantrucks.com. And today, we have a review and install of the Barricade XD Running Boards, fitting your '07 to '13 Silverado 1500 extended cab models. This is perfect for the truck owner looking to add the convenience of a step to their truck and wants one with an aggressive design and black finish. These running board-style steps feature a one-piece design that extends the length of your cab and is 7 inches wide for ease of entry, especially if your truck is lifted or leveled, and adds a bit of side and rocker panel protection as a bonus. These running boards feature a lightweight aluminum construction with a nice, black powder coat finish and expanded metal tread for increased traction.So as far as price goes, these come in at around $550 for the pair, putting them about middle of the road price-wise when compared to other options. And for your money, you're getting a wide running board-style step with an aggressive design and black finish. And as far as the install goes, I'm giving this one a one out of three wrenches on the difficulty meter. They do feature a direct bolt-up install with no modification required and can be done within two hours. So with that said, let's check out that install.For this install, we use an impact gun, but a regular hand ratchet will work just fine. You'll also need a 13-millimeter socket. You may want a 13-millimeter ratcheting wrench and a flat-head screwdriver. All right. So the first step in our install is to grab your brackets and then we'll head underneath the truck and get them bolted up. Now we're starting with the rearmost mounting point. You'll see two holes all the way towards the back of the cab. One is in the body and one is in the pinch weld down here. There should be a rubber plug right next to it. And the first thing we're gonna do is grab a flat-head or a similar tool, and just remove this rubber plug out of the body.Once you've done that, you'll see a clip nut in the kit. Now what we're doing here is lining up the clip nut through the opening and popping it in place. You want the threaded section to be right over that smaller hole. Grab a second clip nut, and slide it over top of that pinch weld. Now we can go ahead and grab one of our brackets. Now, these are all the same aside from the passenger front, that one will be a little bit different. So go ahead and grab that bracket, hold it up to make sure everything is lining up properly, then we'll go ahead and thread in our hardware. We're using one of the hex bolts with a washer, as well as a lock washer. Now from this angle, it might be a little bit difficult to see them thread in. We're just gonna go ahead and thread them into those clip nuts. Same with the bottom washer, as well as a lock washer over that hex bolt. And we're threading it through that pinch weld, through the bracket, and into the clip nut.Now grab a 13-millimeter socket and what we're gonna do is tighten down the bracket to your pinch weld area. This one doesn't have a ton of room so you may need to use hand tools down here. But then once that is tight, you can go ahead and grab that 13 and tighten down the top one as well. Now we're moving on to our middle mounting point. You'll see another rubber plug there next to two holes, one in the body and one in the pinch weld. First things first, if you do have that rubber plug there, just go ahead and under it with a flat-head and remove that plug.Next up, we have our clip nut. We're gonna go in that larger opening and sort of push it over top of the smaller opening. It might fall down like this, but you'll just, you know, line it up a little bit better when the bracket goes on. That's totally okay. And then right over the bottom pinch weld area, just make sure that threaded opening lines up with the opening and the pinch weld. Now we have our bracket here. Now, this bracket is slotted. So what you can do is you can start to thread this bolt in if you're having trouble lining it up, and then come over top, and line the bracket up. Or if that's proving to be a little bit too difficult, you can line them both up at the same time. Grab the hardware, again, it's the same as we did before. One of the hex bolts with a washer, as well as a lock washer.Go ahead and get that threaded into your clip nut. Then once you have both of those threaded in, we're gonna start with tightening down the bolt on the pinch weld. Grab that 13-millimeter socket, tighten that down. Then we do have a little bit more room up top here so we're gonna use our gun and tighten down the top on as well. And finally, we're all the way at the frontmost mounting point. Again, you can check out that hole in the pinch weld and also another hole in the body that's how you'll know you're in the right spot. Remove the plug, grab your clip nut, through the larger section, and line it up with the smaller hole. And then same thing, line it up with the hole on the pinch weld. Grab the bracket, line it up, thread in your hardware. And with that 13-millimeter socket, tighten it down.Now, again, you might need to go with hand tools for the bottom, but you should be able to fit a power tool up top. Go ahead and tighten that down as well. Now you can grab your step and get it lined up on top of those brackets. Just take a look front to back, make sure you like the alignment of the step. There is a ton of adjustability if you do need to make any changes later, but next, we're gonna go ahead underneath and get it bolted up. Now we're underneath the step, we're gonna grab these bolt plates, one per mounting point, and get them lined up in the step. Now you'll see the rounded edge here, that's what we're gonna use to lock in place. So go ahead and put it up at an angle, and then with the rounded edge, you should be able to tilt it in place. Now you'll see these two studs. Go ahead and line those up with the openings in the step. Then grab your hardware. We're using a washer, lock washer, and a nut. Get this threaded on over top of that stud. Repeat that for your other mounting pointAnd once you're sure the step is in the location you want it, you can go ahead and tighten it down. We're gonna grab a 13-millimeter socket and tighten that down. And you may need a ratcheting wrench for this one because the bracket is in the way a little bit. We'll tighten this one down as well. And now you can repeat that process with the rest of your brackets. Getting it up in the step, lining it up with the brackets we already installed, and installing that hardware. Again, we're using a washer, lock washer, and a nut.And once they're both installed and you like the positioning of your step, grab that 13-millimeter socket, and tighten it down. And repeat that for your final mounting point. Then with that 13-millimeter socket, tighten it down.All right. Now that you have the driver-side running board installed, repeat all of those steps to install your passenger side. Then that is gonna do it for the review and install of these running boards. And remember, for all things Silverado, keep it right here at americantrucks.com.

      Product Information

      Features, Description, Reviews, Q&A, Specs & Installation

      Features & Specs

      • Stable Step for Easy Entry and Exit
      • Slip-Resistant, Expanded Metal Tread for Increased Traction
      • Durable Steel Construction
      • Black Powder Coated Finish
      • Includes All Mounting Hardware
      • Direct Bolt-On Installation
      • Sold as a Pair, Driver and Passenger Side Included
      • Fits 2007-2013 Chevrolet Silverado 1500 Extended Cab Models

      Description

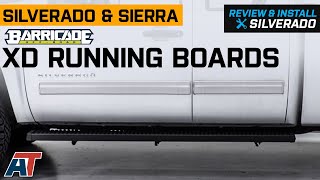
      Function and Rugged Styling. Now you can give your 2007-2013 Chevrolet Silverado 1500 Extended Cab a rugged appearance, while also providing a stable, high-traction, non-slip step for easy entry in and out of your truck, with a set of Barricade XD Running Boards. As an added bonus, these Running Boards will also help to shield your vehicle's body and paint from stones and road debris that can get kicked up while driving.

      Rugged Steel Construction. These Barricade XD Running Boards are manufactured from heavy duty steel for superior strength and feature a serrated tread pattern on the top step plate for maximum traction . These Running Boards are then completed in a black powder coated finish for aggressive good looks and long lasting corrosion resistance.

      Bolt-on Installation. These Barricade XD Running Boards are designed to be a direct bolt-on upgrade using basic hand tools, so there is no drilling or cutting required for a clean straight forward install. All of the necessary hardware is included for installation, making this an easy job for anyone to complete in under two hours.

      Application. These Barricade XD Running Boards are designed to fit 2007-2013 Chevrolet Silverado 1500 Extended Cab models. Driver and passenger side included.

      Fitment:

      Details

      Barricade S116885

      CA Residents: WARNING: Cancer and Reproductive Harm - www.P65Warnings.ca.gov

      Installation & What's in the Box

      Installation Info

      What's in the Box

      • (1) Driver Side Running Board
      • (1) Passenger Side Running Board
      • Installation Hardware
      4.9

      Customer Reviews (20)

        Questions & Answers

        10 More Questions

        Will It Fit My Silverado 1500

        • 4.3L V6 - 07, 08, 09, 10, 11, 12, 13
        • 4.8L V8 - 07, 08, 09, 10, 11, 12, 13
        • 5.3L V8 - 07, 08, 09, 10, 11, 12, 13
        • 6.0L V8 - 07, 08, 09
        • 6.2L V8 - 10, 11, 12, 13