FREE 1 to 3-Day Delivery on Orders $149+ Details
How to Install KC HiLiTES 4 in. LZR Series LED Round Light - Spot Beam - Pair (97-18 All) on your Ford F-150

Shop Parts in this Guide
- KC HiLiTES 6-Inch Black Gravity Daylight LED Round Light; Driving Beam (Universal; Some Adaptation May Be Required)
- KC HiLiTES 6-Inch Black Gravity Daylight LED Round Lights; Driving Beam (Universal; Some Adaptation May Be Required)
- KC HiLiTES 6-Inch Black Gravity Daylight LED Round Light; Spot Beam (Universal; Some Adaptation May Be Required)
- KC HiLiTES 6-Inch Black Gravity Daylight LED Round Lights; Spot Beam (Universal; Some Adaptation May Be Required)
Thanks for choosing a KC HiLiTES product. We take pride in building the highest quality, best engineered systems possible. Your satisfaction with our product is important, so if you have any questions, please call our customer service line at 800-528-0950. For warranty information, visit our website at www.kchilites.com.
Parts Included
1 - Wiring Harness
3 - Sheet Metal Screws
1 - Switch & Panel
6 - Wire Ties
MOUNTING YOUR LIGHTS
1. Choose a location on your vehicle to mount your light(s). Mark the location for mounting and drill the appropriate size hole for each light. Install the light(s) and loosely tighten. (you will secure them later when aiming)
WIRING YOUR LIGHTS
1. Remove the fuse from the harness. Find a suitable location inside the passenger compartment for your switch. Mark and drill two 1/8” holes, insert screws and loosely install the panel to ensure fit. Remove panel, install switch, and slide panel with switch back in place. (Do not tighten. The panel and switch will be removed when attaching wires.)
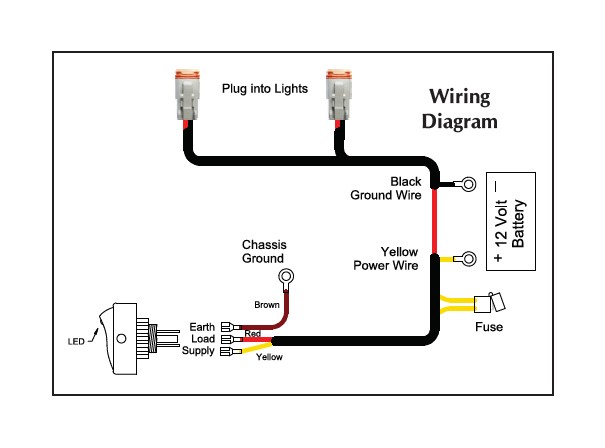
2. Connect the light wire(s) to the light(s) and route the harness back toward the battery or other 12V power source. Attach the YELLOW wire to the positive side of the battery or power source. Attach the BLACK wire to the negative side of the battery or chassis ground.
3. Continue routing the YELLOW and RED wires of the harness into the vehicle toward the switch. Once the wires are inside the vehicle near the switch, remove the panel with switch and attach the RED wire to the switch terminal marked LOAD. Attach the YELLOW wire to the switch terminal marked SUPPLY. Attach one end of the BROWN wire to the switch terminal marked EARTH and the other end to a good grounded metal surface under the dash. (use supplied screw and washer if needed) Re-attach the panel with switch and tighten the screws.
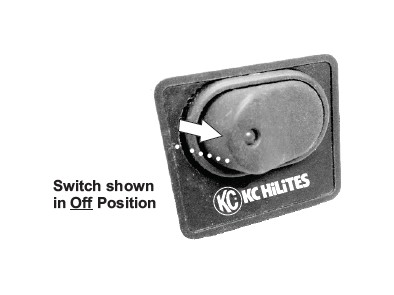
4. Before replacing the fuse, ensure the switch is in the off position (see below). Replace the fuse and turn on your lights.
AIMING YOUR LIGHTS
Fog Lights - The vertical aiming of fog lights is very important. Because of the low mounting position relative to the ground (12 to 30 inches), they should be aimed parallel to the ground or lower. Fog lights should be aimed so the cutoff is on or below your horizontal low beam for best results. The side to side adjustments are up to you. A large center overlap will increase center light and decrease overall width. A slight center overlap will increase your side lighting and give even coverage overall.
Driving Lights - Driving lights are used to supplement your high beams. They should only be used in conjunction with high beam headlights. The horizontal centers of the beams may be aimed at the same level as your high beam. The width is up to you as you may prefer to light the sides of the road at a distance rather than concentrating the majority of the light down the middle.
Off Road Lights - Since lights such as these are not legal on any public road or highway, aiming your off road or competition lights is entirely up to you. Most prefer the beam as far down the road as possible, others adjust them slightly off to the sides.
After aiming the lights to your preference, tighten all hardware.
YOU’RE DONE