FREE 1 to 3-Day Delivery on Orders $149+ Details
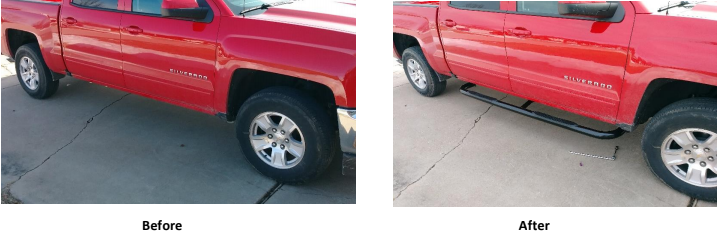
How to Install Barricade 3 in. Body Mount Side Step Bars - Black (14-18 Silverado 1500) on your Chevy Silverado
Installation Time
2 hours
Tools Required
- 1⁄2 inch Socket
- 3⁄4 inch Socket
- 21 mm Socket
- Ratchet for all sockets
- Breaker Bar for 21 mm Socket

Shop Parts in this Guide
Note: This installation was completed on a 2018 Silverado 1500 LT Crew Cab. The steps may vary slightly if you own a different model.
Installation Instructions:
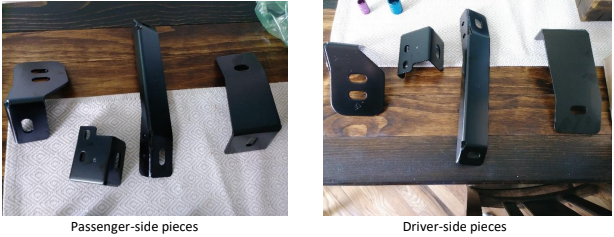
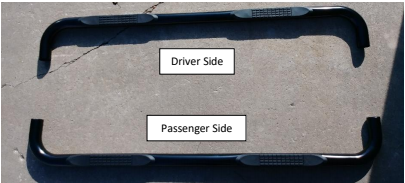
1. Separate out the passenger side brackets from the driver side ones. Each piece is marked with a D (driver) or P (passenger) as well as an F (front), M (middle) or R (rear).
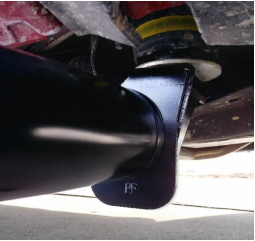
2. Using the 21mm socket and breaker bar, remove the body mount bolt and washer at the front of the passenger side, located below the front of the front passenger door. Thread the bolt through the bracket marked “PF,” replace the washer, and reinstall the bolt snug but not fully tightened.
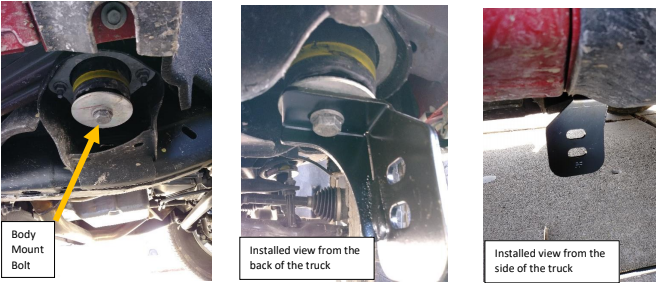
3.
a. Using the 21mm socket and breaker bar, remove the body mount bolt and washer at the middle of the passenger side, located below the joint of the two passenger doors. Thread the bolt through the mounting bracket marked “PM,” replace the washer, and reinstall the bolt snug and fully tightened to factory specifications.
b. Attach the passenger support bracket marked “PM” to the mounting bracket installed in 3a using two 8-1.25mm x 25mm hex bolts, 8mm split washers, and 8mm flat washers included with the packaging. Use the 1⁄2 inch ratchet to tighten the bolt snug but not fully tightened.
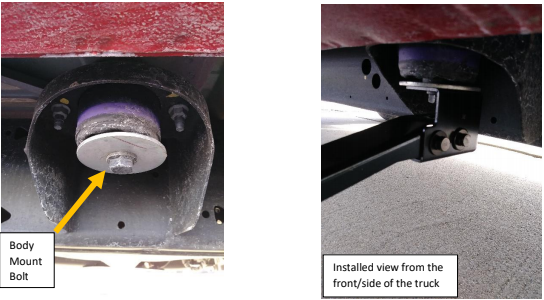
4. Using the 21mm socket and breaker bar, remove the body mount bolt and washer at the back of the passenger side, located below the back of the rear passenger door. Thread the bolt through the bracket marked “PR,” replace the washer, and reinstall the bolt snug but not fully tightened.

5. Separate out the passenger side rail from the driver side rail. The front side of each rail has more space between the bend and the step than the rear.
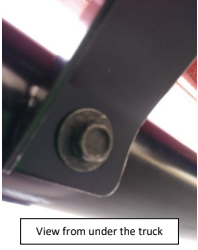
6. Using a 1⁄2” x 2” hex bolt, 1⁄2” split washer, and 1⁄2” flat washer, attach the back of the passenger side rail to the rear bracket. Put the bolt through the back of the bracket and thread it through the receiver. Use the 3⁄4 inch ratchet to tighten the bolt snug but not fully tightened.
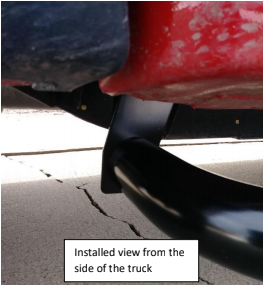
7. Using a 1⁄2” x 2” hex bolt, 1⁄2” split washer, and 1⁄2” flat washer, attach the front of the passenger side rail to the front bracket. Determine whether to use the top or bottom hole on the bracket using the included documentation. Put the bolt through the back of the bracket and thread it through the receiver. Use the 3⁄4 inch ratchet to tighten the bolt snug but not fully tightened.
8. Use a 8-1.25mm x 25mm hex bolt, 8mm split washer, and a 8mm flat washer, attach the middle support bracket to the side rail. If the hole in the bracket doesn’t match up with the threads in the bar adjust the rest of the bar and brackets until the bolt can easily thread in. Fully tighten the bolt down with the 1⁄2 inch socket.
9. Finish the passenger side by fully tightening all bolts. Body mount bolts should be retightened to the manufacturer’s specifications.
10. Repeat steps 2-9 for the driver side rail.
Installation Instructions Written by AmericanTrucks Customer Tyler Roe 01/27/2018