FREE 1 to 3-Day Delivery on Orders $149+ Details
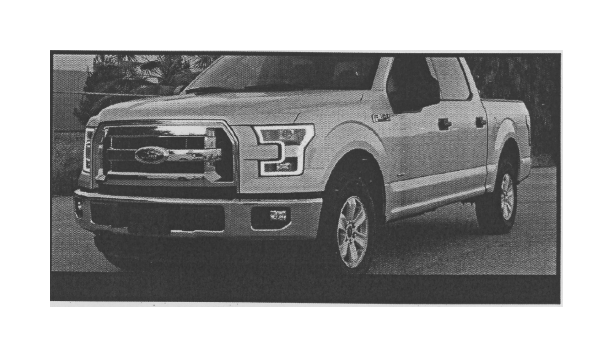
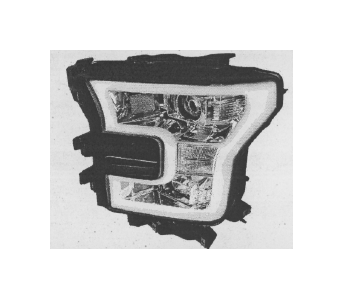
How to Install Axial Chrome Projector Headlights w/ LED DRL on your F-150
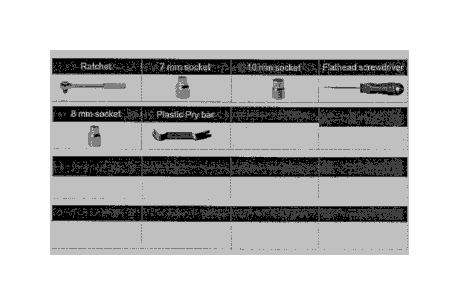
Tools Required
- Ratchet
- 7 mm socket
- 10 mm socket
- Flathead screwdriver
- 8 mm socket
- Plastic Pry bar

Shop Parts in this Guide
BEFORE INSTALLATION
• If you experience any difficulties that the instruction did not cover, please seek assistance at local automotive shop.
• Please wear protection before you work on any vehicle.
• An assistant is useful when removing the front bumper from your vehicle.
• Please be cautions when working with the bumper or any parts belonging to the vehicles's body to prevent scratching.
• Do not make direct contact with the halogen bulbs or the wire assembly until the unit has cooled down after use.
LET'S START THE INSTALLATIONS
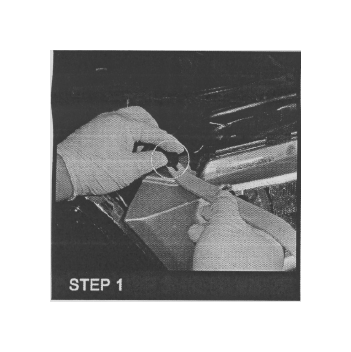
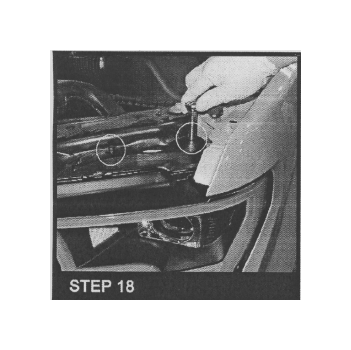
Remove the headlight trim fastener
Remove (2) 7mm headlight trim bolts
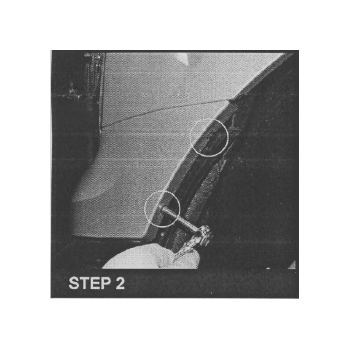
Remove the headlight trim
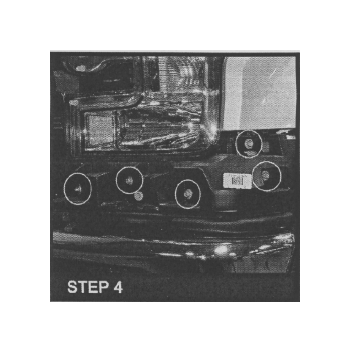
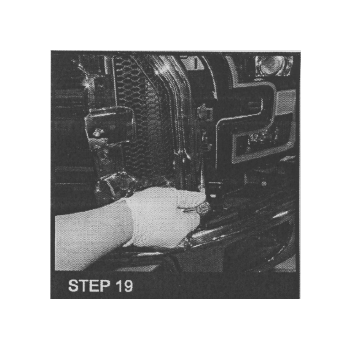
Remove (1)8mm bolt and (5)10mm
headlight bracket bolts
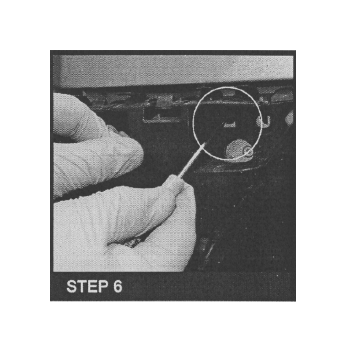
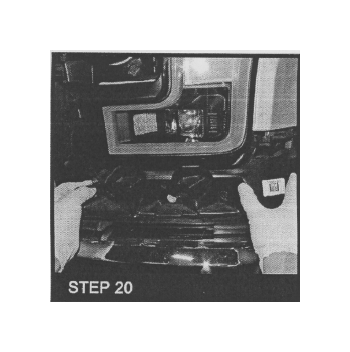
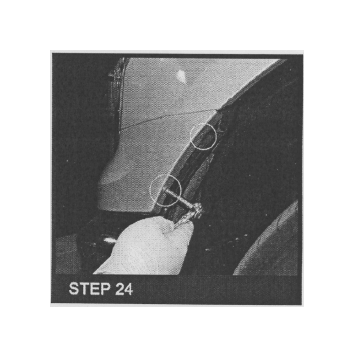
Remove the headlight bracket fastener in the wheel well
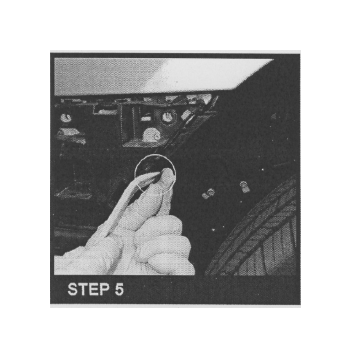
Press down retaining clip with flathead screwdriver to loosen bracket
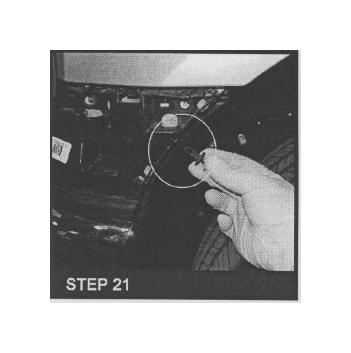
Gently pry and loosen headlight bracket
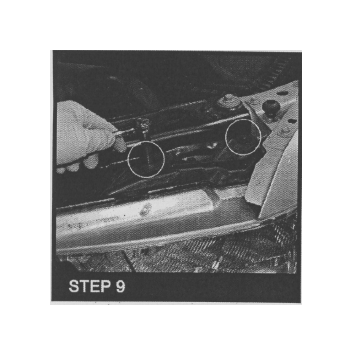
Remove (1) 10mm front headlight bolt deep behind grille
Remove (2) 10mm upper headlight bolts
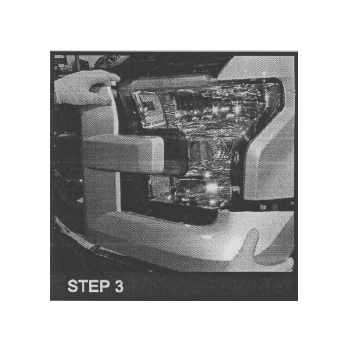
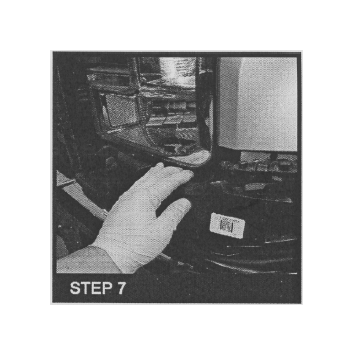
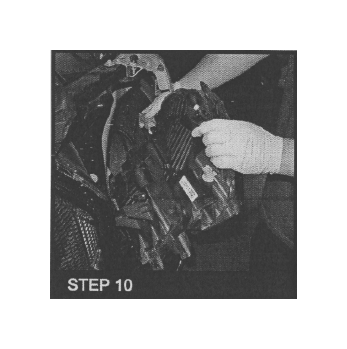
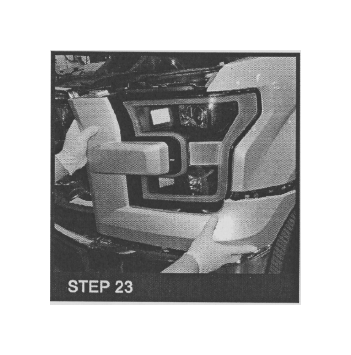
Remove the healight housing and disconnect the sockets and connectors
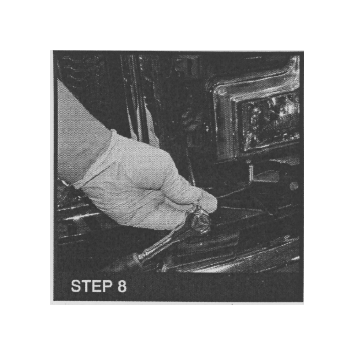
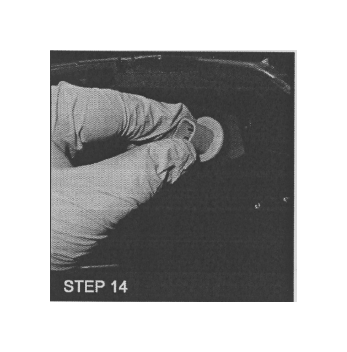
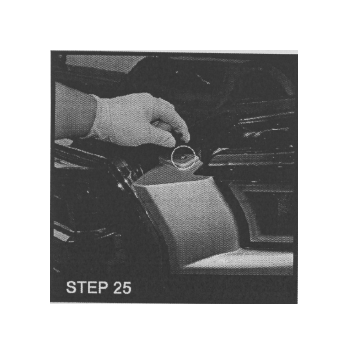
Remove the parking light socket
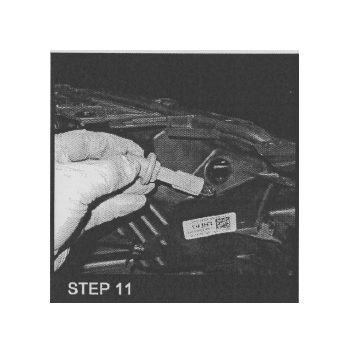
Remove the parking light bulb
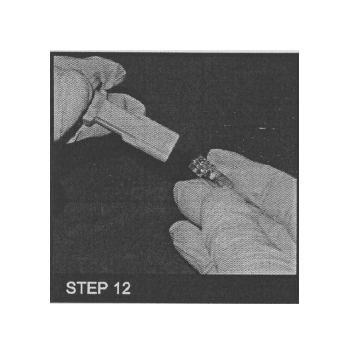
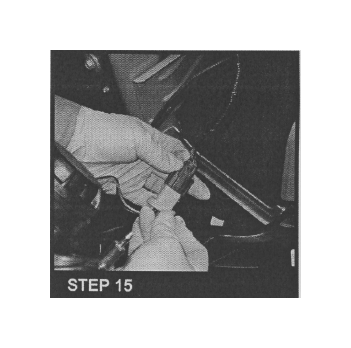
Attach the LED connector to the parking light socket
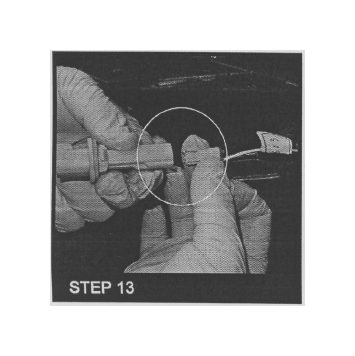
Secure the parking light socket onto LED headlights
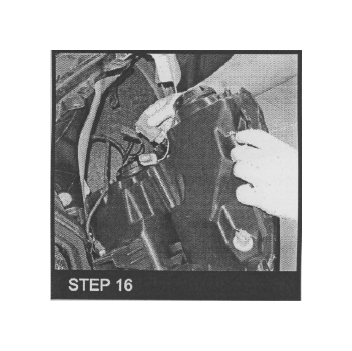
Connect the main light connector to the projector headlight housing
Secure all the connectors and sockets to the LED headlight housing
Secure the headlight housing
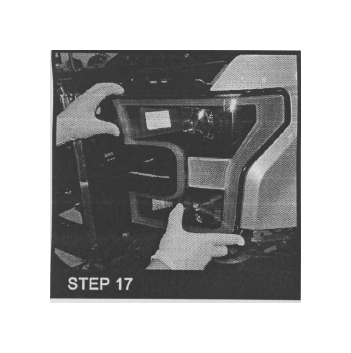
Reinstall (2) 10mm upper headlight bolts
Reinstall (1) 10mm front headlight bolt deep behind grille
Secure the headlight bracket back into the original position
Secure the headlight bracket fastener
Reinstall (1) 8mm and (5)10mm bracket bolts

Reinstall the headlight trim
Reinstall (2) 7mm headlight trim bolts
Secure the top headlight trim fastener
Please repeat the steps from 1 to 25 for the opposite side
The installation is now complete