 FREE 1 to 3-Day Delivery on Orders $149+ Details
How to Install BedRug Tailgate Mat (07-17 Silverado 1500) on your Chevy Silverado

Shop Parts in this Guide
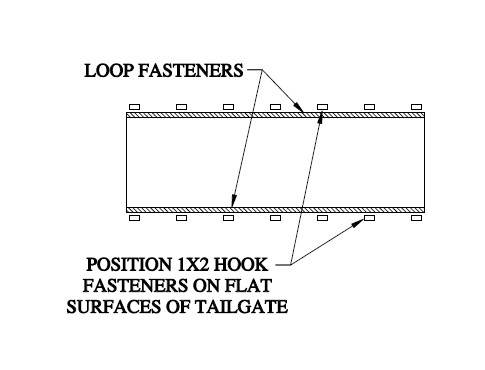
I. (2) Loop fasteners are sewn to the tailgate Mat. Attach the hook fasteners that have a selfadhesive backing to the loop fasteners. (14) hook fasteners are included in the kit.
2. Lay the tailgate Mat on the tailgate of the truck to determine the exact location and fit.
3. Roll one side of the tailgate up exposing the area where the hook fasteners are to be adhered.
4. Using a cloth, soap and water, clean and dry this area thoroughly removing all dirt and debris. With a separate cloth, clean the area again with alcohol. Once the area has been cleaned, with alcohol, apply the adhesive promoter to a lint free cloth then apply a thin layer to surfaces that have a spray in liner or plastic tailgate cap. Allow the promoter to dry before adhering hook fasteners. The adhesive promoter is not required and should not be used for applying hook fasteners to painted sheet metal. * See adhesive promoter information on next page.
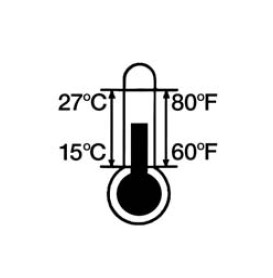
5. Remove the protective liner exposing the adhesive and lay the tailgate Mat down and FIRMLY rub the fastener down VERY AGGRESSm3LY to assure full engagement of the fastener and the adhesive. NOTE: TAILGATE SURFACE TEMPERATURE SHOULD BE 680 F OR HIGHER IN ORDER FOR THE HOOK FASTENER TO ACHIEVE ADHESION. ALSO, NEVER CONTAMINATE THE ADHESmE BY TOUCHING IT WITH YOUR FINGERS.
6. Repeat for the opposite side of the tailgate Mat.
"3M" is a registered trademark of 3M Company.
Ingredients: Methyl Isobutyl ketone (108-10-1); toluene (108-88-3); nitrocellulose 9004-
70-0); film formers, resins, and additives (unknown); n-butyl acetate (123-86-4);
Isopropyl alcohol (67-63-0); ethyl alcohol (64-17-5)
Flashpoint: 5'C (41'F)
WARNING! FLAMMABLE LIQUID AND VAPOR. MAY CAUSE FLASH FIRE.
MAY CAUSE EYE AND SKIN IRRITATION. VAPOR OVER EXPOSURE MAY
CAUSE RESPIRATORY TRACT IRRITATION AND CENTRAL NERVOUS
SYSTEM DEPRESSION. CONTAINS A CHEMICAL WHICH CAN CAUSE BIRTH
DEFECTS.
PRECAUTIONS: Keep away from heat, sparks and flame. Keep container sealed until
ready for use. Provide adequate ventilation. Avoid contact with eyes and skin. Wear
appropriate protective gloves. Wash thoroughly after handling. Avoid breathing of vapor.
BEDBUG CLEANING INFORMATION
The mildew resistant BedRug foam will not absorb liquids. The engineered polypropylene fiber top surface resists stains and deterioration from most acids, chemicals, gas and oils, etc. Therefore, by following the cleaning instructions below, your BedRug will remain serviceable for as long as you own your truck.
Cleaning your BedRug is easy:
1. A vacuum, broom, brush or compressed air can be used to remove dirt, grime, sand, mulch etc. Due to the fact that water will not harm the BedRug, pressure washing is also an effective way to clean a soiled BedRug.
2. Although most acids will not harm the BedRug, baking soda should be applied immediately to neutralize the acid to ensure the safety of the paint on the truck.
3. To clean tougher jobs such as gasoline, oil, chemicals, acid spills or leaks from your BedRug use detergent soap with degreaser and water, then rinse thoroughly. This detergent soap is used in most car wash locations with pressure washing equipment. The BedRug polypropylene closed-cell foam will not absorb water and the polypropylene fiber dries in minutes.
If you have additional questions, call BedRug, Inc. customer service at 800-462-8435.
Retain this cleaning information with your vehicle owner's manual for future reference.

