 FREE 1 to 3-Day Delivery on Orders $149+ Details
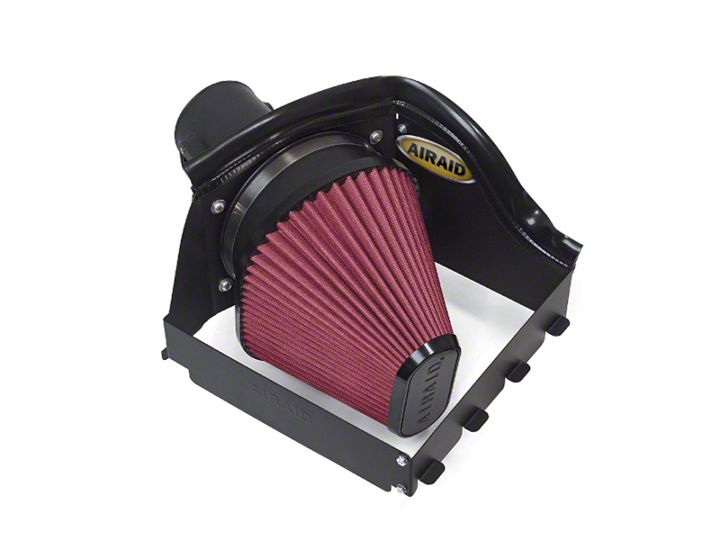
How to Install Airaid QuickFit Air Dam w/ SynthaFlow Oiled Filter on your F-150
Shop Parts in this Guide
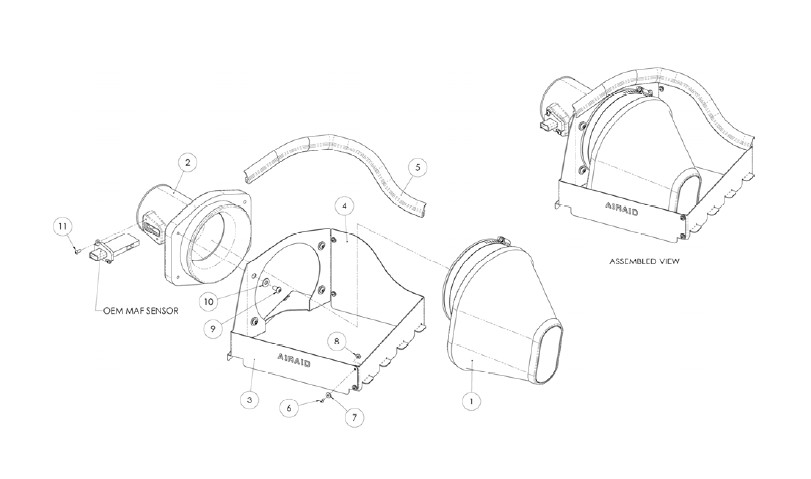
Component Identification
1. Disconnect the negative battery cable!
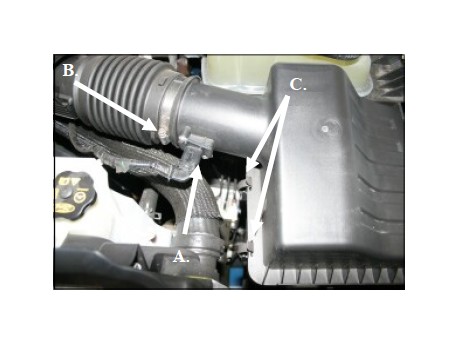
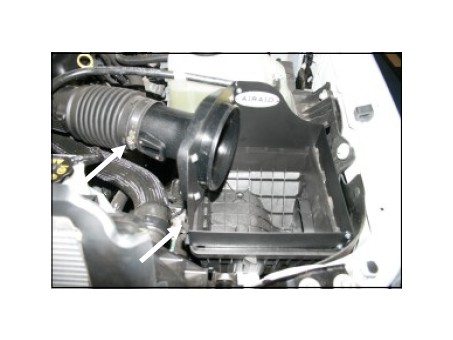
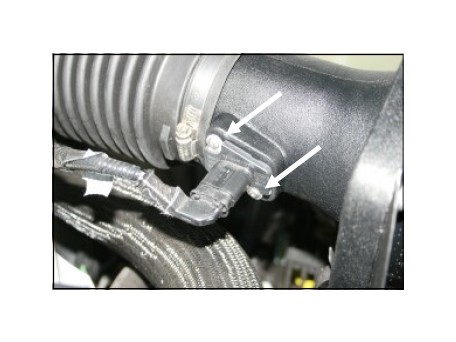
A.) Using the provided #20 Torx Bit remove two screws and the Mass Air Flow (MAF) sensor from the factory intake tube. There is no need to disconnect the wiring harness.
B.) Loosen the factor y hose clamp.
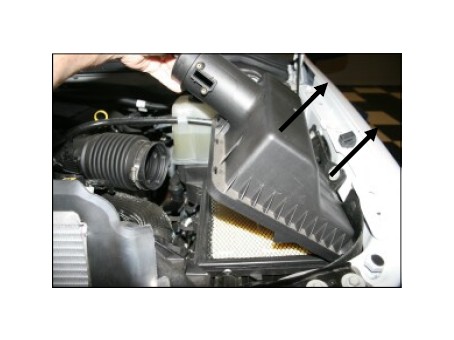
C.) Unlatch 3 clips that secure the airbox lid to the base.
2. Remove the factory airbox lid from the vehicle by sliding the flexible tube off of the airbox lid neck, and then rotate the lid up and out of the base.
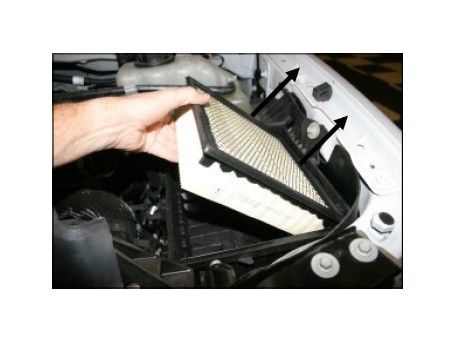
3. Remove the factory air filter from the airbox base.
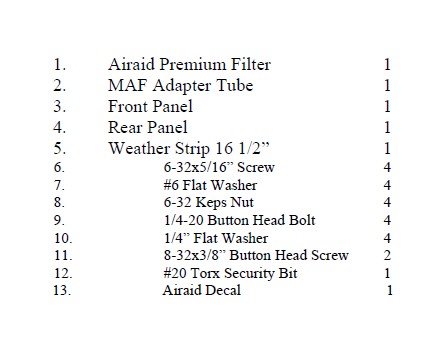
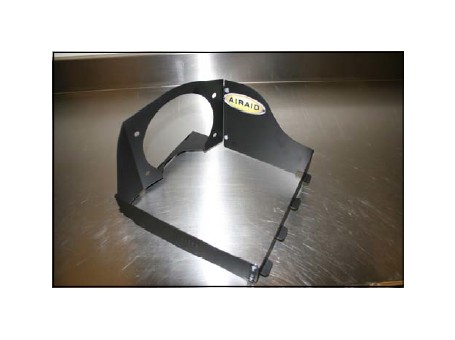
4. Assemble the two Quick Fit panels (#3 & #4) as shown using four 6-32 screws (#6) flat washers (#7) and kep nuts (#8). Apply the Airaid Decal onto the Panel assembly as shown.
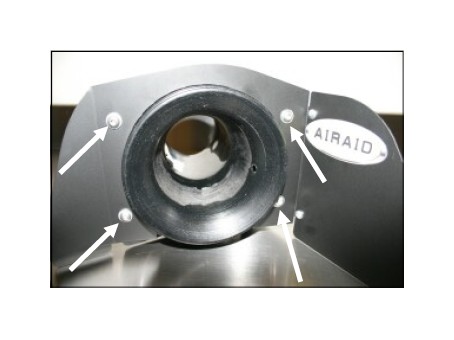
5. Install the MAF Adapter Tube (#2) into the Quick Fit Panel as shown using four 1/4-20 button head bolts (#9) and flat washers (#10). Make sure the slot for the MAF sensor is on the left side when looking from this view.
6. Install the Quick Fit Assembly onto the top of the factory airbox base sliding the four tabs on the panel into the slots on the base and then latching the three factory latches. Slide the factory intake tube over the MAF tube and tighten the factory hose clamp as shown.
7. Reinstall the MAF sensor into the Airaid Adapter Tube using two 8-32 x 3/8” button head screws (#11). Do Not Use The Factory Screws !
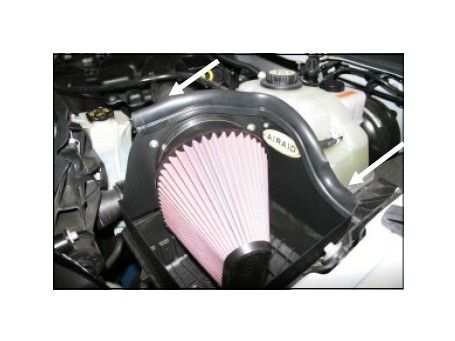
8. Install the Airaid Premium Filter (#1) onto the adapter tube and tighten the hose clamp. Next install the weather strip (#5) onto the top of the Quick Fit panels as shown.
9. Double check your work! Make sure there is no foreign material in the intake path. Make sure all clamps, hoses, bolts, and screws are tight. intake path. Make sure all clamps, hoses, bolts, and screws are tight. Periodically check the tightness of all hose clamps.
10. Re-connect the negative battery cable!

