FREE 1 to 3-Day Delivery on Orders $149+ Details
How to Install Airaid Classic Performance Air Intake - Silver - SynthaFlow Oiled Filter
Installation Time
1 hours
Tools Required
- Ratchet & Extension
- 10mm & 11mm Socket
- 7/16” Deep Socket
- 7/16” wrench
- 5/16” Socket or Nut Driver
- Flat Blade Screwdriver
- Pliers & Shop Knife
1. Disconnect the negative battery cable.
Using a 10mm socket, remove the three bolts securing
the engine beauty cover, remove the cover, and
set it aside (save the bolts and cover for reuse).
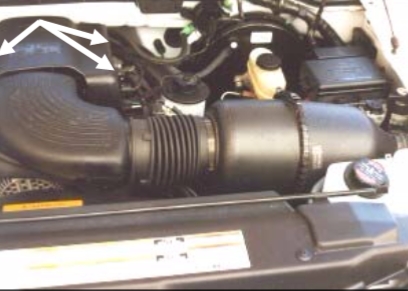
2. Loosen the hose clamps at the throttle body,
and air filter housing outlet.
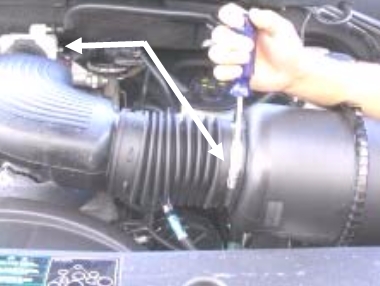
3. Remove the crankcase breather hose from the
factory intake tube and the valve cover. Disconnect
the Air Intake Temperature (AIT) sensor
wiring harness from the sensor. (4.6L Engine
only: Disconnect the Idle Air Bypass Valve
(IABV) inlet tube from the factory intake tube.)
(5.4L Engine only: disconnect the IABV, save the
plastic hose for reuse.)
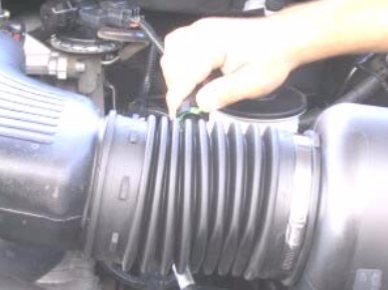
4. ) Remove the factory intake tube, and set it aside.
Remove the AIT sensor from the tube by carefully
prying it out with a flat blade screwdriver (save the
sensor for reuse). Disconnect the Mass Air Flow
(MAF) sensor wiring harness from the main engine
wiring harness.
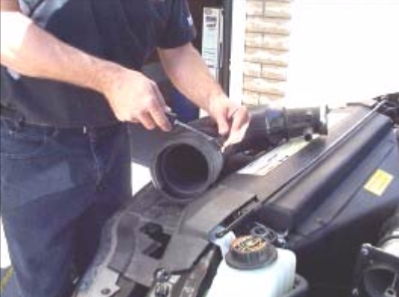
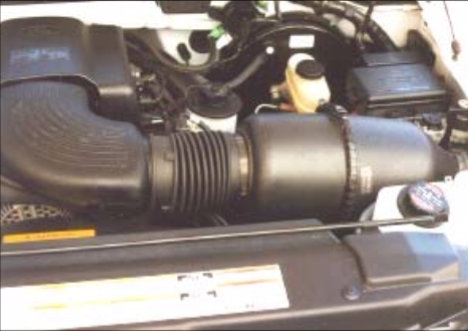
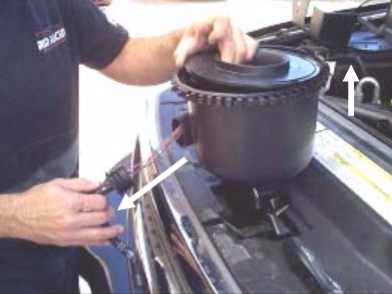
5. The factory airbox assembly is held in place by
rubber grommets (it is a “pull to release fit.”). Remove
the assembly and grommets from the engine
compartment. Unlatch the airbox and separate the
two sections. Remove the wire loom from the
MAF sensor wiring harness, then slide the grommet
away from the connector.
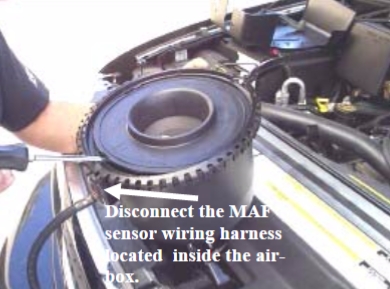
6. Locate the notch on the flat side of the airbox
and gently pry it up. Disconnect the MAF sensor
wiring harness from the sensor (inside the airbox).
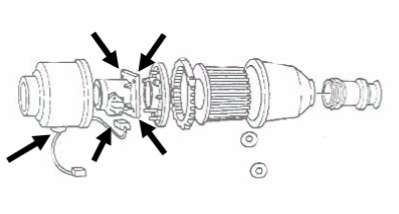
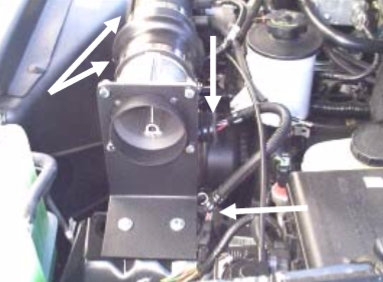
7. Using a 10mm socket, remove the four MAF
sensor mounting nuts. Carefully remove the MAF
sensor and the wiring harness from the airbox, (save
them for reuse).
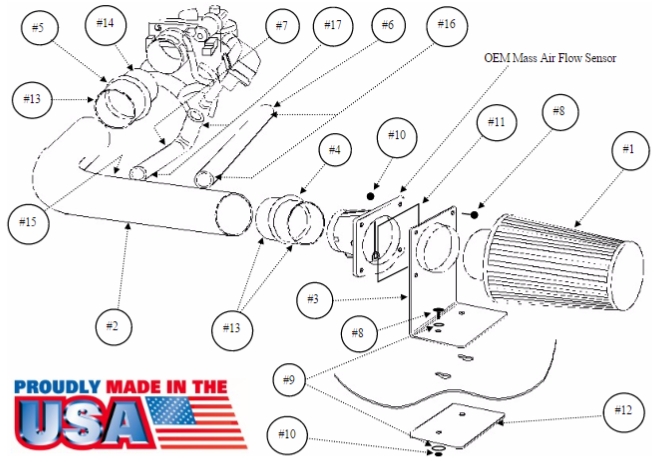
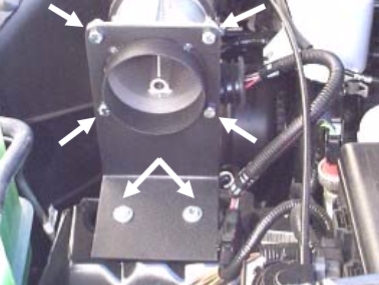
8. Mount the MAF sensor to the MAF bracket
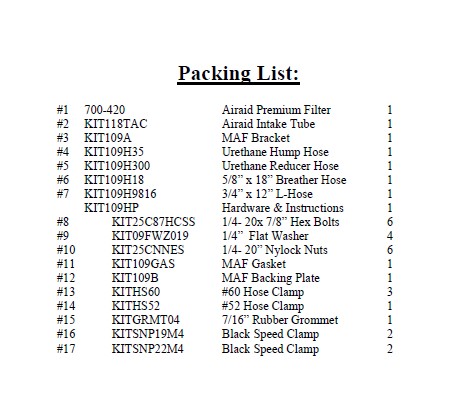
(#3) using four 1/4-20x 7/8” hex bolts (#8), 1/4-
20” nylock nuts (#10), and the MAF gasket
(#11). Mount the bracket and sensor to the factory
location, using the MAF backing plate
(#12), two 1/4-20x 7/8” hex bolts (#8), four 1/4”
flat washers (#9), and two 1/4- 20” nylock nuts
(#10). (Leave the MAF bracket loose for now).
9. Reconnect the MAF sensor wiring harness to
the sensor, and to the main engine wiring harness.
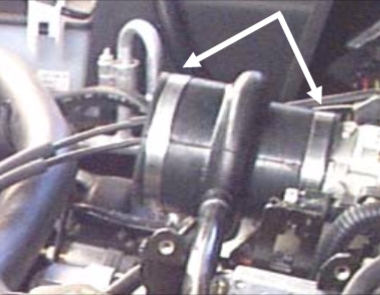
Install the urethane hump hose (#4) onto
the MAF sensor, with two #60 hose clamps
(#13). Tighten only the clamp on the sensor.
10. Install the small side of the urethane reducer
hose (#5) onto the throttle body using one #52
hose clamp (#14). Install one #60 hose clamp
(#13) onto the larger side of the reducer hose.
Tighten only the clamp on the throttle body.
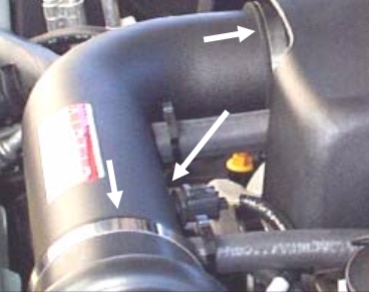
11. Install the 7/16” rubber grommet (#15) into
the Airaid Intake Tube (#2). Insert the factory
AIT sensor into the grommet. Slip the Airaid
Intake Tube into the urethane hump and reducer
hoses. Align for best fit and tighten the remaining
hose clamps. Tighten the MAF bracket and
reconnect the AIT sensor wiring harness.
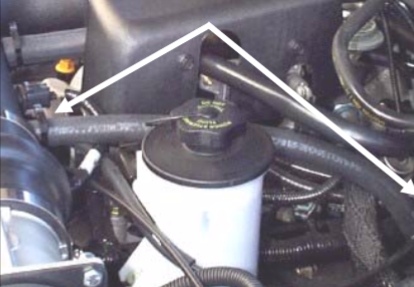
12. Install the 5/8”X18” breather hose (#6) onto the
valve cover breather fitting then onto the Airaid Intake
Tube nipple. Secure the hose using two #19
speed clamps (#16).
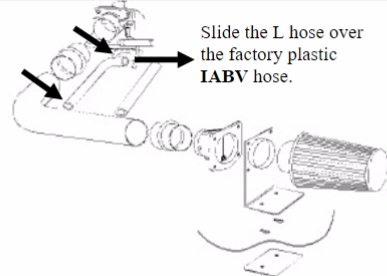
13. 5.4L engines: Measure and cut the 3/4 x 12”
L-hose (#7) as needed, then slide it over the factory
plastic IABV hose. Install the hose onto the
Airaid Intake Tube nipple and secure it using two
#22 speed clamps (#17).
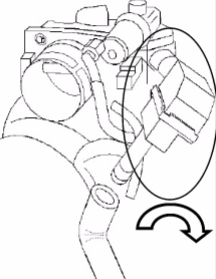
14. 4.6L engines: Rotate the IABV inlet tube 90
degrees to provide clearance for the 3/4 x 12” Lhose
(#7).
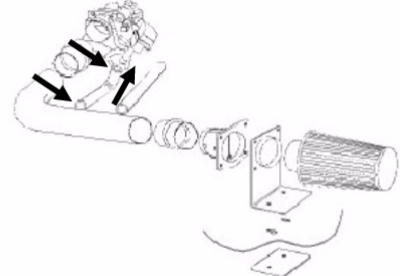
15. 4.6L engines continued: Connect the Airaid
Intake Tube nipple to the IABV inlet tube using
the 3/4 x 1/2” L-hose (#7), and two #22 speed
clamps (#17).
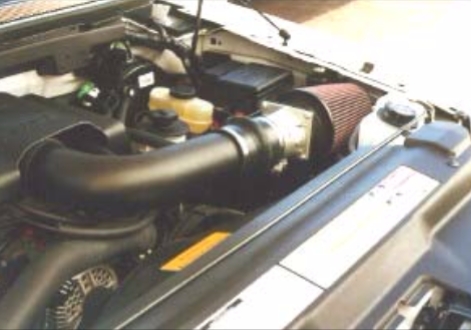
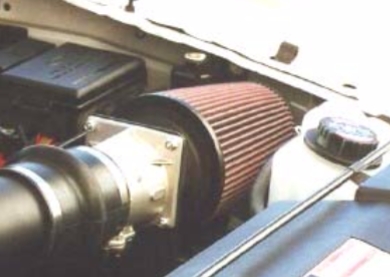
16. Install the Airaid Premium Filter (#1) onto the
MAF bracket, and tighten the clamp. Reinstall the
beauty cover using the three factory bolts.
17. Double check your work!
Make sure there is no foreign material in the intake path. Make sure all clamps, hoses, bolts, and screws are tight.
18. Reconnect the negative battery cable!
Included with your Airaid Intake System is a sticker with a California Air Resources Board (C.A.R.B.) Executive Order (EO) number. This sticker must be placed in plain view inside of the engine compartment. Failure to do so may prevent you from passing a smog inspection.