
How to Install AFE Magnum Force Stage 1 Pro 5R Cold Air Intake - Black on your F-150
Installation Time
1 hours
Tools Required
- Ratchet
- 5/32” 6-point & 10mm socket
- Nut Driver
- Flat Head Screw Driver
- 5/32" Hex Key
Instruction Manual
• Please read the entire instruction manual before proceeding.
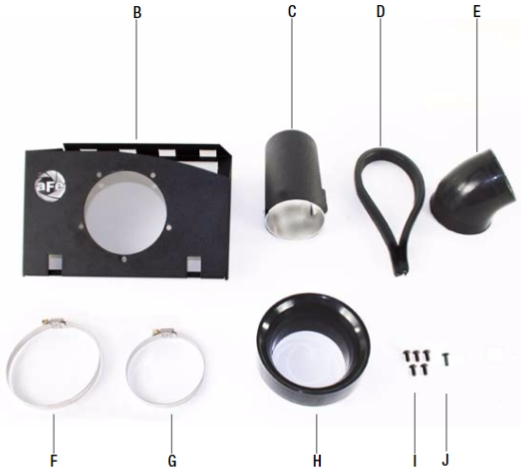
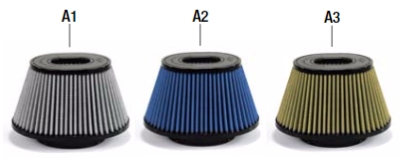
• Ensure all components listed are present.
• If you are missing any of the components, call customer support at 951-493-7100.
• Ensure you have all necessary tools before proceeding.
• Do not attempt to work on your vehicle when the engine is hot.
• Disconnect the negative battery terminal before proceeding.
• Retain factory parts for future use.
Note: Legal in California for use on race vehicles only. The use of this device on vehicles used on public streets or highways is strictly prohibited in California and others states that have adopted California emission regulations.
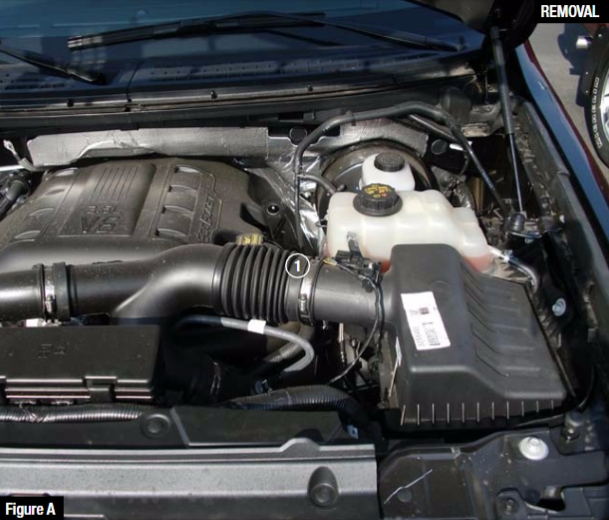
Refer to Figure A for steps 1-3
Step 1: Disconnect the Manifold Air Pressure (MAP) sensor plug from stock air box.
Step 2: Loosen Clamp 1 using a 8mm Nut Driver.
Step 3: Unclip the three (3) tabs on the stock intake air box.
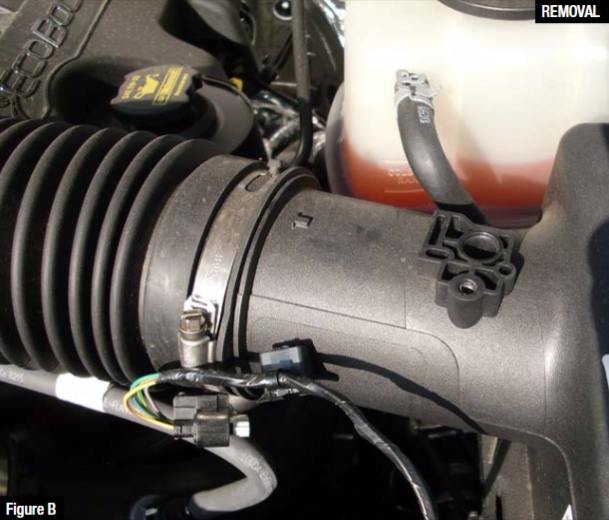
Refer to Figure B for step 4
Step 4: Remove the MAP Sensor from stock air box using 5/32” 6-point socket.
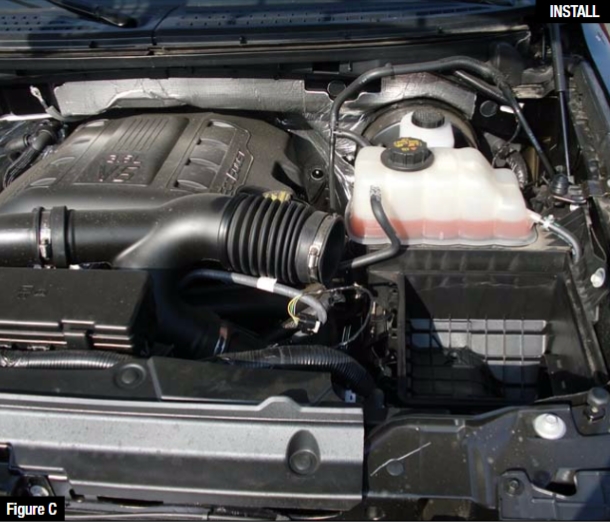
Refer to Figure C for step 5
Step 5: Remove the upper portion of the stock air box and the stock air filter. Also remove the middle clip from stock air box.
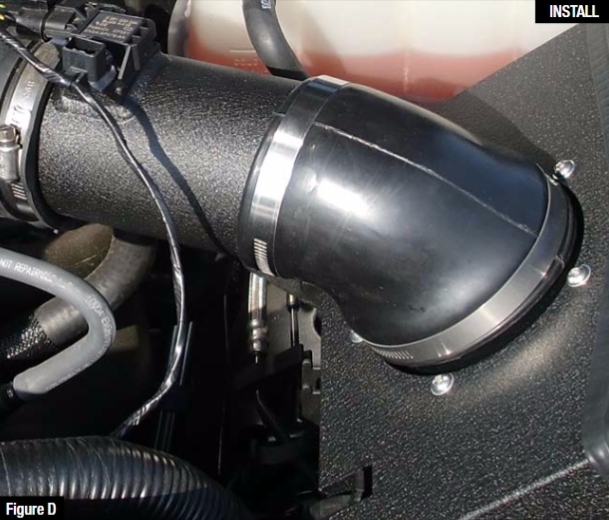
Refer to Figure D for steps 6-9
Step 6: Install the 3-angle adaptor onto the aFe housing using the five (5) button head screws provided and a 5/32 hex key.
Step 7: Install the elbow coupling onto the 3-angle adaptor using provided clamps. (Do not tighten)
Step 8: Insert the aFe intake tube into the coupling with the MAP pad pointing straight up.
Step 9: Install the MAP sensor onto the aFe intake tube using the hex head screw provided and a 10mm socket.
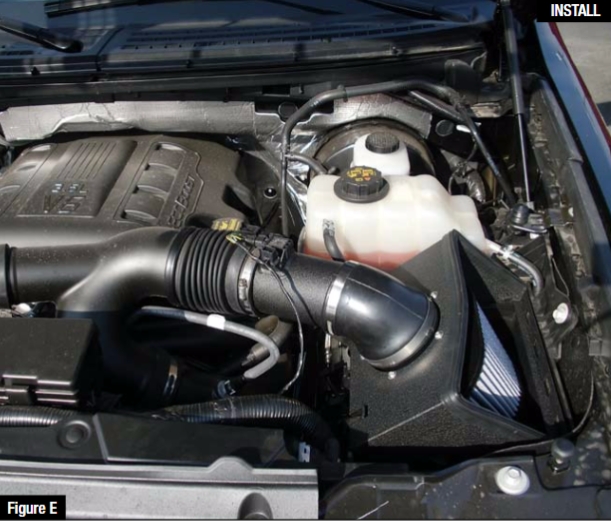
Refer to Figure E for steps 10-14
Step 10: Place aFe intake onto the lower portion of the stock air box and secure using factory clips.
Step 11: Slide the factory accordian coupler over the aFe intake tube.
Step 12: Adjust the coupling and tube for proper alignment and tighten clamps.
Step 13: Reconnect the MAP sensor plug and battery.
Step 14. The installation is now complete!
NOTE: Retighten all connections after approximately 100-200 miles.
Warranty
General Terms:
• aFe warrants their products to be free from manufacturer’s defects due to workmanship and material.
• This warranty applies only to the original purchaser of the product and is non-transferrable.
• Proof of purchase of the aFe product is required for all warranty claims.
• Warranty is valid provided aFe instructions for installation and/or cleaning were properly followed.
• Proper maintenance with regular inspections of product is required to insure warranty coverage.
• Damage due to improper installation, abuse, unauthorized repair or alteration is not warranted.
• Incidental or consequential damages or cost, including installation and removal of part, incurred due to failure of aFe product is not covered under this warranty.
• All warranty is limited to the repair and/or replacement of the aFe part. To request Return Goods Authorization (“RGA”), email [email protected] or call (951)493-7100. Upon receipt of the RGA, you must return the product to the address provided in the RGA, freight prepaid and accompanied with a dated proof of purchase and the RGA.
Upon receipt of the defective product and upon verification of proof of purchase, aFe will either repair or replace the defective product within a reasonable time, not to exceed thirty days.

