
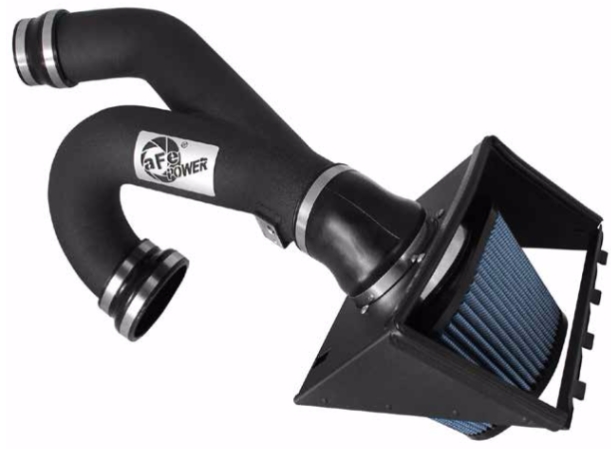
How to Install AFE Magnum Force Stage 2 Pro 5R Intake - Polished on your F-150
Installation Time
1 hours
Tools Required
- 8mm Nut Driver
- 10mm Nut Driver
- 5/32" Hex Key
- 5/32" 6-point socket
• Please read the entire instruction manual before proceeding.
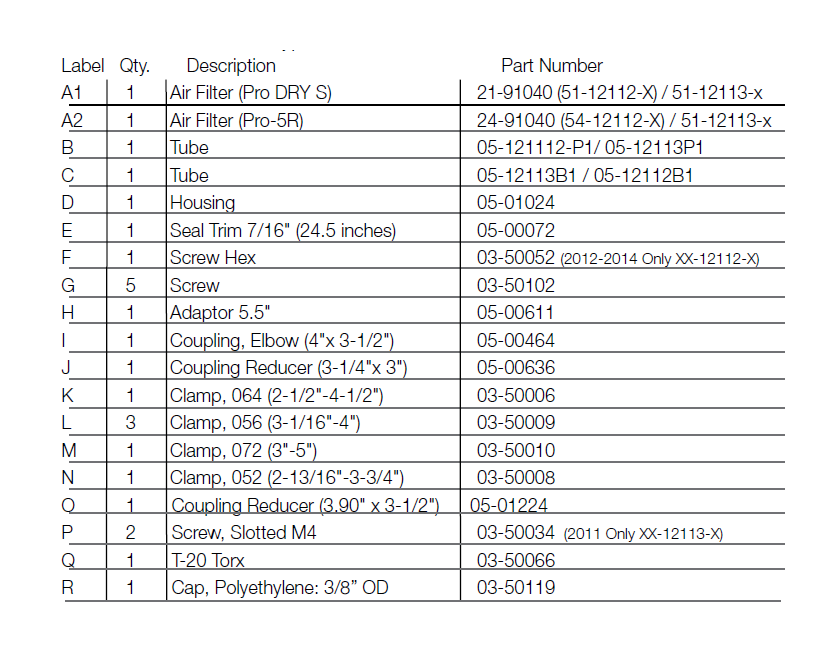
• Ensure all components listed are present.
• If you are missing any of the components, call customer support at 951-493-7100.
• Ensure you have all necessary tools before proceeding.
• Do not attempt to work on your vehicle when the engine is hot.
• Disconnect the negative battery terminal before proceeding.
• Retain factory parts for future use.

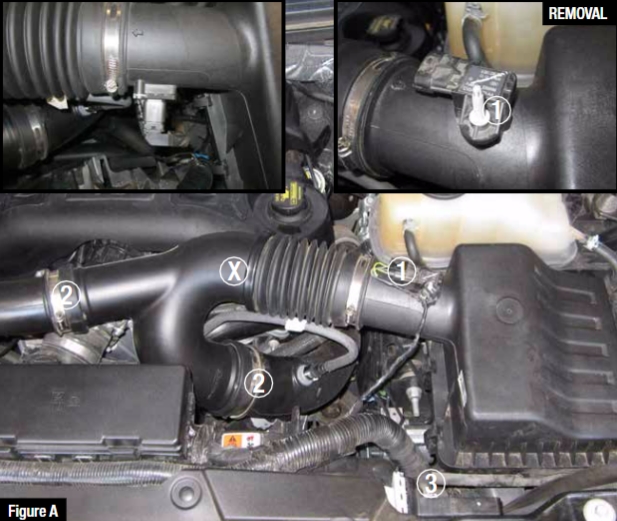
Refer to Figure A for Steps 1-3
Step 1: Disconnect the Manifold Air Pressure (MAP) sensor plug from stock air box 1 .
Step 2: Loosen the driver and passenger intake clamps 2 .
Step 3: Unclip the 3 housing clips that secure the top portion of the stock intake housing 3 .
NOTE: For 2011 model years unplug the vacuum line from the underside of the OE intake tube X .
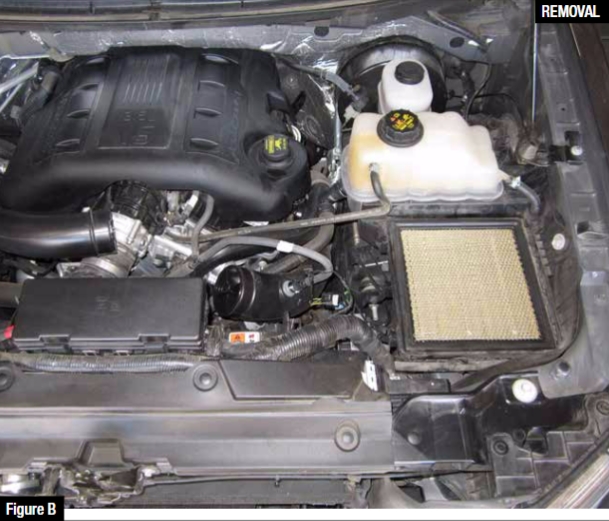
Refer to Figure B for Steps 4-5
Step 4: Remove the stock intake tube by prying the passenger and driver side intakes first then remove the top portion of the housing.
Step 5: Remove the stock filter from lower portion of the housing.
DO NOT DISCARD YOUR ORIGINAL COMPONENTS
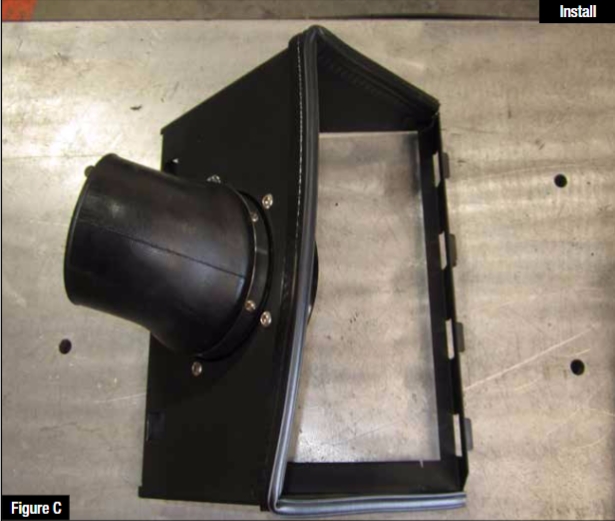
Refer to Figure C for Steps 6-9
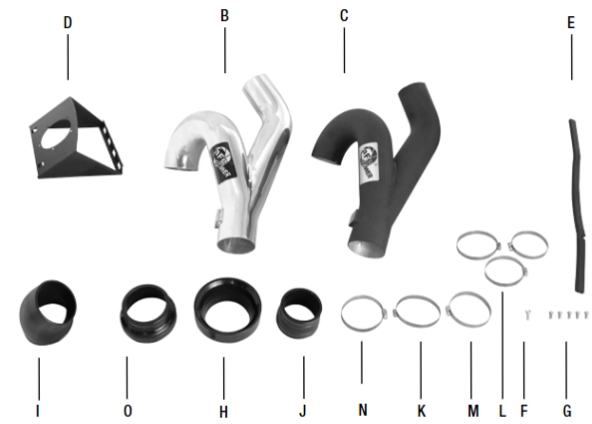
Step 6: Install the 3-angle adaptor onto the aFe housing using the five (5) button head screws provided with a 5/32 hex key.
Step 7: Install the elbow coupling onto the 3-angle adaptor using provided clamps. (Do not tighten).
Step 8: Install the seal trim around the edges of the housing.
Step 9: Install the filter.
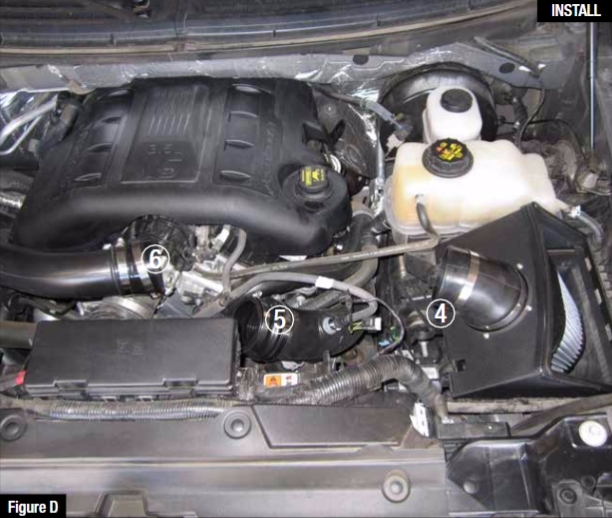
Refer to Figure D for Steps 10-12
Step 10: Install the aFe housing on top of the lower portion of the OE housing. Clamp down using factory clips 4 .
Step 11: Install the larger reduction coupling (05-01224) on the driver side runner. Clamp down but do not tighten 5 .
Step 12: Install the smaller reduction coupling (05-00636) on the passenger side runner. Clamp down but do not tighten 6 .
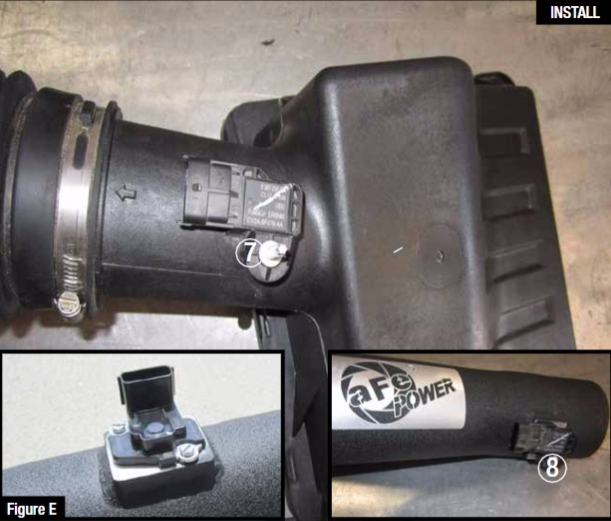
Refer to Figure E for Steps 12-13
Step 12: Remove the MAP sensor from the stock air box using 5/32" 6-point socket 7 .
Step 13: Install the map sensor onto the aFe intake tube using the hex head screw provided with a
10mm socket 8 .
NOTE: For 2011 install MAP sensor on the aFe tube using the two slotted M4 screws.
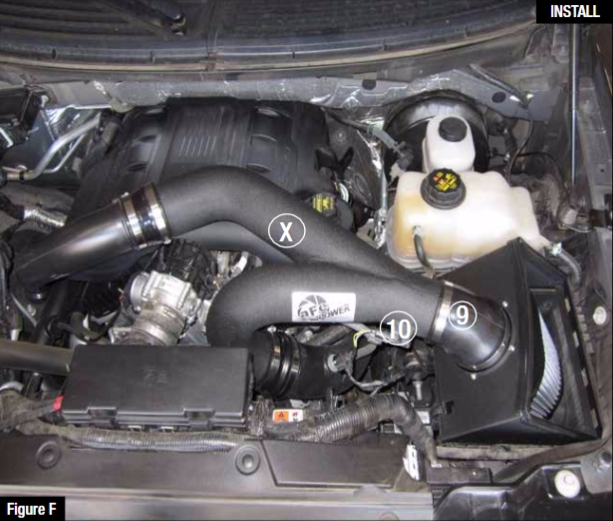
Refer to Figure F for Steps 14-18
Step 14: Install the aFe intake tube passenger side runner first and then the driver side runner, followed
by inserting the tube onto the adaptor coupling elbow.
Step 16: Adjust the couplings and the tube for proper alignment and then tighten all clamps 9 .
Step 17: For 2011 model year, reconnect the vacuum line to the aFe intake tube X .
Step 18: Reconnect the MAP sensor plug 10 .
Step 19: The installation is now complete!
NOTE: Retighten all connections after approximately 100-200 miles.
Place enclosed CARB EO sticker on or near device on a smooth, clean surface.
EO identification label is required to pass the smog inspection.

