 FREE 1 to 3-Day Delivery on Orders $149+ Details
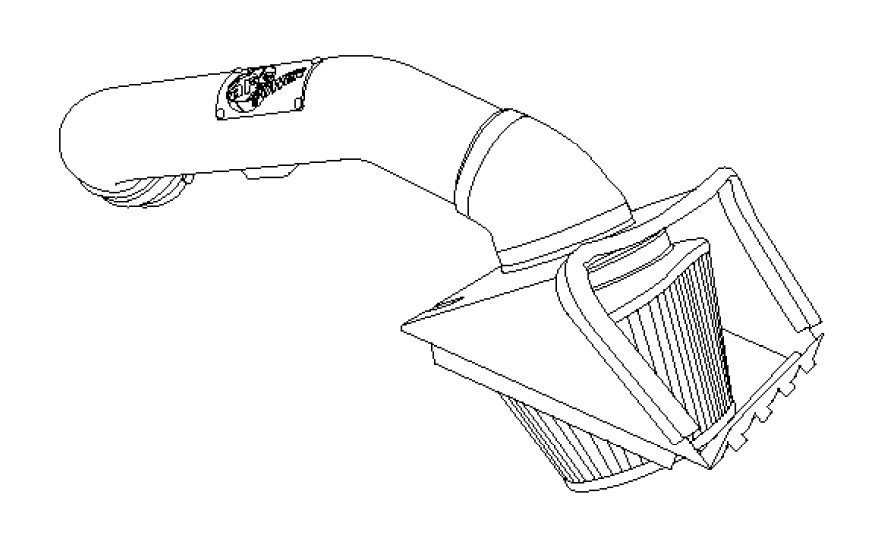
How to Install AFE Magnum Force Stage 2 Pro 5R Cold Air Intake - Black (11-14 5.0L) on your Ford F-150
Installation Time
1 hours
Tools Required
- 4mm Hex Key
- 5/16” Socket or Nut Driver
- T20 Torx Bit & Flat-Head Screw Driver

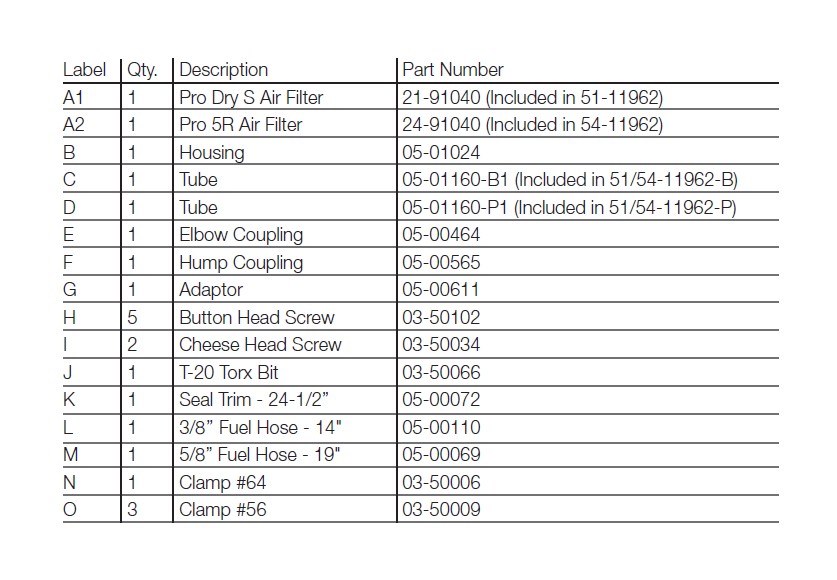
Shop Parts in this Guide
• Please read the entire instruction manual before proceeding.
• Ensure all components listed are present.
• If you are missing any of the components, call customer support at 951-493-7100.
• Ensure you have all necessary tools before proceeding.
• Do not attempt to work on your vehicle when the engine is hot.
• Disconnect the negative battery terminal before proceeding.
• Retain factory parts for future use.
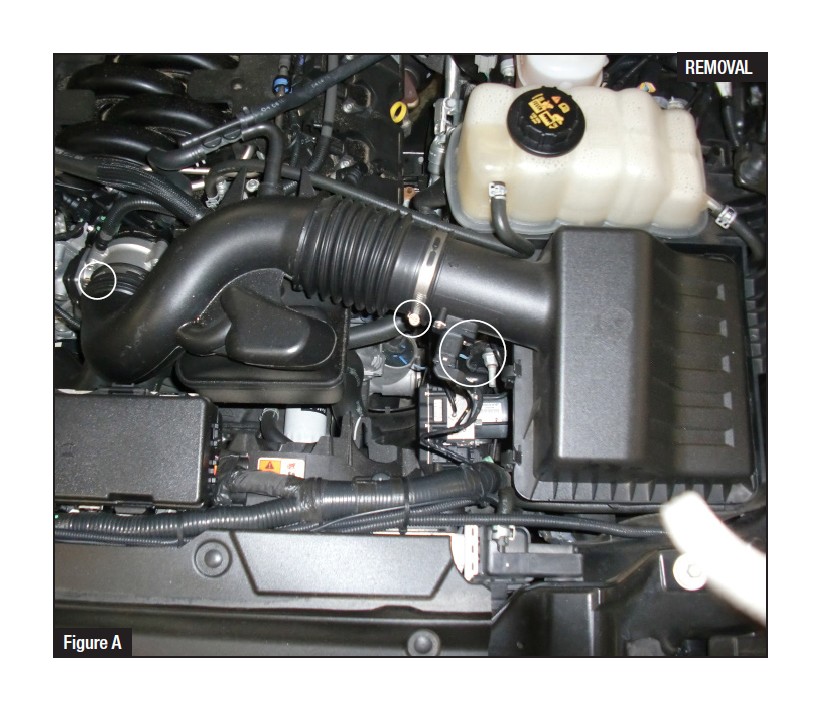
Refer to Figure A for steps 1-6
Step 1. View of complete stock intake.
Step 2. Disconnect the wiring harness from the MAF sensor.
Step 3. Loosen the clamp securing the intake tube to the throttle body.
Step 4. Disconnect the crankcase vent tubes from the intake tube.
Step 5. Unclip the upper airbox from the lower airbox.
Step 6. Remove the intake tube, upper airbox and air filter. Also remove the middle clip from the stock air box as it will not be needed.
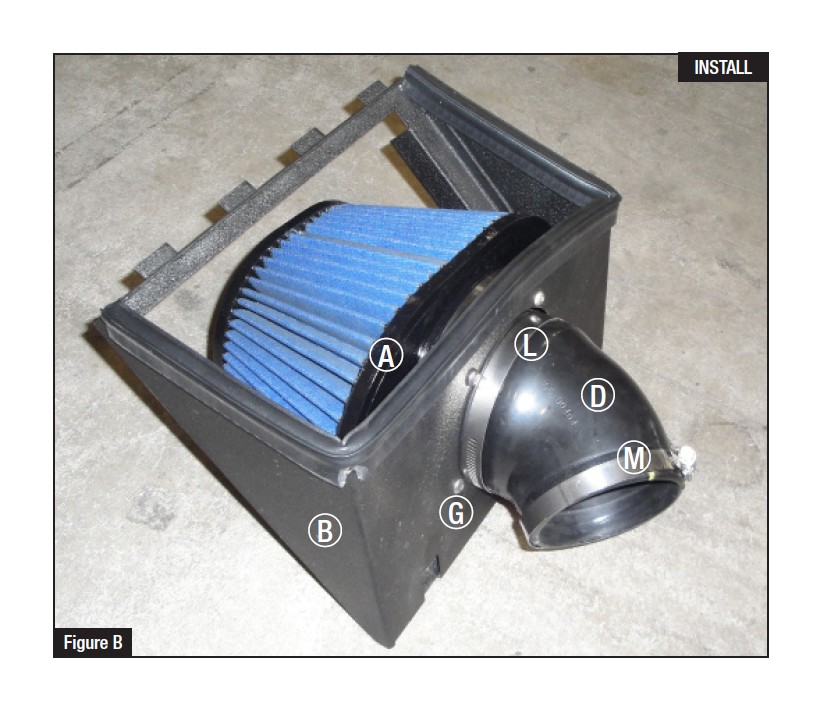
Refer to Figure B for steps 7-9
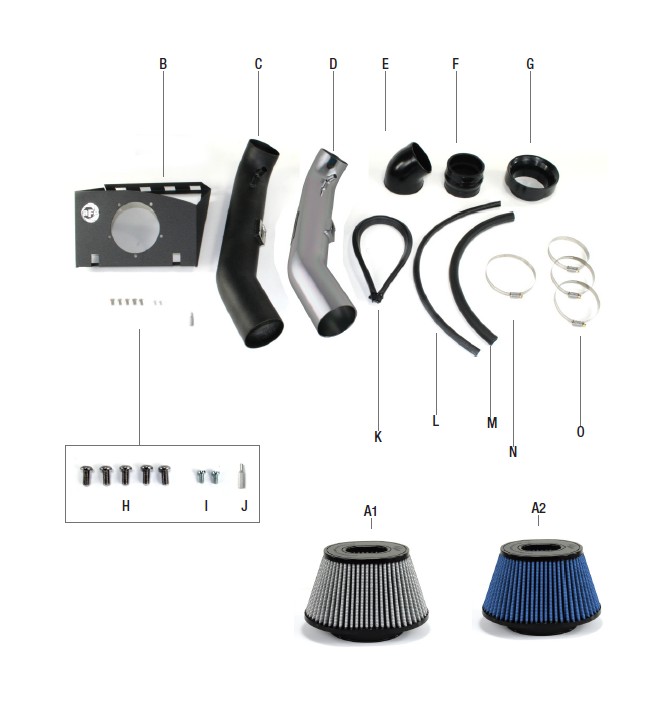
Step 7. Attach the filter adaptor F to the air filter housing B using the supplied button head Screws G .
Step 8. Install the aFe air filter A and clamp onto the filter adaptor. (do not tighten)
Step 9. Install the elbow coupler D using clamps L and M onto the filter adaptor. (do not tighten)
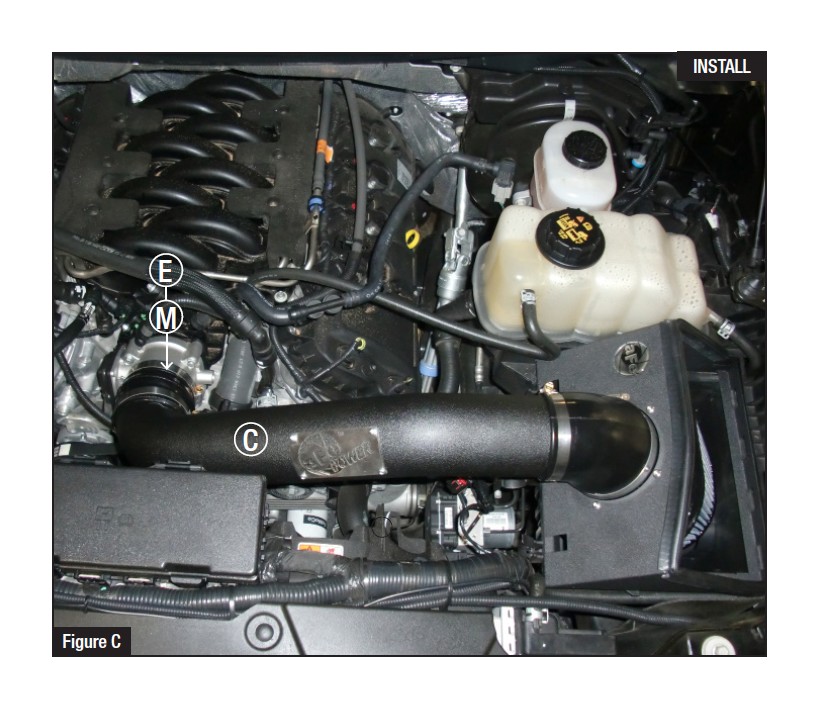
Refer to Figure C & D for steps 10-13
Step 10. Install the hump coupling E and clamps M on the throttle body.
Step 11. Remove the MAF sensor from the stock intake tube and install on the aFe intake tube C using the supplied screws H .
Step 12. Install the air filter housing assembly in the lower airbox and secure using the stock front and rear clips only.
Step 13. Install the aFe intake tube in the elbow coupler first followed by the throttle body coupler.
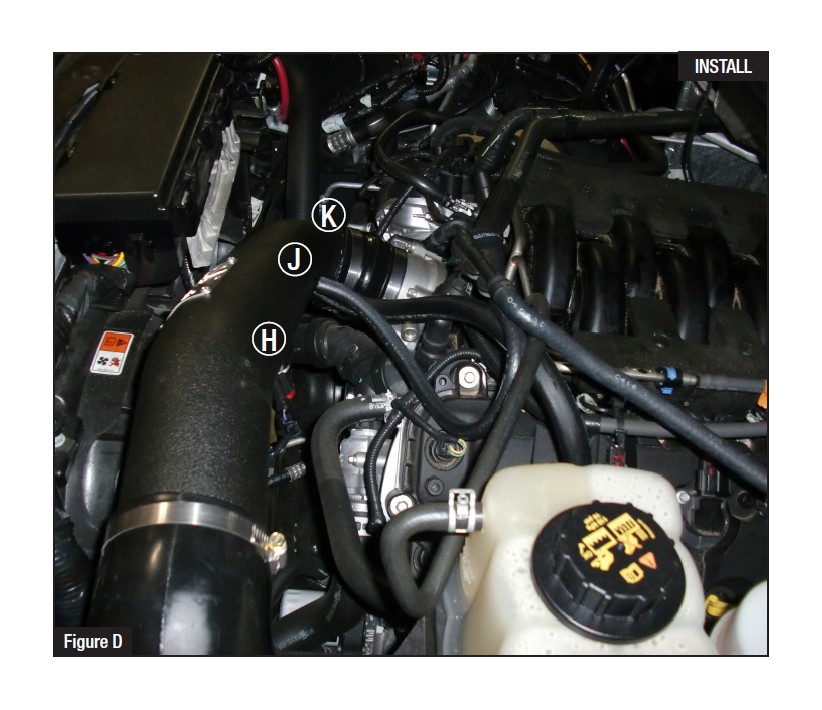
Refer to Figure D for steps 14-15
Step 14. Fine tune the alignment of the intake tube by rotating both the intake tube and elbow coupler and tighten the clamps.
Step 15. Replace the stock crankcase vent tubes with the supplied hoses J and K .
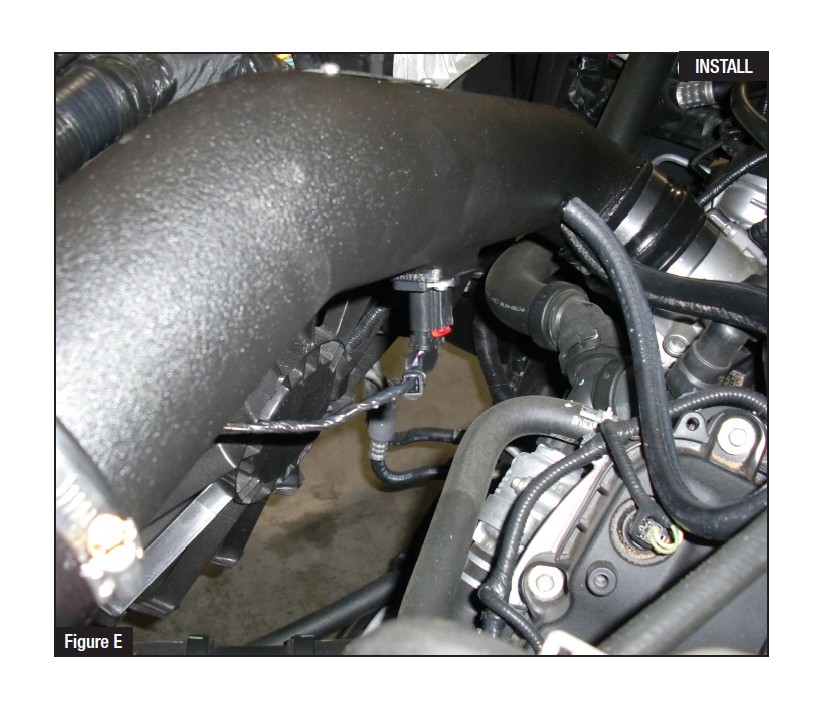
Refer to Figure E for step 16
Step 16: Connect the wiring harness to the MAF sensor.
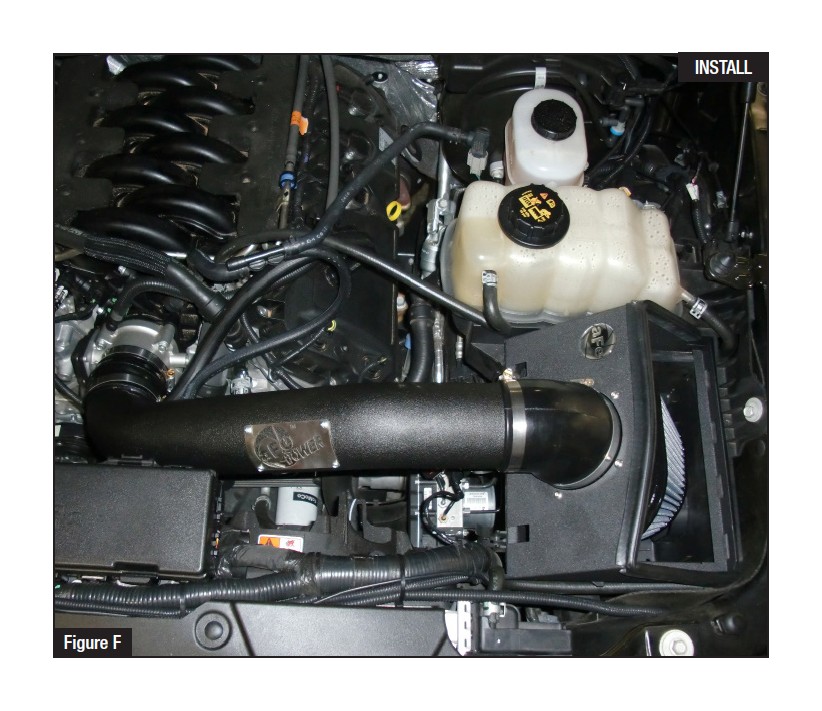
Refer to Figure F for steps 17-19
Step 17: Tighten the air filter clamp. Be sure not to over tighten or you can damage the filter base. Installation is now complete.
Step 18: Make sure all clamps are tight. Installation is complete.
Step 19: Place the included CARB EO Sticker on or near the intake system on a smooth, clean surface. E.O. identification label is reuired in passing the Smog Check Inspection.
NOTE: Retighten all connections after approximately 100-200 miles.

