 FREE 1 to 3-Day Delivery on Orders $149+ Details
How to Install AFE BladeRunner Intercooler Tubes on your F-150
Installation Time
2 hours
Tools Required
- 7mm, 8mm & 10mm sockets
- Pick
- Flat head screw driver
- Ratchet
- WD-40

Shop Parts in this Guide
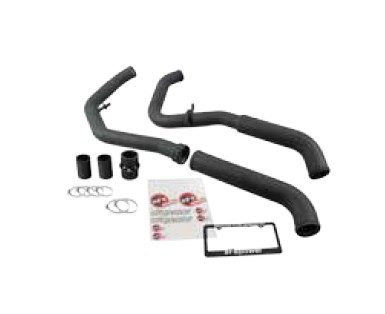
Parts Included:
•Intercooler Tubes (x3)
•Coupling (x3)
•Clamp (x6)
•Fitting (x1)
CAUTION: Allow time for your vehicle to cool down prior to installation. When working on or under your vehicle proceed with caution. Exhaust systems reach high temperatures and may cause serious burns. Wear protective safety equipment; eye goggles and gloves to ensure a safe installation. aFe recommends professional installation on our products. Note: aFe’s Downpipe recommends an aftermarket tuner to clear check engine light
Step 1: Park vehicle on level ground and engage parking brake.
Step 2: Loosen the clamps and remove the couplings that connect both of the hot side intercooler tubes to the intercooler, using a 7mm socket. (Note: You may need to use a pick to loosen the coupling from the intercooler.)
Step 3: Up top, remove the engine cover along with the intake Y-pipe, by removing the (x2) 10mm nuts on the engine cover, loosening the (x3) clamps for the y-pipe using a 7mm nut driver, and disconnecting the sensor.
Step 4: Unclip the air box cover and remove from the vehicle.
Step 5: Loosen the clamp holding the passenger side intercooler tube onto the turbo using a 7mm nut driver, then remove the tube from the vehicle.(Note: You may need to use a pick to loosen the coupling from the turbo.)
Step 6: Disconnect the vacuume line that is connected to the turbo air inlet tube that runs over the intercooler tube on the drivers side so the intercooler tube can be removed.
Step 7: Loosen the clamp holding the driver side intercooler tube onto the turbo using a 7mm nut driver, then remove the tube from the vehicle.
Step 8: Install the supplied short 2” straight coupling with (x2) of the small clamps and install the passenger side aFe intercooler tube into vehicle.(Note: Use a small amount of WD-40 on the grommet for ease of installation.)
Step 9: Install the 2nd supplied short 2” straight coupling with the other (x2) small clamps and 2.5” hump coupling onto the aFe intercooler tube then install the upper half of the drivers side aFe intercooler tube into vehicle. (Note: Use a small amount of WD-40 on the grommet for ease of installation.)
Step 10: Install stock hump coupling and clamps onto the final intercooler tube on the shorter end of tube, do not tighten clamps.
Step 11: Install tube from previous step into vehicle, connect the long end to the coupling installed in step 9 then install the stock coupling onto the intercooler.
Step 12: Ensure tubes are not resting on any metal then tighten all clamps on all aFe Intercooler Tubes, using an 8mm nut driver.
Step 13: Reconnect the vacuum line disconnected from Step 6.
Step 14: Reinstall all parts removed and disconnected from Steps 3 & 4.
Step 15: Installation is now complete.
Step 16: Enjoy and thank you for choosing aFe Power!

