FREE 1 to 3-Day Delivery on Orders $149+ Details
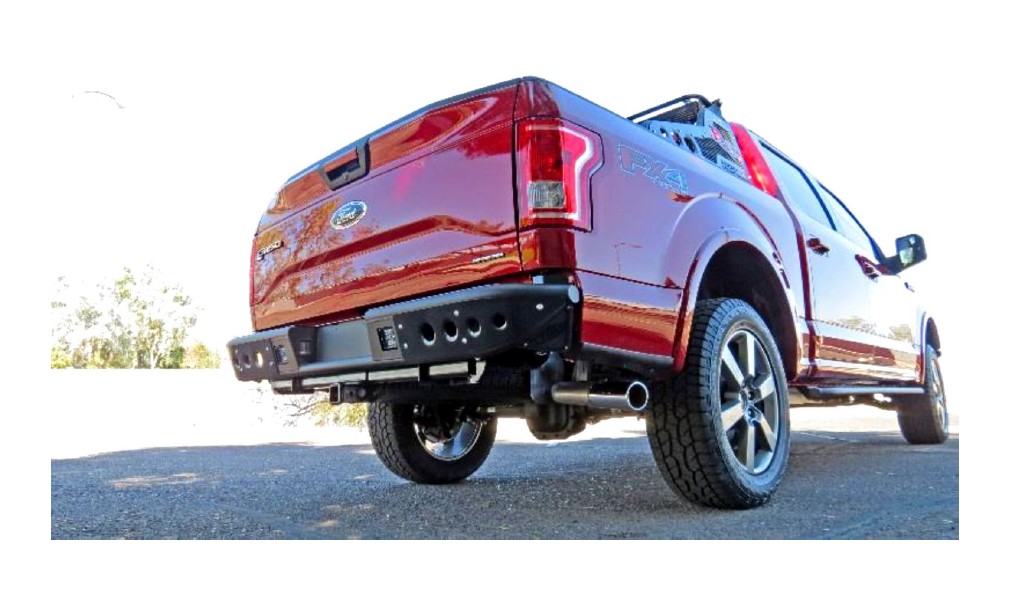
How to Install Addictive Desert Designs Venom Rear Bumper (15-17 All, Excluding Raptor) on your Ford F-150
Installation Time
3 hours
Tools Required
- 13mm Socket
- 14mm Socket
- Ratchet
- 3/4” Socket and Wrench
- Grinding Wheel
- 11/32” Drill Bit
PREPARATION STEPS
1. Disconnect the negative terminal on the battery. Park the vehicle on level ground and set the emergency brake.
2. We recommend reading through the installation instructions in whole before performing the work.
3. You will need the following tools:
a. 13mm Socket
b. 14mm Socket
c. Ratchet
d. 3/4” Socket and Wrench
e. Grinding Wheel
f. 11/32” Drill Bit
4. Included in Kit:
a. 6 – 1/2”-13 x 1 1/2” Hex Head Bolts
b. 12 – 1/2” SAE Flat Washers
c. 6 – 1/2”-13 Nylon Lock Nuts
d. 1 – Trailer Plug Relocation Bracket
e. 2 – 3/8-16 Hex Thread Cutting Bolts
REMOVAL INSTRUCTIONS
1. Remove the license plate light sockets from their housings.
2. Remove the license plate light housings from the bumper by gently pulling them outwards.
3. Unplug the electrical connector for your trailer/towing lights. Remove the trailer light plug by pushing in the tabs on the back of the assembly and pushing the assembly out of the front of the bumper.
4. Remove the spare tire access lock, if equipped, by turning the key to the unlocked position and pulling the assembly outwards.
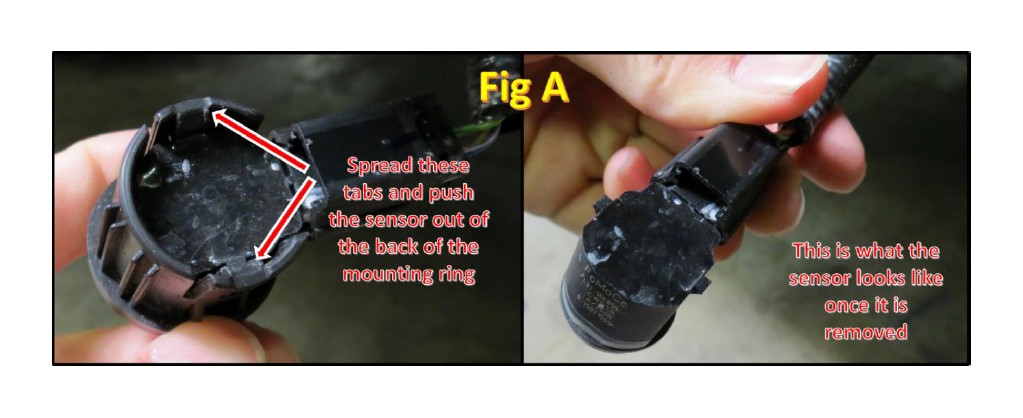
5. If equipped with parking sensors, remove them by spreading the two tabs on the rear of the outer ring and pushing the sensor out of the backside of those rings. Refer to Fig A.
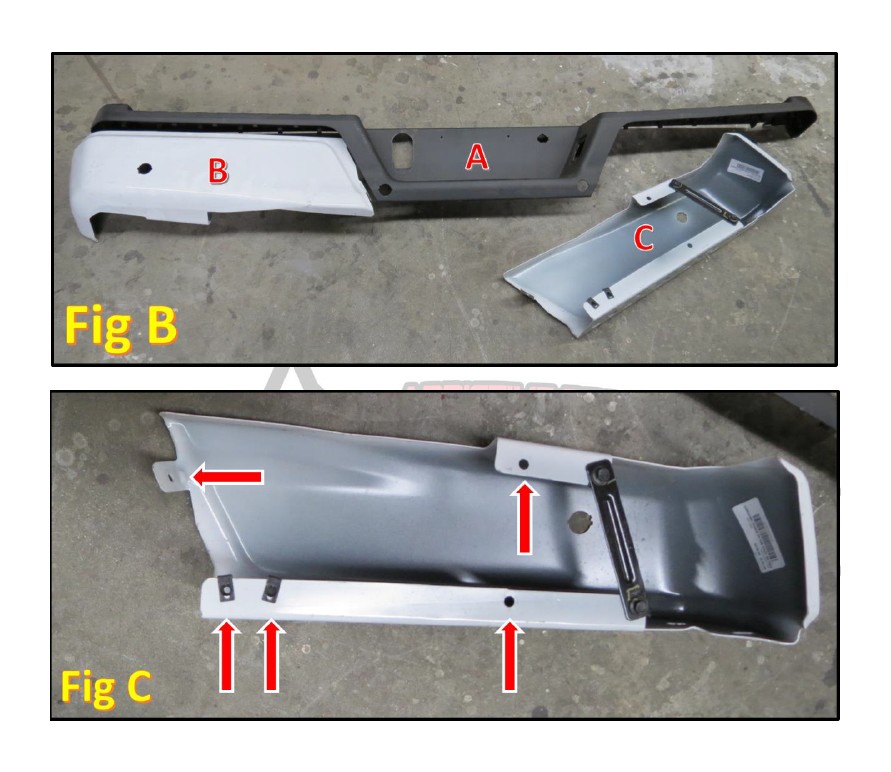
6. Pull the black plastic piece off of the top of the rear bumper. There are no tools necessary for this step, it should pull off by hand. This part has been labeled as “A” in Fig B.
7. Next, remove the 13mm bolts (x10) holding the two metal portions of the bumper to the frame. These portions have been labeled as “B” and “C” in Fig B. Fig C points out the locations of the bolts that hold them on (there are 5 bolts per piece).
8. Remove the parking sensor outer rings by pushing the two tabs on the back of the ring in and pushing the ring out of the front of the bumper.
9. You are now ready to start the installation of your new A.D.D. Rear bumper.
INSTALLATION INSTRUCTIONS
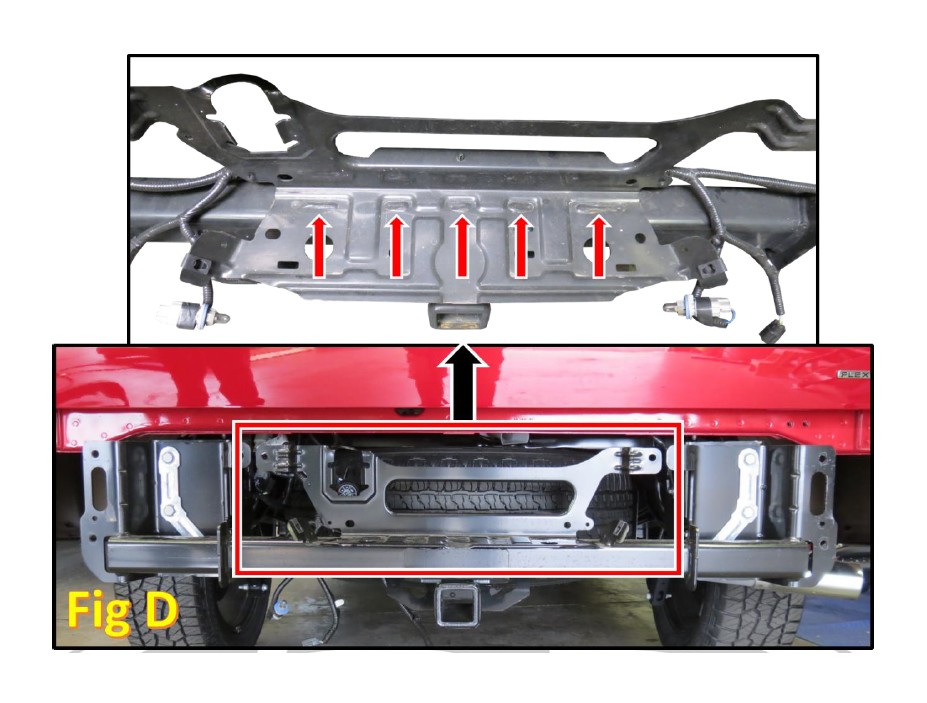
1. Remove the OEM structure that sits behind the bumper.
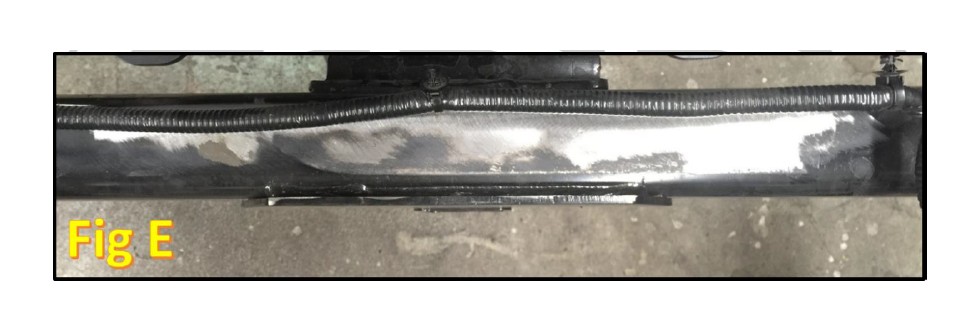
a. Grind the 5 welds on the bottom portion of the structure. Refer to Fig D.
b. When you are done, the frame should look like it does in Fig E.
c. Paint over any part of the frame with bare metal showing. It is OK to get paint on parts of the frame that are already painted as long as all of the bare metal gets covered.
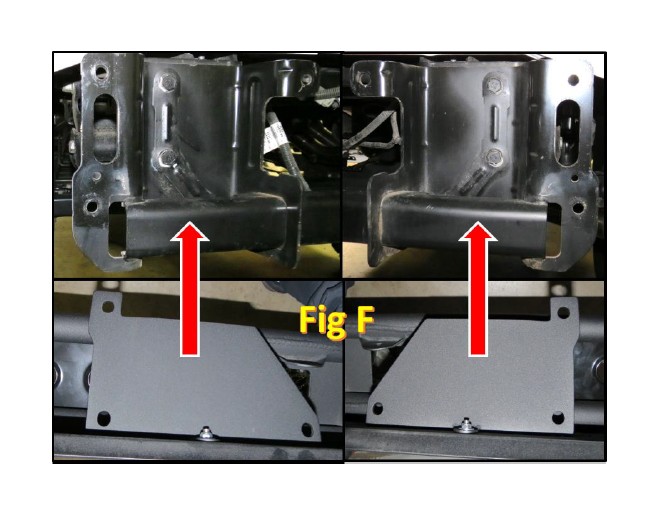
2. Line the 6 mounting holes on the back side of your A.D.D. Venom Rear Bumper with the 6 mounting holes on the rear of your truck frame. Refer to Fig F.
3. Use the supplied 1/2”x1 1/2” Bolts (x6), 1/2” Washers (x12), and 1/2” Locking Nuts (x6) to secure the bumper to the frame mounts. Leave all bolts finger tight.
4. Align the bumper so that it sits straight in relation to the bottom of the tailgate. Also make sure it is aligned left to right. Torque the mounting bolts to 70 foot pounds.
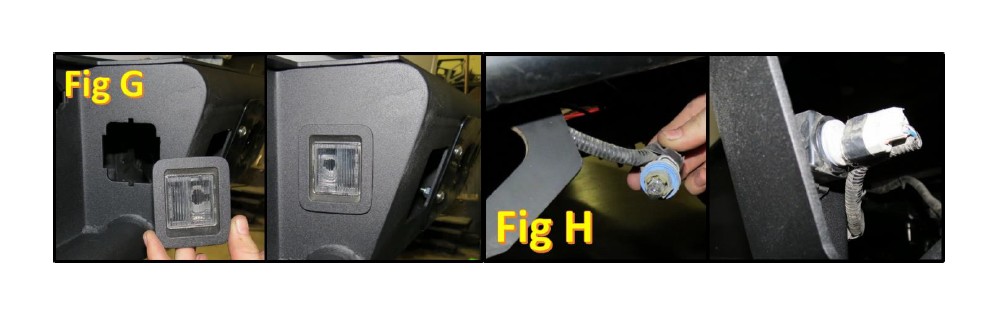
5. Install the license plate light fixtures onto your bumper by pushing them into their mounting holes. Refer to Fig G.
6. Connect the license plate light sockets to the housings. Refer to Fig H.
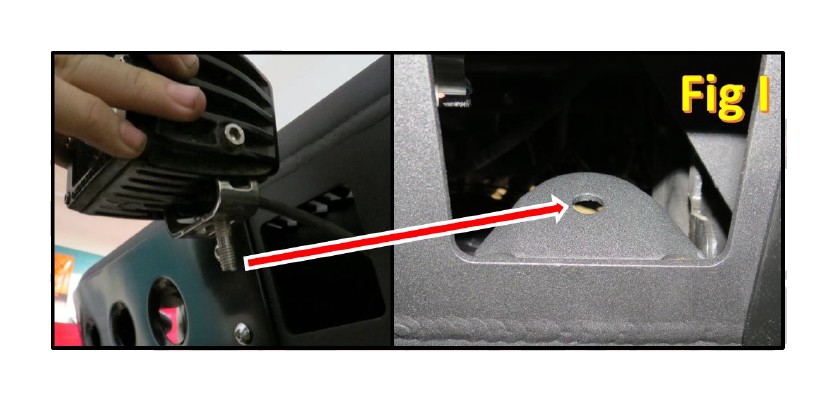
7. If you have lights for your bumper, now is a good time to install them. Refer to Fig I
a. Fit the threaded post on the bottom of the light into the mounting hole
b. Tighten the nut to the light manufacturer’s specification
c. To wire the lights, please follow the light manufacturer’s instructions
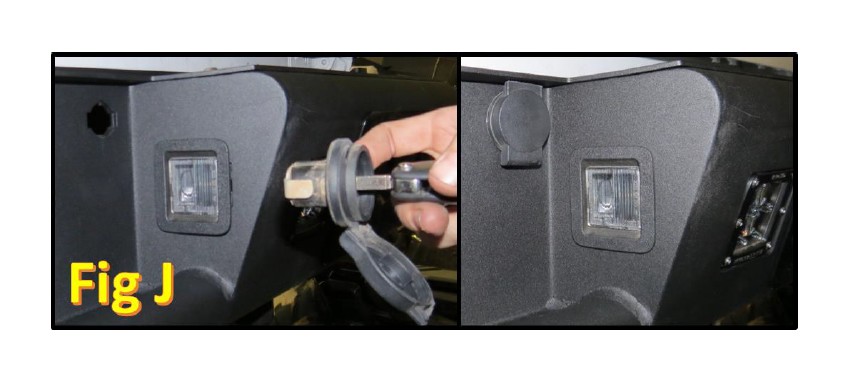
8. Install the spare tire access lock by turning the key to the unlocked position, pushing the lock into its mounting hole, turning the key to the locked position, and removing the key. Refer to Fig J.
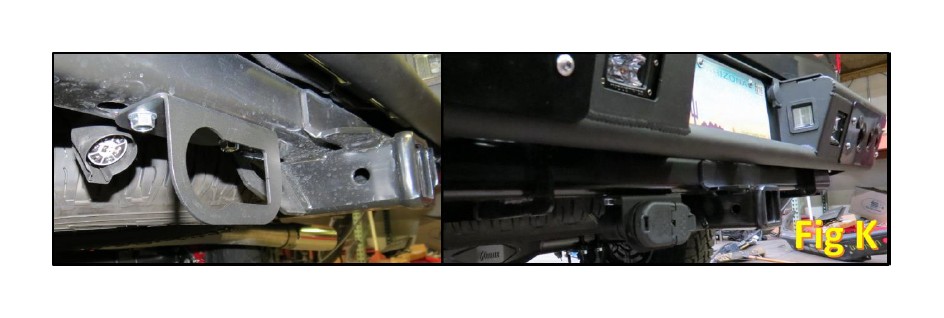
9. Install the trailer plug relocation bracket.
a. Choose a spot to mount the bracket. We chose to the left of the hitch. Refer to Fig K.
b. Using the adapter as a template, drill 2 holes with an 11/32” bit.
c. Install the supplied 3/8”-16 Thread Cutting Bolts (x2).
d. Push the trailer plug into the relocation bracket and connect the electrical connector.
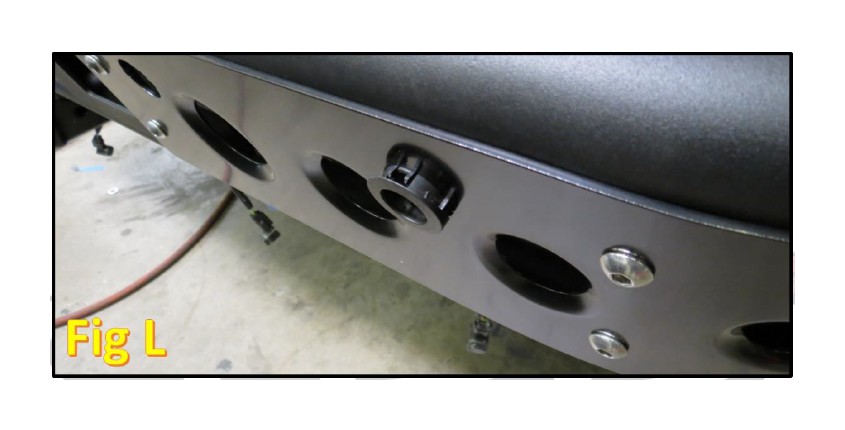
10. Install the parking sensors.
a. Push the outer mounting rings into the holes cut into the bumper. Refer to Fig L.
b. Push the sensors into the outer ring from the back.
11. Stand back and enjoy your A.D.D. Venom Rear Bumper.
12. Check and re-tighten if needed, all mounting bolts after 100 miles and periodically

thereafter.