 FREE 1 to 3-Day Delivery on Orders $149+ Details
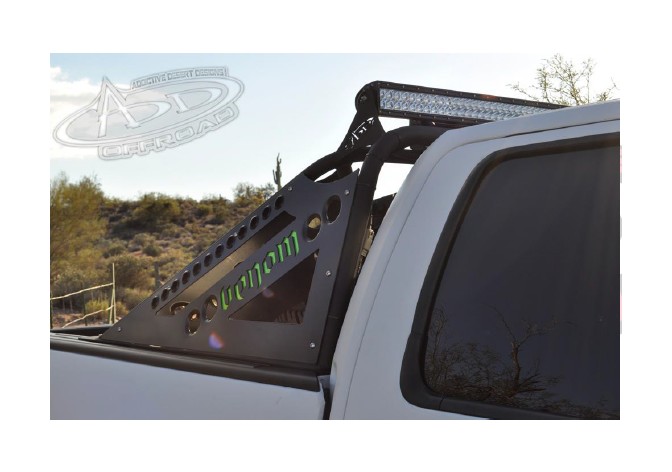
How to Install Addictive Desert Designs Venom Chase Rack (04-17 All) on your Ford F-150
Tools Required
- 90’ drill
- ½” drill bit
- Ratchet
- ¾” Socket
- ¾” Wrench
- Sharpie
- Utility knife
PREPARATION STEPS
1. Disconnect the negative terminal on the battery. With the vehicle on level ground and the emergency brake set.
2. You will need the following tools:
a. 90’ drill
b. ½” drill bit
c. Ratchet
d. ¾” Socket
e. ¾” Wrench
f. Sharpie
g. Utility knife
3. Hardware Included:
a. 6– ½” x 1 ½” Bolts
b. 6 – ½” Nuts
c. 12 – ½” Flat washers
INSTALLATION INSTRUCTIONS
1. Place Venom Chase Rack into position on bed cap. Align front edge of flat channel to the plastic cover piece as shown.
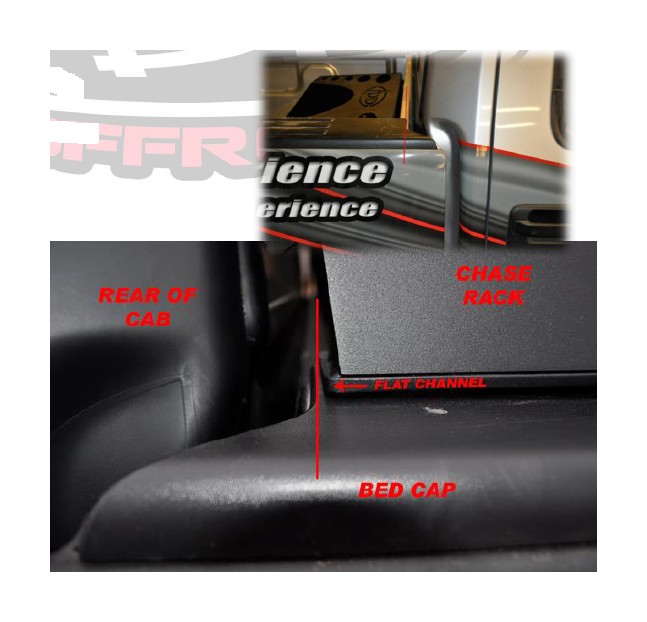
2. Mark the 6 hole locations with sharpie and move the chase rack out of the away.
3. Drill the 6 marked holes with the ½” drill bit and drill. Clean of any burrs in the plastic with utility knife.
***If you purchased lights that fit into the Chase Rack, now is a good time to do the install. ****
4. Fit the Chase Rack onto the truck and attach using the supplied ½” x 1 ½” Bolts (6 ea.), ½” Nuts (6 ea.) and ½” Flat Washers (12 ea.). Leave finger tight until all of the bolts are installed, then tighten to 70 ft./lbs..
5. Step back and enjoy your new A.D.D. Venom Chase Rack.
6. Check, and re-tighten if needed, all mounting bolts after 100 miles and periodically thereafter.

