FREE 1 to 3-Day Delivery on Orders $149+ Details
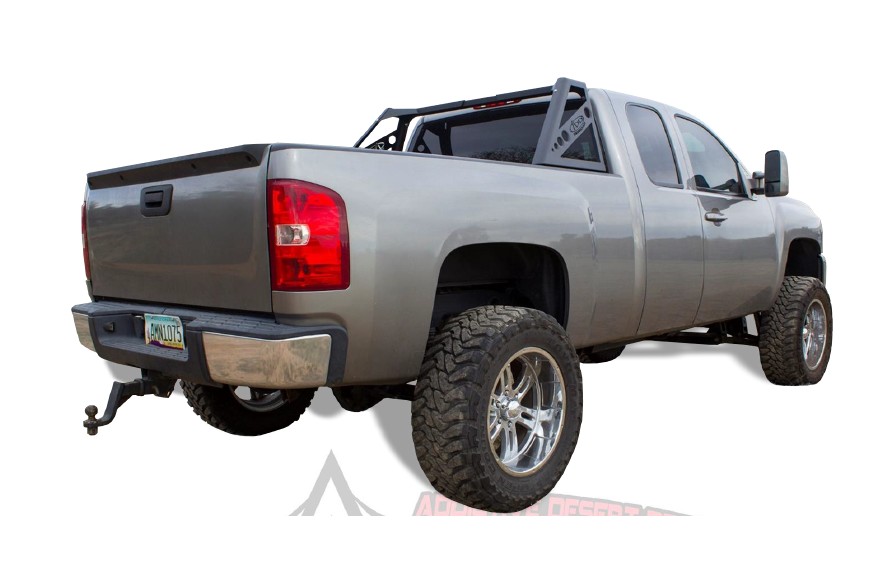
How to Install Addictive Desert Designs Style Rax Chase Rack (07-17 Silverado 1500) on your Chevy Silverado
Installation Time
1 hours
Tools Required
- 3/4” Socket & Wrench
- 7/32” Allen Wrench or Allen Key Socket
- 9/16” Socket or Wrench
- Ratchet
- 1/2” Drill Bit
- Drill
- Sharpie
PREPARATION
1. Disconnect the negative terminal on the battery. Park the vehicle on level ground and set the emergency brake.
2. We recommend reading through the installation instructions in whole before performing the work.
3. Estimated Installation Time: 1 Hour
4. You will need the following tools:
a. 3/4” Socket & Wrench
b. 7/32” Allen Wrench or Allen Key Socket
c. 9/16” Socket or Wrench
d. Ratchet
e. 1/2” Drill Bit
f. Drill
g. Sharpie
Note: this installation requires 2 people for best results
5. Included in Kit:
8 – Hex Head Bolts – 1/2”-13 x 1 1/2”
16 – Flat Washers – 1/2”
8 – Nylon Locking Nuts – 1/2”-13
4 – Carriage Bolts – 1/2”-13 x 1”
14 – Button Head Bolts – 3/8”-16 x 3/4”
14 – Flat Washers – 3/8”
14 – Nylon Locking Nuts – 3/8”-16
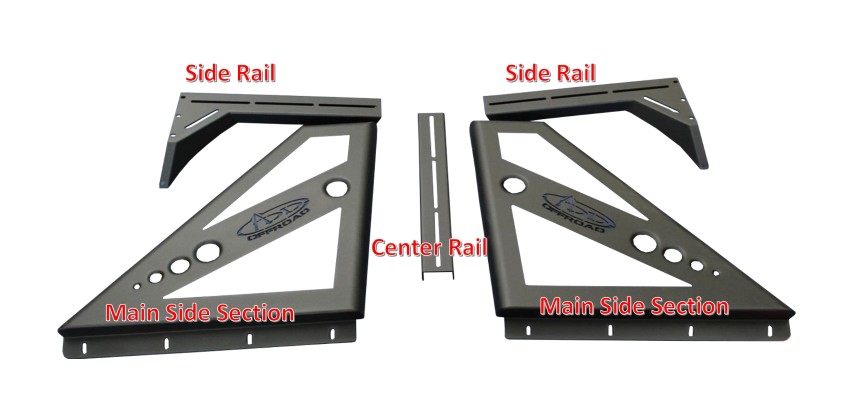
2 – Main Side Sections
2 – Side Rails
1 – Center Rail
INSTALLATION
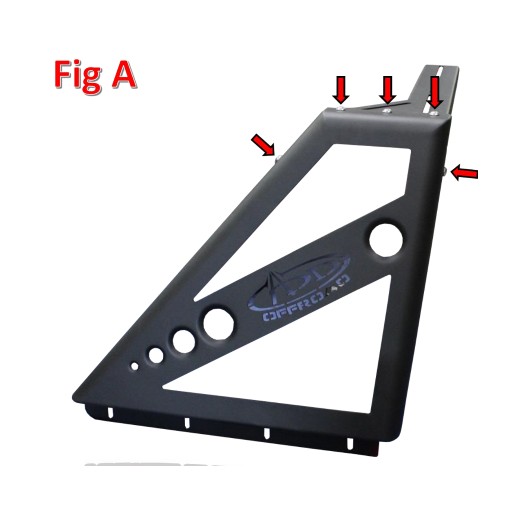
1. Attach one of the Side Rails to the corresponding Main Side Section. Line the mounting holes up, then use the supplied 3/8” Bolts (x5), 3/8” Washers (x5), and 3/8” Nuts (x5) to secure it. Leave bolts finger tight until they are all installed, then go back and tighten them to 30 foot pounds. (Fig A)
2. Repeat Step 1 with the other Side Rail/Main Side Section.
3. Next, Install the two assembled Side Section/Side Rails on the vehicle. If you have a vehicle with slide rail system in your truck bed, Skip to Step 4.
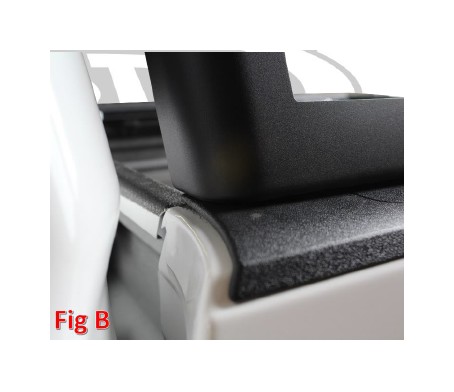
a. We try to line the front of the StyleRax up with the front lip of the plastic bed rail cover. (Fig B)
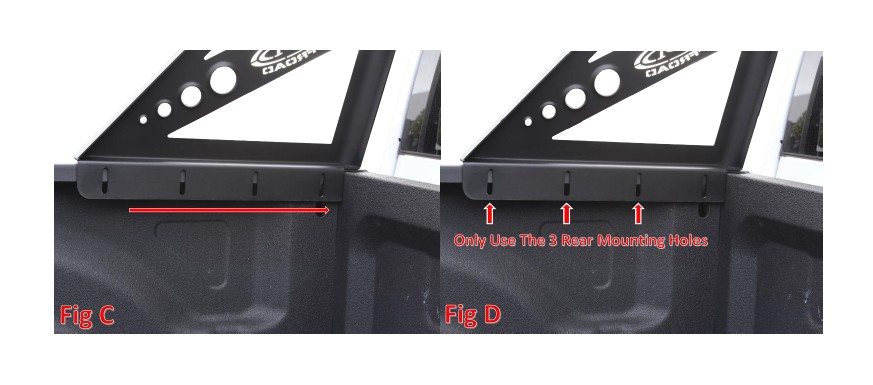
b. If the StyleRax will not slide forward enough to reach the front lip of your plastic bed rail cover, just mount it as far forward as it will slide. (Fig C)
c. If you cannot access the backside of your bed lip where the first slot sits, only use the rear three mounting holes. (Fig D)
d. Once you have the sides set in place, use a sharpie to mark the locations of the mounting holes.
e. Using a 1/2” Drill Bit, Drill holes in the newly marked locations.
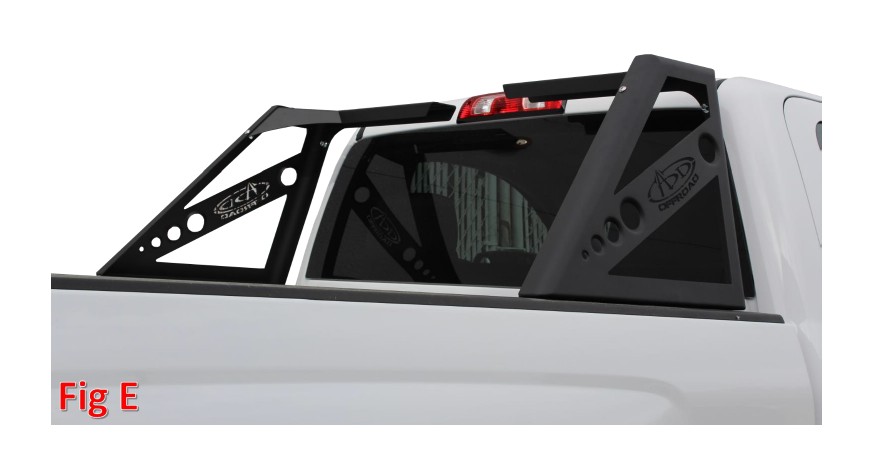
f. Secure the sides to the truck using the supplied 1/2” Bolts (x8), 1/2” Washers (x16), and 1/2” Nuts (x8). Leave these finger tight for now. Your truck should now look like Fig E.
4. IF YOUR VEHICLE DOES NOT HAVE A SLIDE RAIL SYSTEM IN THE TRUCK BED, PLEASE SKIP THIS STEP.
a. For a slide rail system, pull the end caps off of the rail and remove everything that’s in the system.
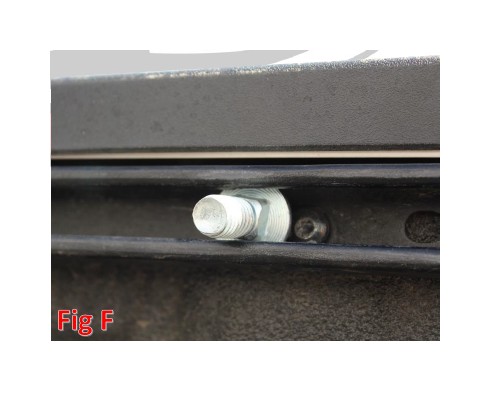
b. Slide the supplied 1/2” Carriage Bolts (x4) into the rail. There are 2 per side. (Fig F)
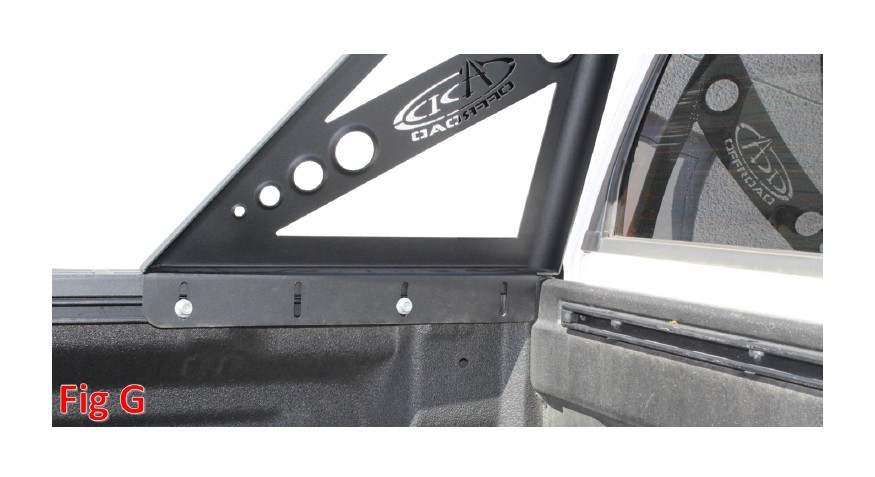
c. Line up the mounting holes on the StyleRax with the bolts, then install the supplied 1/2” Washers (x4) and 1/2” Nylon Nuts (x4). Leave these finger tight for now. (Fig G)
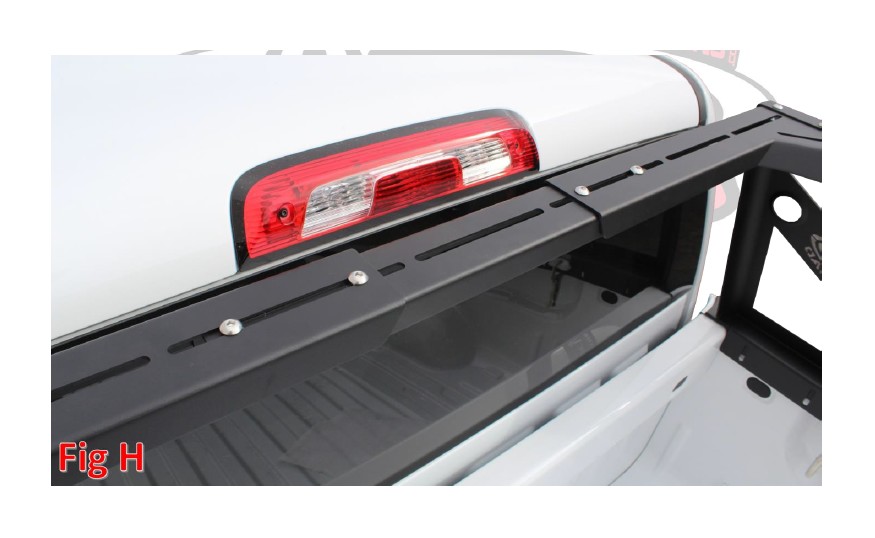
5. Slide the Center Rail in place. Use the supplied 3/8” Bolts (x4), 3/8” Washers (x4), and 3/8” Nuts (x4) to hold it in place. Leave bolts loose until they are all installed, then go back and tighten them to 30 foot pounds. (Fig H)
6. Go back and tighten the 1/2” Mounting Bolts (Installed in either Step 3f or 4c) to 30 foot pounds.
7. Stand back and enjoy your new ADD StyleRax.
8. Check and re-tighten if needed, all mounting bolts after 100 miles and periodically thereafter.