FREE 1 to 3-Day Delivery on Orders $149+ Details
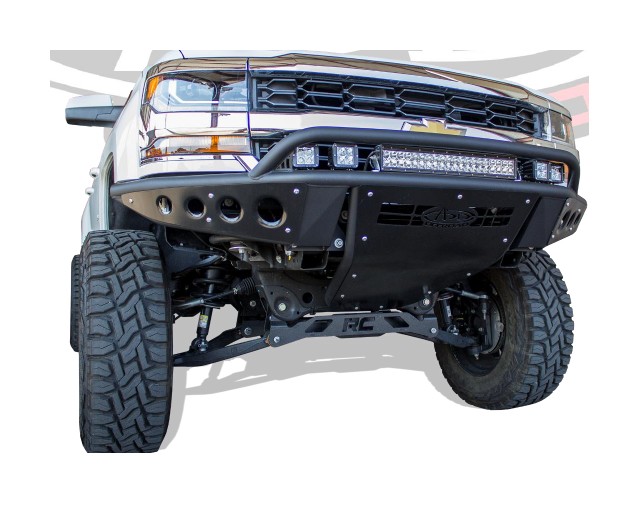
How to Install Addictive Desert Designs Stealth R Front Bumper (14-17 All) on your Chevy Silverado
Installation Time
2 hours
Tools Required
- Ratchet
- 10mm Socket
- 15mm Socket
- 18mm Socket
- Cutoff Wheel
- Grinding Wheel
- Black Paint
PREPARATION
1. Disconnect the negative terminal on the battery. Park the vehicle on level ground and set the emergency brake.
2. We recommend reading through the installation instructions in whole before performing the work.
3. Estimated Installation Time: 2 Hours
4. You will need the following tools:
a. Ratchet
b. 10mm Socket
c. 15mm Socket
d. 18mm Socket
e. Cutoff Wheel
f. Grinding Wheel
g. Black Paint
Note: this installation requires 2 people for best results
5. Included in Kit:
Reuse Stock Hardware
REMOVAL
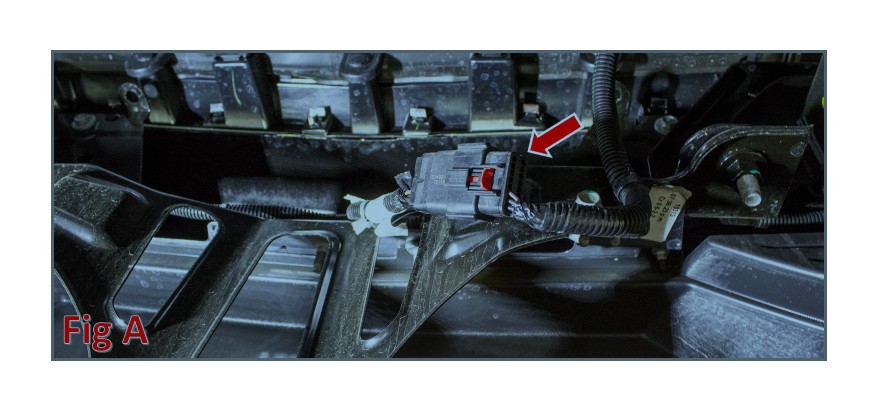
1. Underneath the truck, unplug the main fog light harness connector. (Fig A)
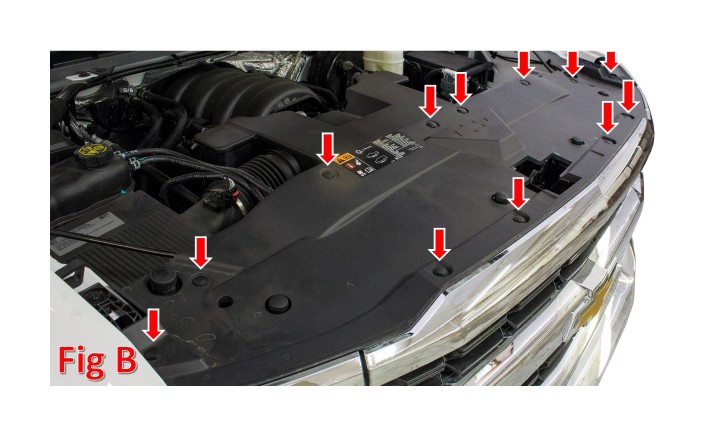
2. Under the hood of your truck, remove the plastic clips (x12) that hold on the radiator cover. Once the clips are gone, remove the radiator cover. Save the plastic clips you remove in this step. (Fig B)
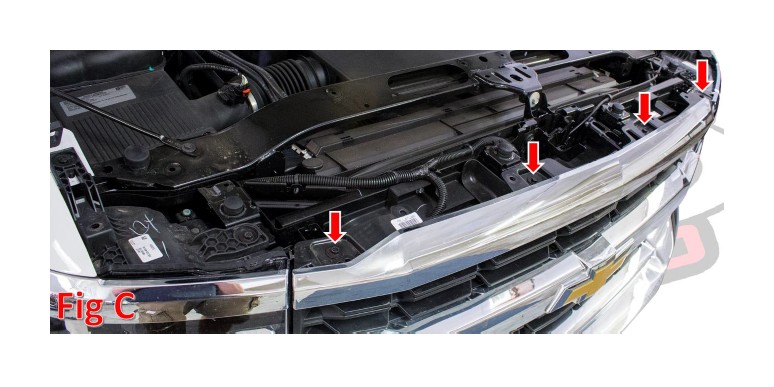
3. Underneath the radiator cover, there are four 10mm bolts that need to be removed. Once these bolts are removed, carefully pull the grill off the vehicle. Save the bolts you remove in this step. (Fig C)
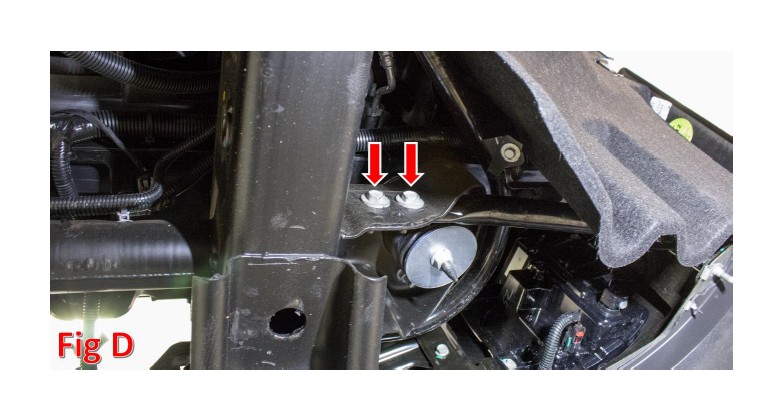
4. Underneath the vehicle, towards the wheel well, you will find the bumper side support bar. Remove the two 15mm bolts holding this bar to the frame. Repeat this step on the other side of the vehicle. (Fig D)
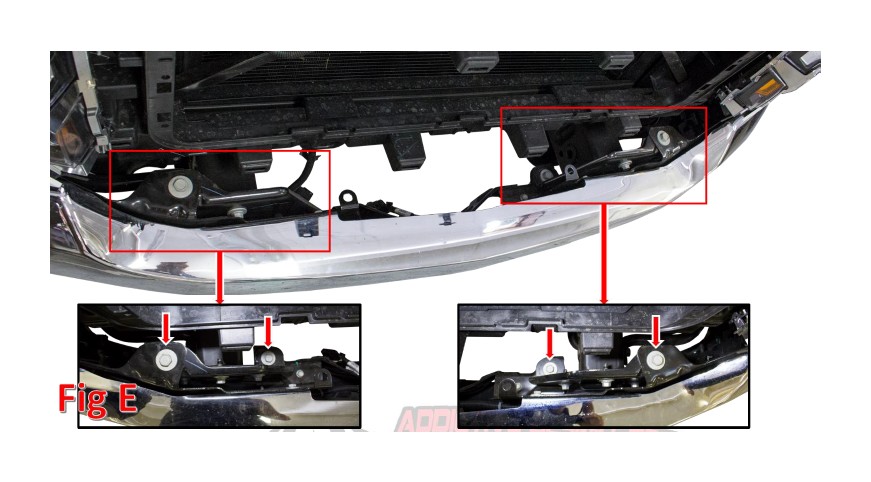
5. There are two 18mm bolts per side that hold the bumper to its mounting bracket. Remove these bolts (x4), then remove the bumper from the vehicle. (Fig E)
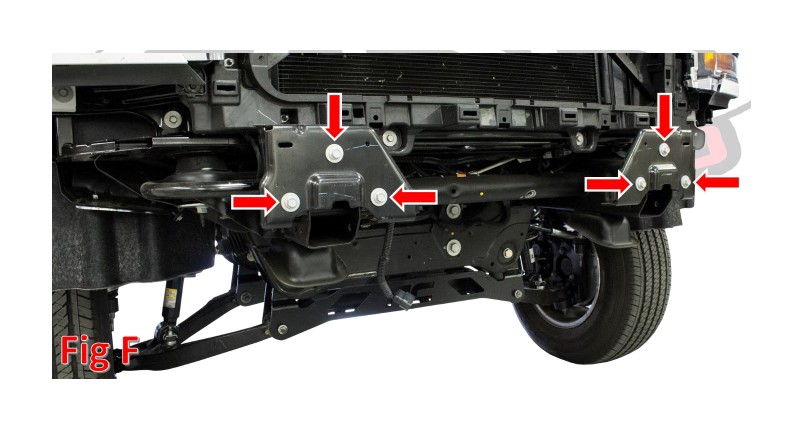
6. Remove the 15mm bolts (x3) that hold each bumper bracket to the frame horns. Save these bolts for reuse. With the bolts removed, take off each bracket.
7. Carefully press your grill back onto the vehicle until you hear it click into place.
8. Reinstall the bolts you removed in Removal Step 3.
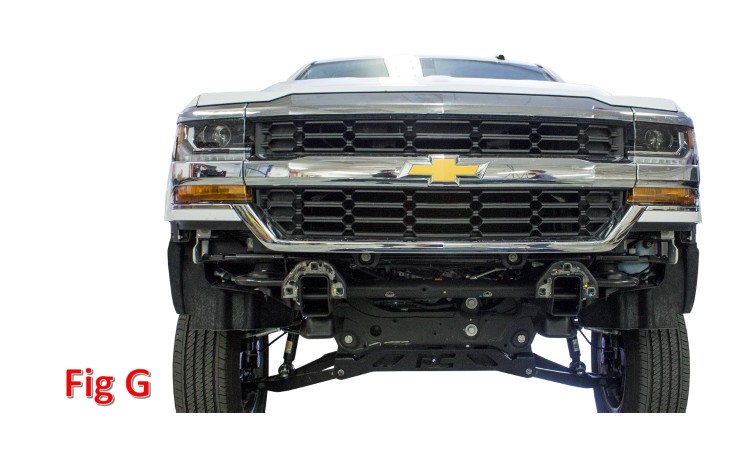
9. Place the radiator cover back in place, then reinstall the plastic clips you removed in Removal Step 2. Your vehicle should now look like the truck in Fig G.
10. Prepare to install your new ADD Stealth R Front Bumper.
INSTALLATION
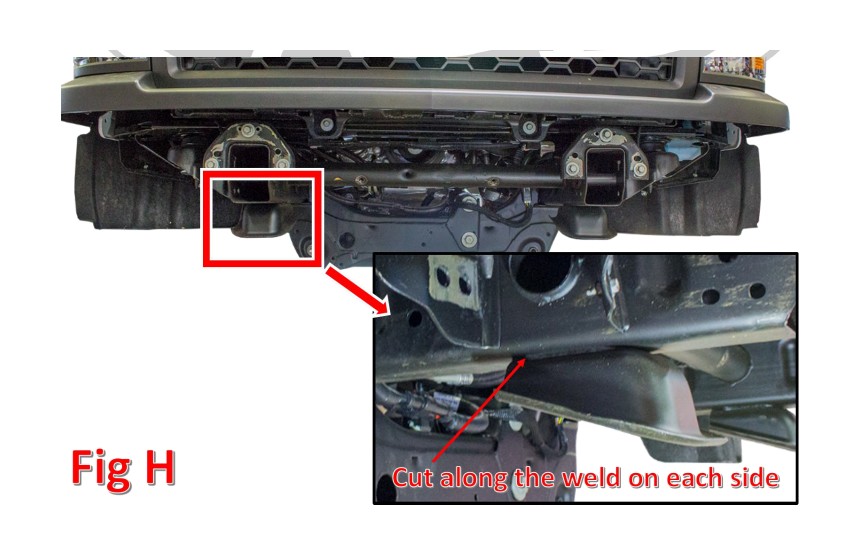
1. Cut off the two bells on your frame, just behind the bumper mounting horns. There are two welds (one along each side) holding on each bell. With a cutoff wheel, cut through those welds. Once you cut through both welds, the bells will come off. Make sure to grind your frame smooth and paint over any exposed metal. (Fig H)
2. If you have any lights to install on your bumper, now is a good time to do so. Please follow the light manufacturer’s installation instructions for wiring and mounting information.
3. Align the mounting holes on your bumper with mounting holes on your vehicle’s frame horns. Then, secure the bumper to your truck by loosely installing the bolts (x6) that you saved in Removal Step 6. (Fig I)
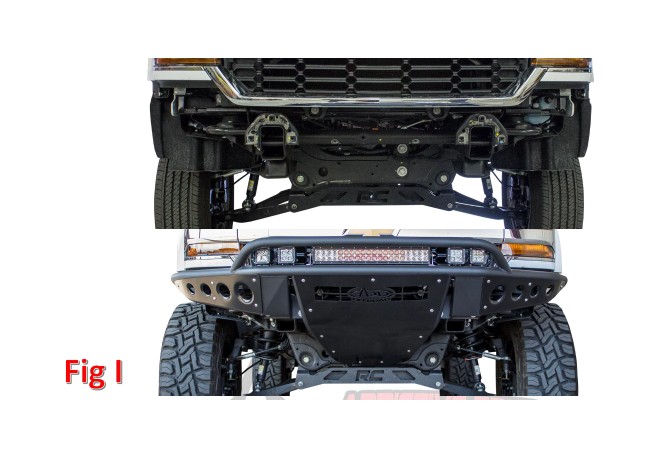
4. Align your bumper so that it sits straight in relation to your grille/valance. Then, tighten the mounting bolts (x6) to the factory torque specification.
5. Stand back and enjoy your new ADD Stealth R Front Bumper.
6. Check and re-tighten if needed, all mounting bolts after 100 miles and periodically thereafter.