FREE 1 to 3-Day Delivery on Orders $149+ Details
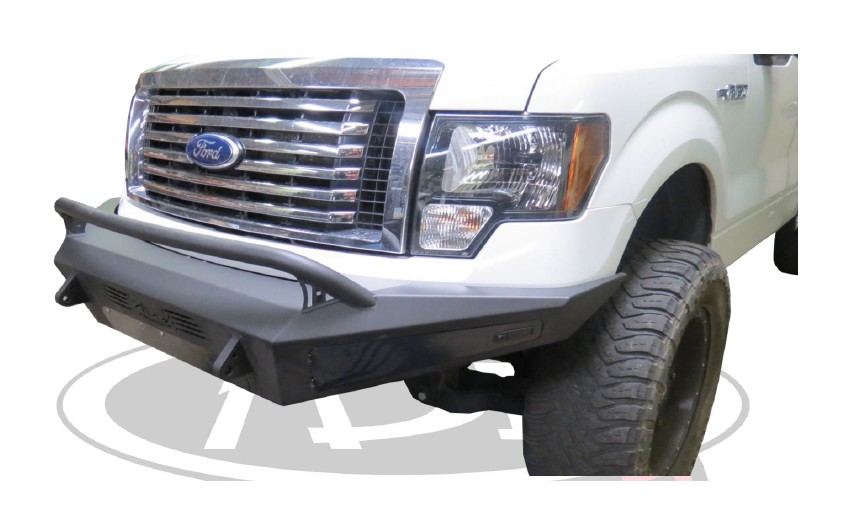
How to Install Addictive Desert Designs HoneyBadger Front Bumper w/ Intercooler Vents (09-14 All, Excluding Raptor) on your Ford F-150
Tools Required
- 3/4” Wrench and Socket
- 21mm Socket
- 15mm Socket
- 10mm Socket
- 1 1/16” Socket
- 13/16” Wrench
- 7/32” Allen Wrench or Allen Key Socket
- Ratchet
- Drill
- 1/2” Drill Bit
PREPARATION
1. Disconnect the negative terminal on the battery. Park the vehicle on level ground and set the emergency brake.
2. We recommend reading through the installation instructions in whole before performing the work.
3. You will need the following tools:
a. 3/4” Wrench and Socket
b. 21mm Socket
c. 15mm Socket
d. 10mm Socket
e. 1 1/16” Socket
f. 13/16” Wrench
g. 7/32” Allen Wrench or Allen Key Socket
h. Ratchet
i. Drill
j. 1/2” Drill Bit
Note: this installation requires 2 people for best results
4. Included in Kit:
10 – Hex Head Bolts – 1/2”-13 x 1 1/2”
20 – Flat Washers – 1/2”
10 – Nylon Locking Nuts – 1/2”-13
2 – Button Head Bolts – 3/8”-16 x 1”
2 – Flat Washers – 3/8”
2 – U-Nuts – 3/8”-16
1 – Non-Lifted Lower Bracket
1 – Lifted Lower Bracket
REMOVAL
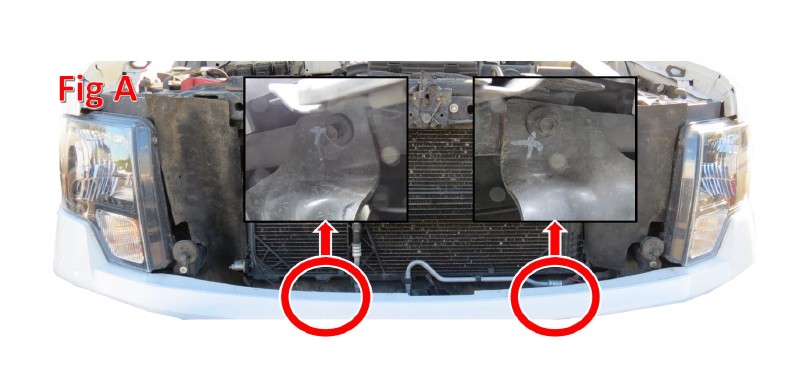
1. With the hood popped, come from the top and remove the two 10mm bolts that are on the backside of the top (painted) part of the bumper. (Fig A)
2. From the bottom, remove any fog light connectors if your vehicle is equipped with fog lights.
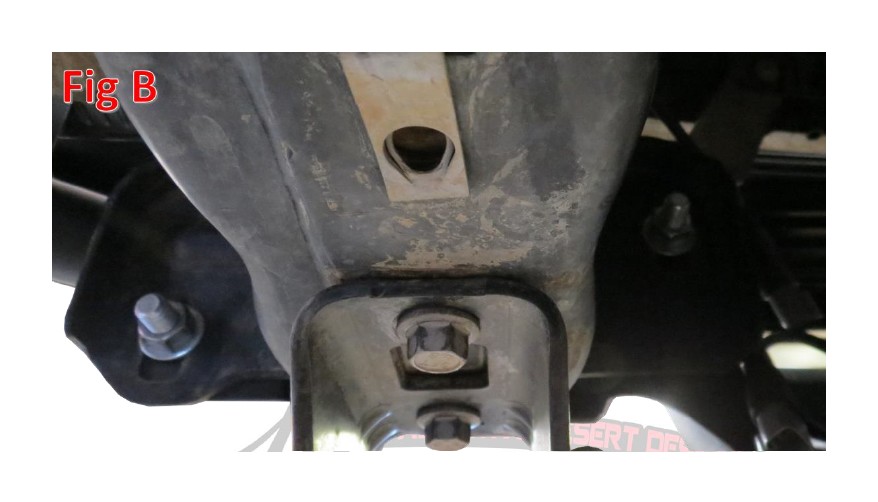
3. From the bottom, remove the four 21mm nuts (2 per side) on the back side of the mounts holding the bumper to the frame horns. (Fig B)
4. Your bumper is now ready to be removed, and you are ready to install your new A.D.D. HoneyBadger Front Bumper.
INSTALLATION
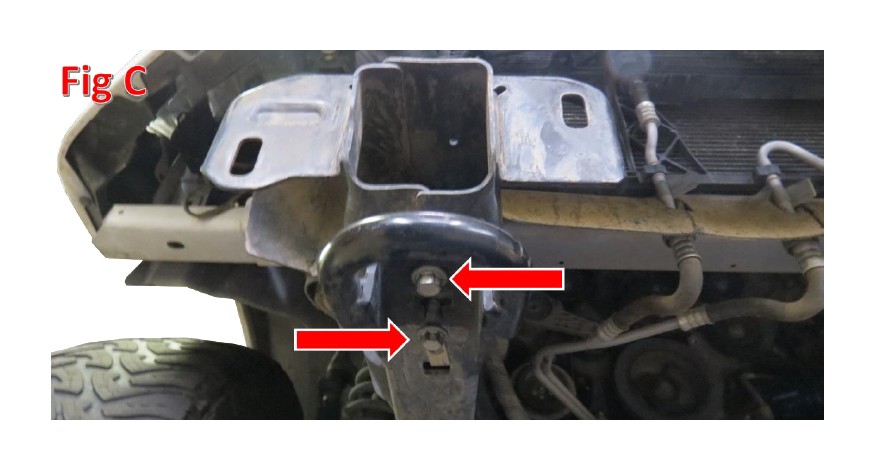
1. Remove the four 15mm bolts (2 per side) that hold on the OEM tow hooks. (Fig C)
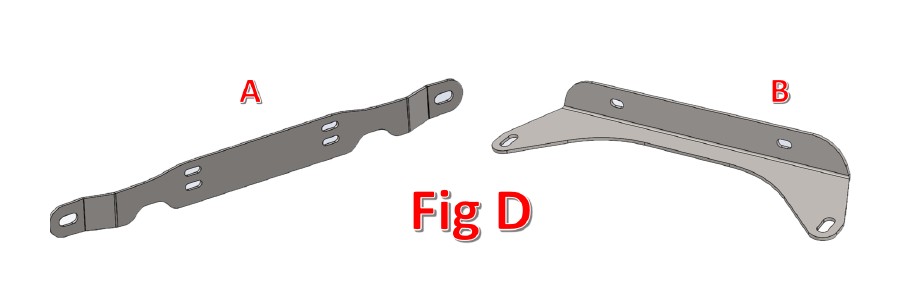
2. Choose which lower bracket to install.
a. There are two options for lower brackets; lifted and non-lifted.
b. If your vehicle has a drop bracket lift, you must use the mount labeled as “A” in Fig D. If your vehicle does not have a drop bracket lift, then use the mount labeled as “B” in Fig D.
3. If your vehicle has a drop bracket lift, please follow this step, otherwise, skip to Step 4.
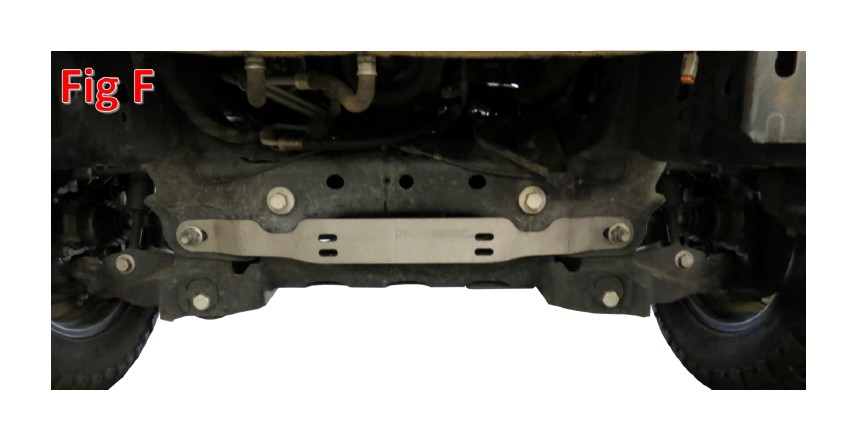
a. Unbolt the top two lift bracket bolts. (Fig E)

b. Bolt the lower bracket to the frame using the bolts you just removed in Step 3b. (Fig F)
4. If your vehicle does not have a drop bracket lift, please follow this step.
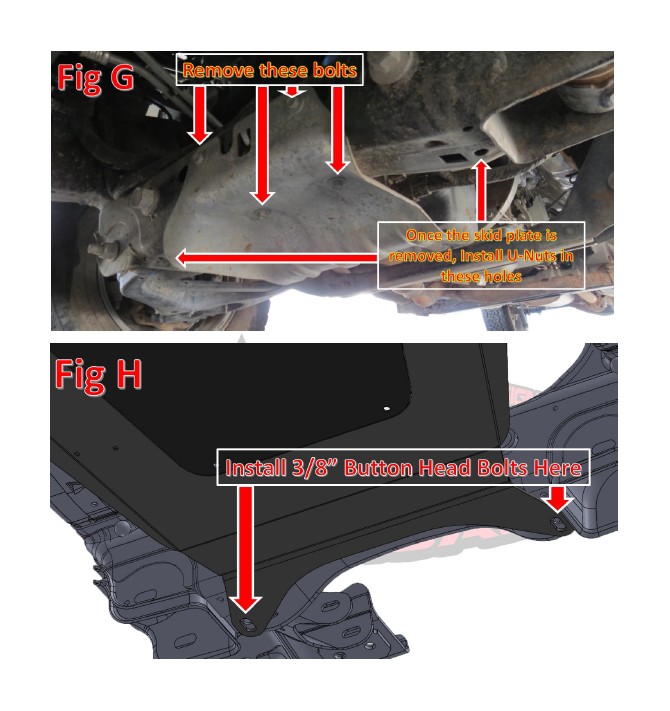
a. Unbolt the OEM skid plate bolts (x4) and remove the skid plate from the vehicle.
b. Install the supplied U-Nuts (x2) into the holes referenced in Fig G.
c. Using the supplied 3/8” Button Head Bolts (x2) and 3/8” Washers (x2), Bolt the bracket referenced in Section “B” of Fig D to the newly installed U-Nuts. (Fig H).
5. If you have any lights to mount to your bumper, now would be a good time to do so. Please follow the light manufacturer’s guide for mounting and wiring information.
6. Mount your new bumper to the vehicle.
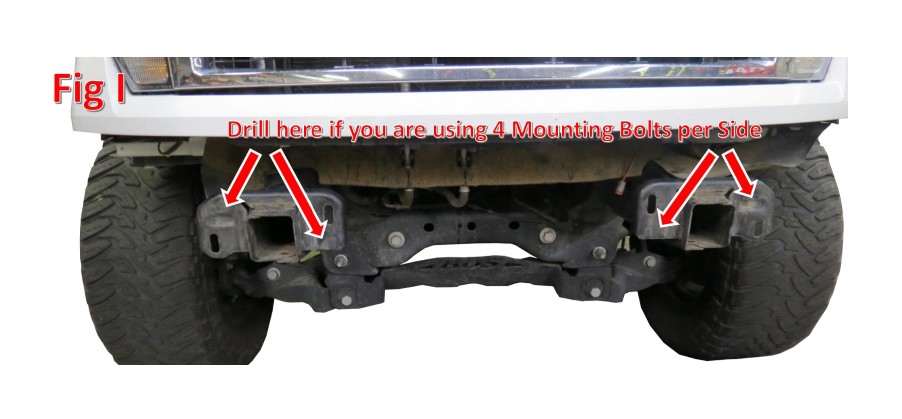
a. If you have the winch option on your bumper, it is highly recommended to drill out the frame horns to accept 4 mounting bolts per side. (Fig I) In order to do this, hold the bumper in place (a second person will come in handy for this step), mark the remaining two holes per side, then drill through the newly marked frame horns with a 1/2” drill bit.
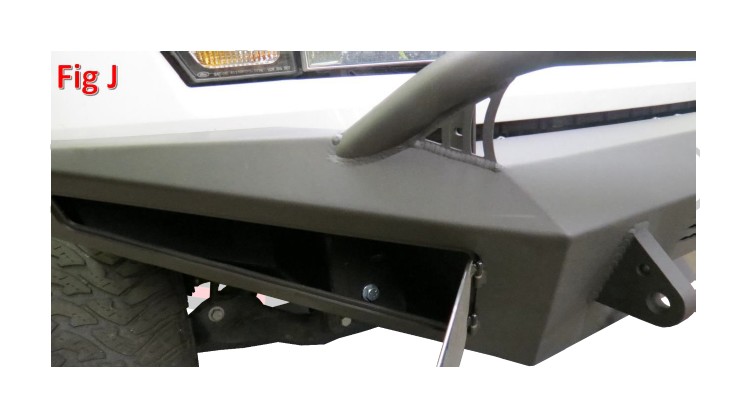
b. Hold the bumper in place and loosely install the supplied 1/2” Bolts (either 4 or 8), 1/2” washers (either 8 or 16), and 1/2” Lock Nuts (either 4 or 8). The outer mounting bolts can be accessed through the toolbox openings. (Fig J)
c. Loosely install the supplied 1/2” bolts (x2), 1/2” Washers (x4), and 1/2” Lock Nuts (x2) on the lower bracket. (Fig K)

d. Line the bumper up with the lower valence that it sits straight and it is centered left to right. Then, go back and tighten all mounting bolts to 70 foot pounds.
7. Stand back and enjoy your A.D.D. HoneyBadger Front Bumper.
8. Check and re-tighten if needed, all mounting bolts after 100 miles and periodically thereafter.