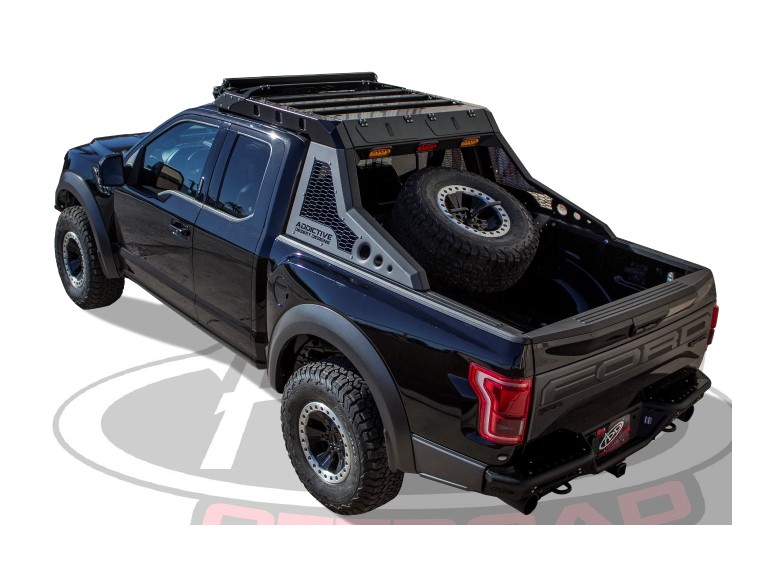
How to Install Addictive Desert Designs HoneyBadger Chase Rack (97-17 Styleside) on your Ford F-150
Installation Time
3 hours
Tools Required
- Ratchet
- 7/32” Allen Wrench or Allen Key Socket
- 9/16” Wrench
- 3/4” Socket & Wrench
- 5/32” Allen Wrench or Allen Key Socket
- 7/16” Wrench
- Drill
- Phillip’s Head Screwdriver
- 1/2” Drill Bit
PREPARATION
1. Disconnect the negative terminal on the battery. Park the vehicle on level ground and set the emergency brake.
2. We recommend reading through the installation instructions in whole before performing the work.
3. Estimated Installation Time: 3 Hours
4. You will need the following tools:
a. Ratchet
b. 7/32” Allen Wrench or Allen Key Socket
c. 9/16” Wrench
d. 3/4” Socket & Wrench
e. 5/32” Allen Wrench or Allen Key Socket
f. 7/16” Wrench
g. Drill
h. 1/2” Drill Bit
i. Phillip’s Head Screwdriver
Note: this installation requires 2 people for best results
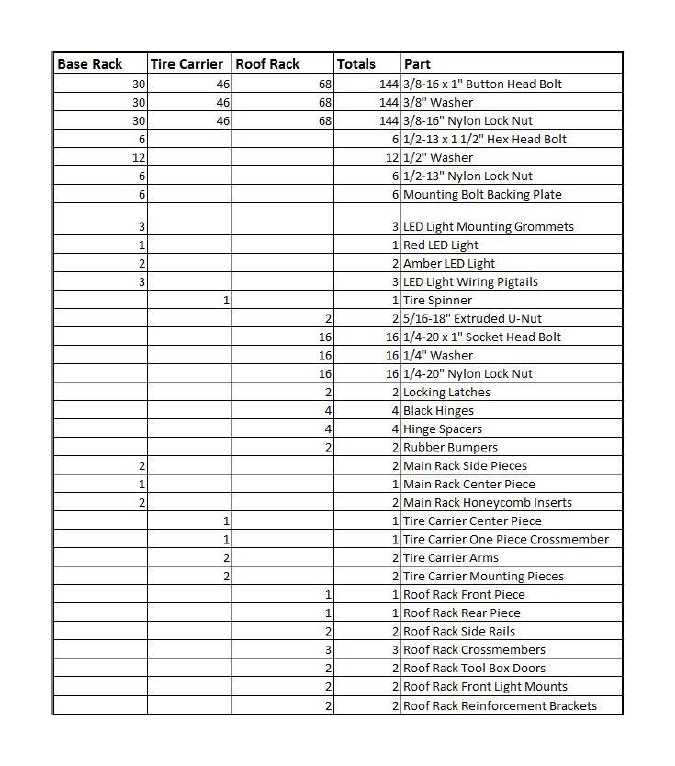
5. Included in Kit:
MAIN RACK ASSEMBLY
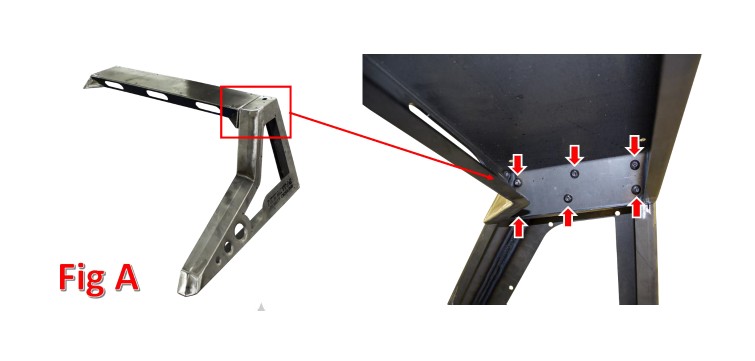
1. Locate one of the main rack side pieces and the main rack center section. Hold these pieces in place, then loosely install the supplied 3/8” Bolts (x6), 3/8” Washers (x6) and 3/8” Lock Nuts (x6). Leave these loose for now. (Fig A)
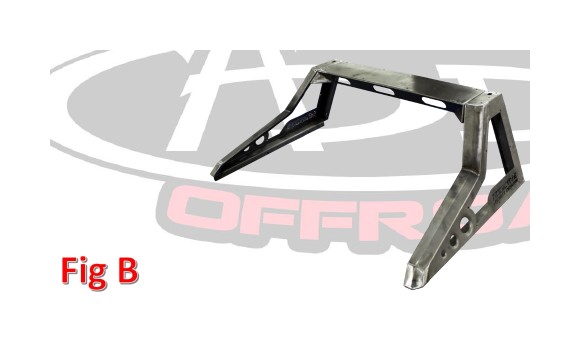
2. Set the remaining side main rack side piece in place. Secure it to the center section with the supplied 3/8” Bolts (x6), 3/8” Washers (x6), and 3/8” Lock Nuts (x6). Go back and tighten all mounting bolts to 20 foot pounds. (Fig B)
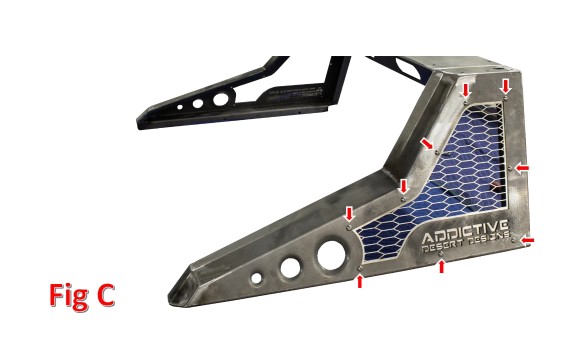
3. Hold one of the honeycomb inserts in place. Secure it with the supplied 3/8” Bolts (x9), 3/8” Washers (x9), and 3/8” Lock Nuts (x9). Once all bolts have been loosely installed, go back and tighten them to 20 foot pounds. Repeat this step on the other side of the rack.
TIRE CARRIER ASSEMBLY
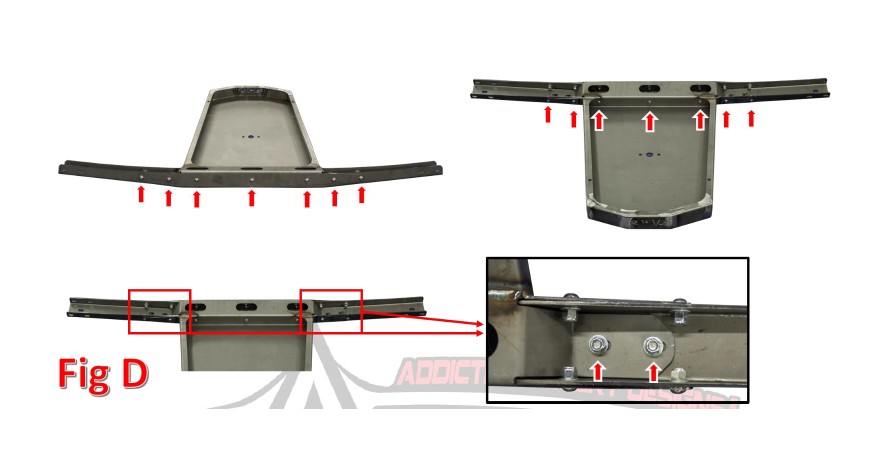
1. Locate the tire carrier center piece and the tire carrier one-piece cross member. Set the cross member in place, then loosely install the supplied 3/8” Bolts (x18), 3/8” Washers (x18), and 3/8” Nuts (x18). (Fig D)
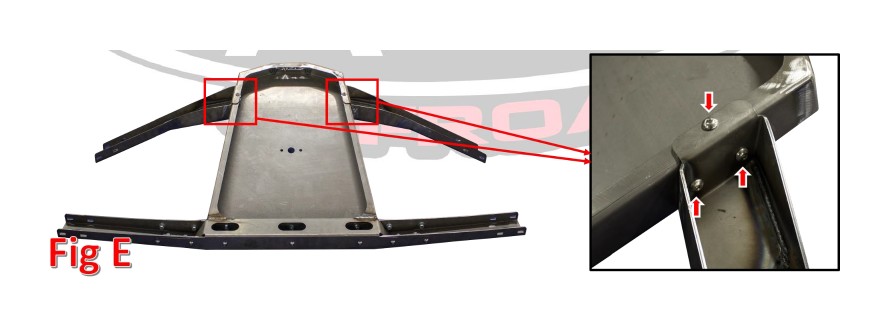
2. Locate the tire carrier arms. Secure the arms in place by loosely installing the supplied 3/8” Bolts (x6), 3/8” Washers (x6), and 3/8” Nuts (x6). Once the arms are installed, go back and tighten all mounting bolts to 20 foot pounds. (Fig E)
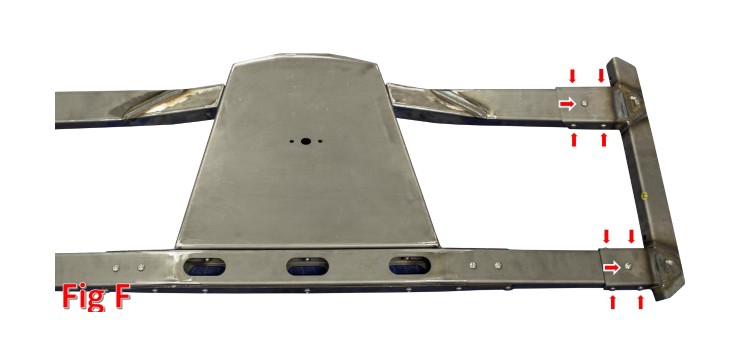
3. Find the one of the tire carrier mounting pieces. Set it in place, then secure it by loosely installing the supplied 3/8” Bolts (x10), 3/8” Washers (x10), and 3/8” Nuts (x10). (Fig F). We do not recommend installing the second mounting piece until the tire carrier portion is being installed on the truck.
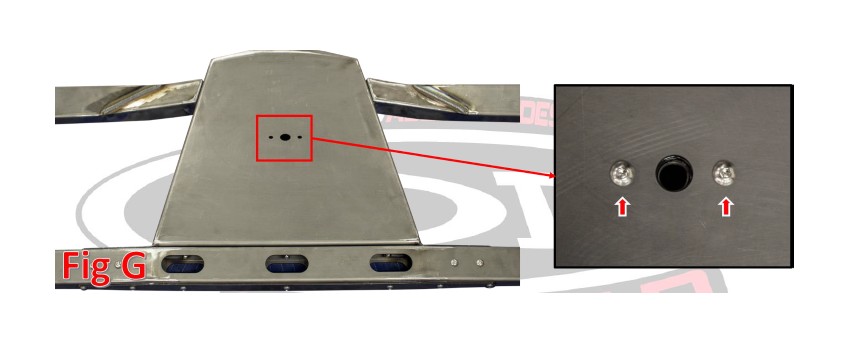
4. Install the receiving end of the tire spinner using the supplied 3/8” Bolts (x2), 3/8” Washers (x2), and 3/8” Nuts (x2). (Fig G) Tighten these bolts to 20 foot pounds.
ROOF RACK ASSEMBLY
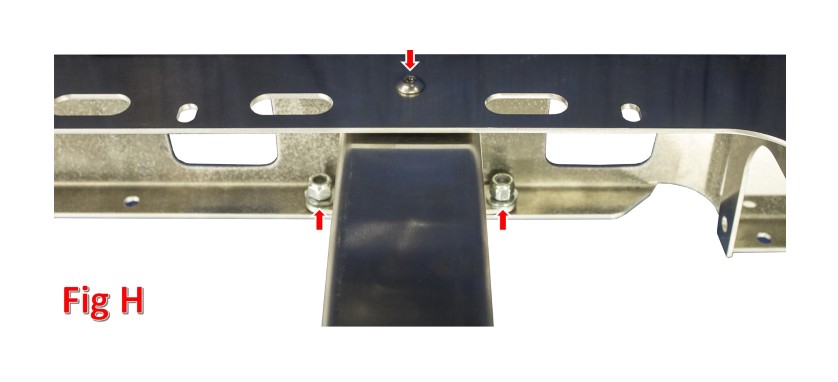
1. Locate one of the roof rack side rails along with one of the roof rack cross members. Set the cross member in place and loosely bolt it to the side rail. (Fig H) Use the supplied 3/8” Bolts (x3), 3/8” Washers (x3), and 3/8” Nuts (x3).
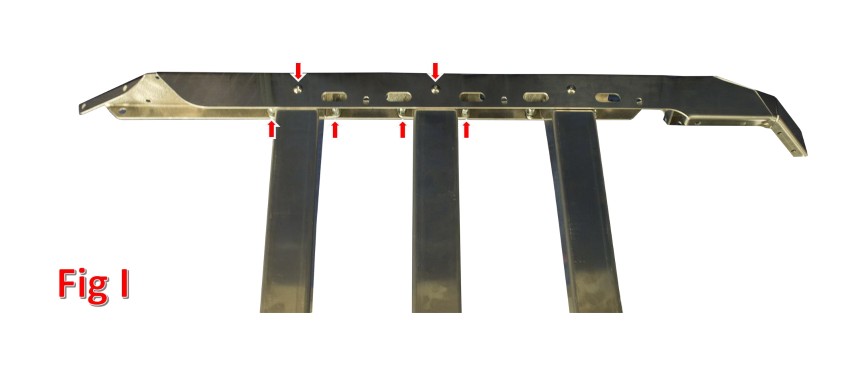
2. Install the other two cross members onto the first side rail. Use the supplied 3/8” Bolts (x6), 3/8” Washers (x6), and 3/8” Nuts (x6). Leave all mounting bolts loose. (Fig I)
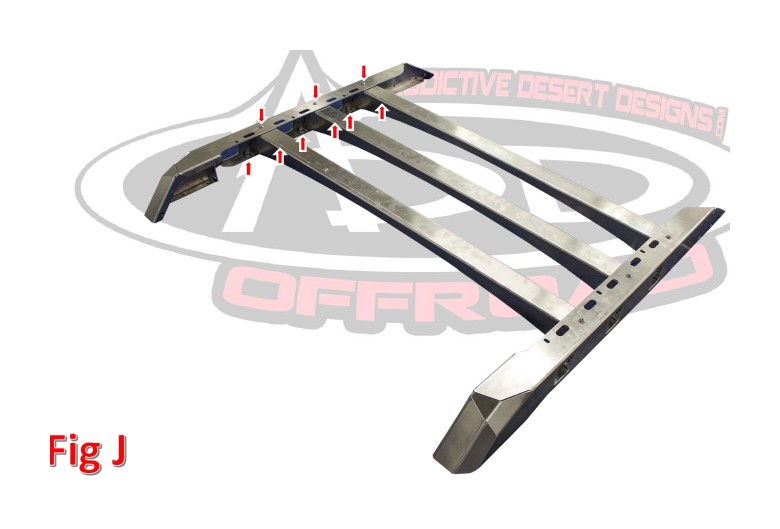
3. Locate the second side rail, then loosely bolt it in place using the supplied 3/8” Bolts (x9), 3/8” Washers (x9), and 3/8” Nuts (x9). (Fig J)
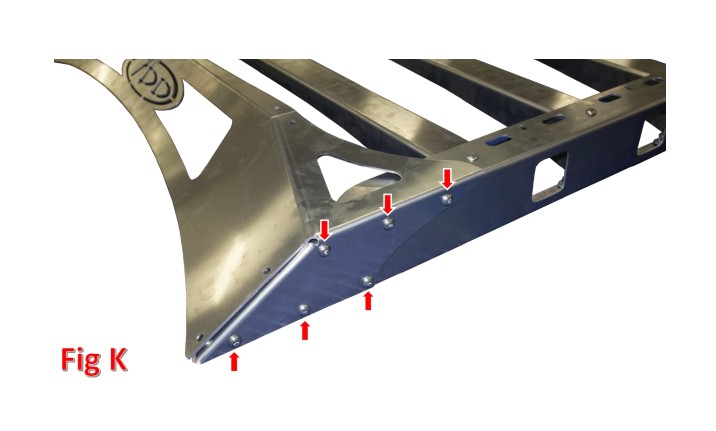
4. Set the roof rack front piece in place. Secure it by loosely installing the supplied 3/8” Bolts (x12), 3/8” Washers (x12), and 3/8” Nuts (x12). (Fig K)
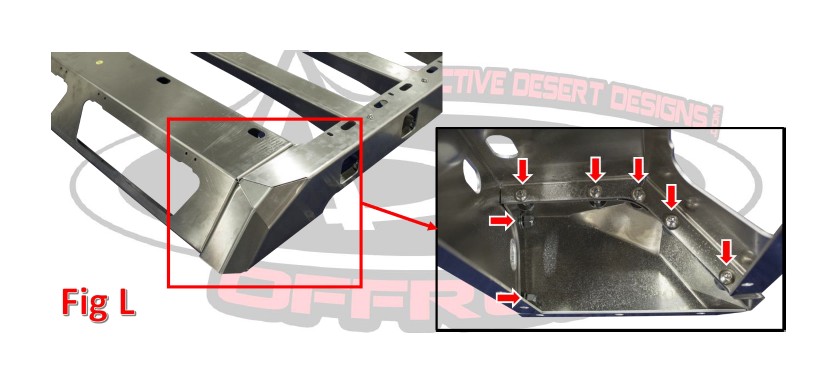
5. Set the roof rack rear piece in place. Then, secure it by loosely installing the supplied 3/8” Bolts (x14), 3/8” Washers (x14), and 3/8” Nuts (x14). (Fig L)
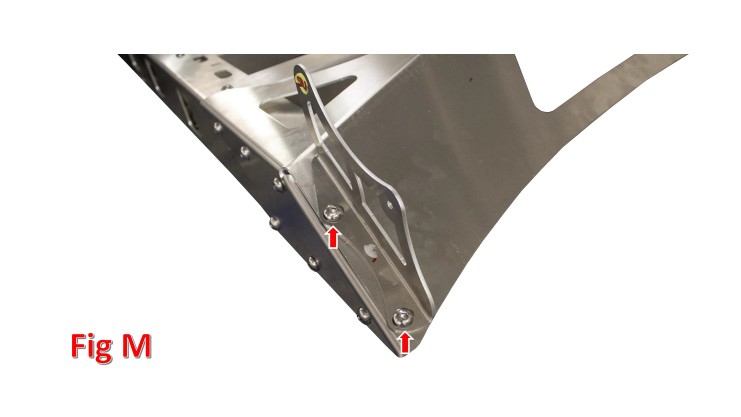
6. Locate the roof rack front light mounts and set them in place. Loosely bolt them to the front nose of the rack using the supplied 3/8” Bolts (x4), 3/8” Washers (x4), and 3/8” Nuts (x4). (Fig M)
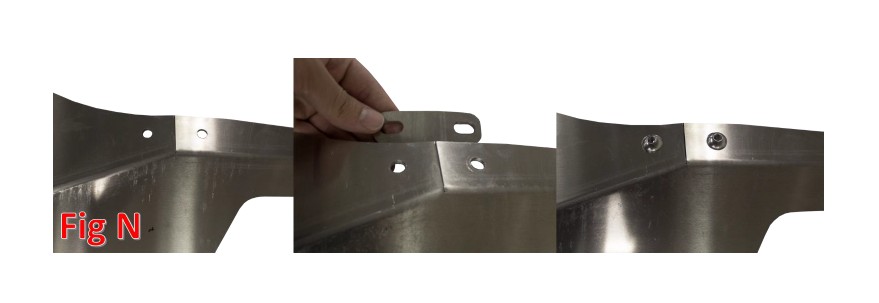
7. Locate the roof rack reinforcement brackets (x2). Loosely secure them to the front nose of the rack using the supplied 3/8” Bolts (x4), 3/8” Washers (x4), and 3/8” Nuts (x4). (Fig N)
8. Go back and tighten all roof rack assembly bolts to 20 foot pounds.
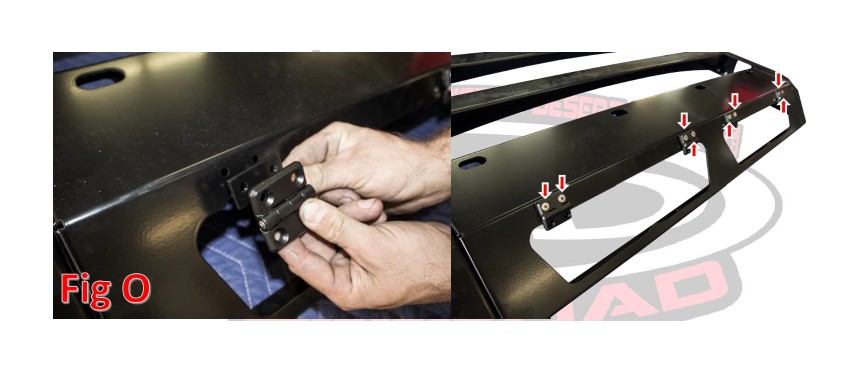
9. Locate the supplied black hinges (x4) and hinge spacers (x4). Then, loosely mount the hinges to the roof rack, sandwiching the spacers between the rack and the hinge. Use the supplied 1/4” Bolts (x8), 1/4” Washers (x8), and 1/4” Nuts (x8). (Fig O)
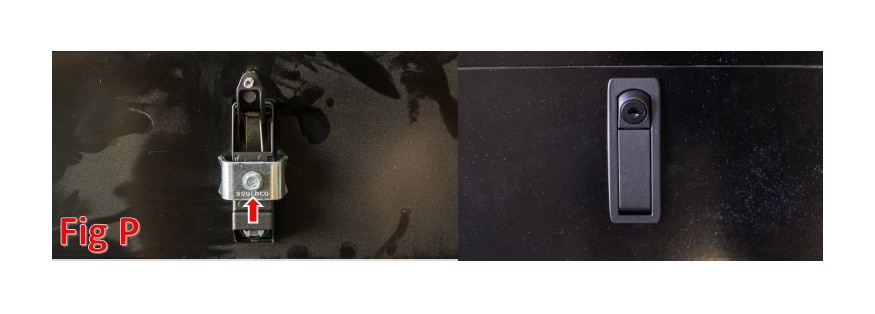
10. Locate the supplied locking latches. Then, slide the latches into their precut holes in the toolbox doors. Install the mounting bracket on the back side of the latch to hold it in place. (Fig P)
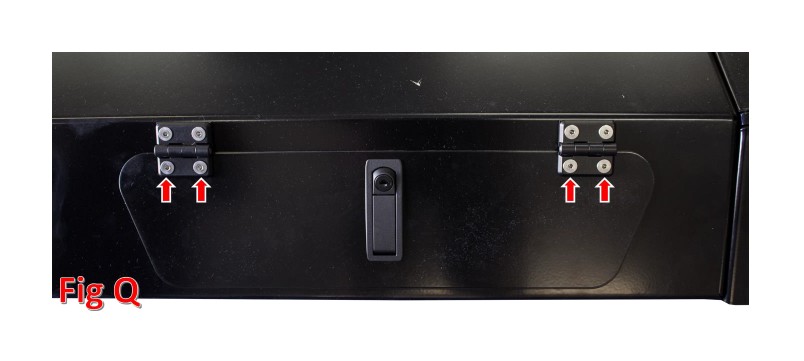
11. Install the toolbox doors onto the toolbox portion of the roof rack. Secure them using the supplied 1/4” Bolts (x8), 1/4” Washers (x8), and 1/4” Nuts (x8). (Fig Q)
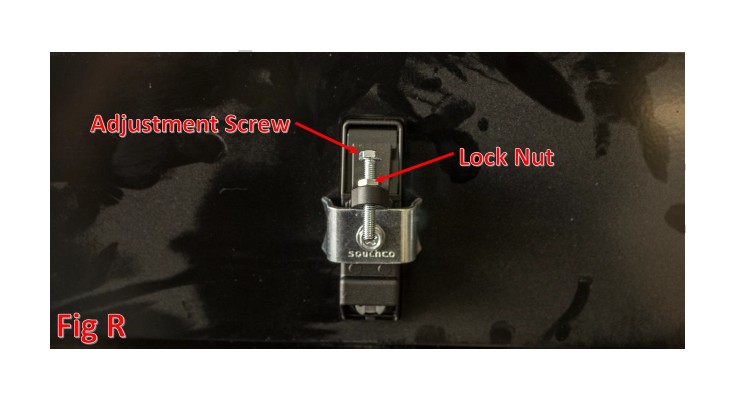
12. On the back side of the latch, there is an adjustment screw. Loosen the lock nut before making any adjustments. Then, adjust the screw until the latch is able to close, but also holds the door shut without any play. Tighten the screw for more play in the door, loosen the screw for less play in the door. When you are done making your adjustments, tighten the lock nut. (Fig R)
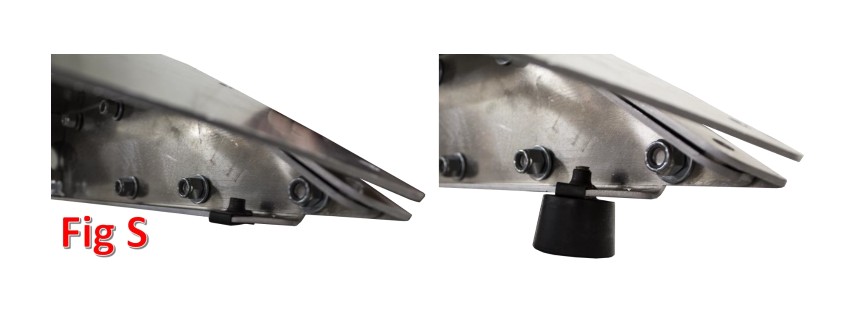
13. On the front corners of the side rails there is a hole to mount the rubber bumpers. First, slide the supplied U-Nuts (x2) into the holes, then thread the supplied rubber bumpers (x2) into the newly installed U-Nuts. (Fig S)
INSTALLATION
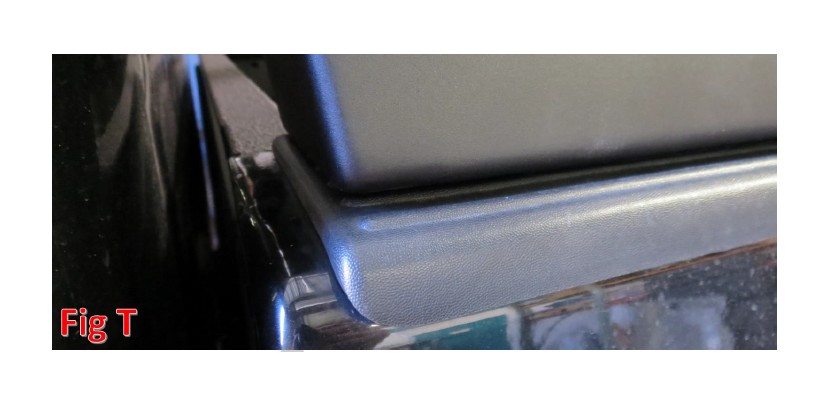
1. Set the Main Rack Section in place. Line the front end of the rack up with the end of the plastic bed rail cap. (Fig T)
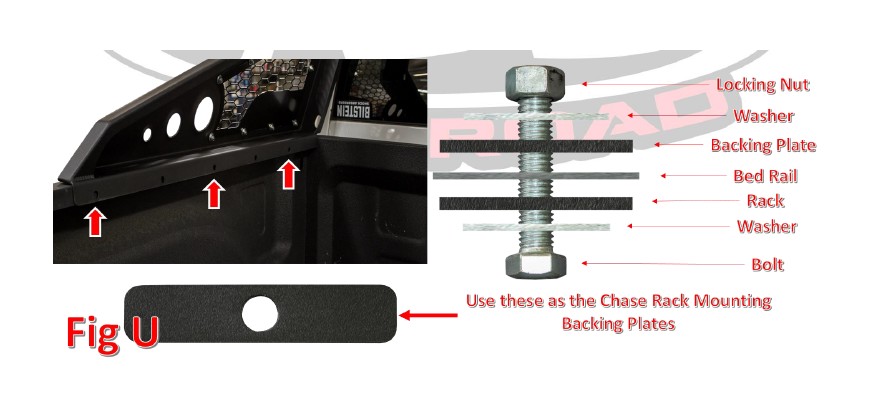
2. Use the chase rack mounting holes as a template to drill your holes. Use a 1/2” Drill Bit and drill them one at a time. We drill our hole and install a bolt before moving on to the next hole. Make sure to use a backing plate between the locking nut and the bed rail lip. (Fig U) There are 5 mounting holes per side on the main rack section. We recommend using (and have supplied hardware for) at least three of those mounting holes. If you are installing a tire carrier, be sure to use at least two holes (per side) that the main rack shares with the tire carrier.
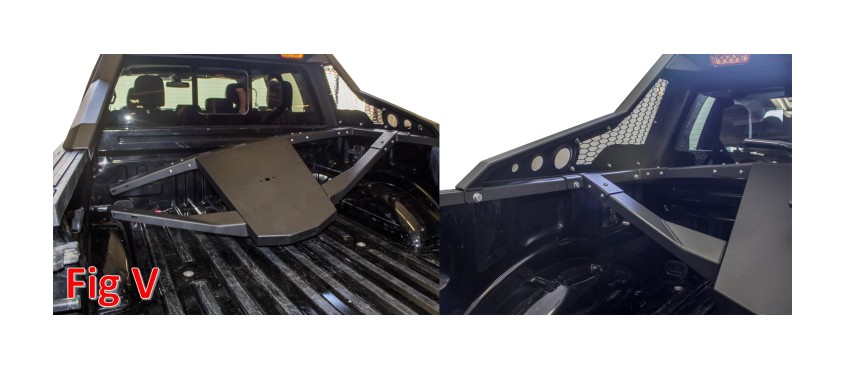
3. Once all the mounting holes have been drilled and you’ve made sure all the bolts will fit in their newly drilled holes, remove the front four rack mounting bolts in preparation for the tire rack installation. Set the tire rack in place (with one side’s tire rack mounting piece still not installed). Then, mount the remaining tire rack mounting piece using the supplied 3/8” Bolts (x10), 3/8” Washers (x10), and 3/8” Nuts (x10) (Refer to Tire Carrier Assembly Step 3). (Fig V) With the tire carrier now fully assembled, reinstall the front four rack mounting bolts, using them as the rack and tire carrier mounting bolts. Once everything is in place, torque the 3/8” Bolts to 20 foot pounds and the 1/2” Bolts to 50 foot pounds.
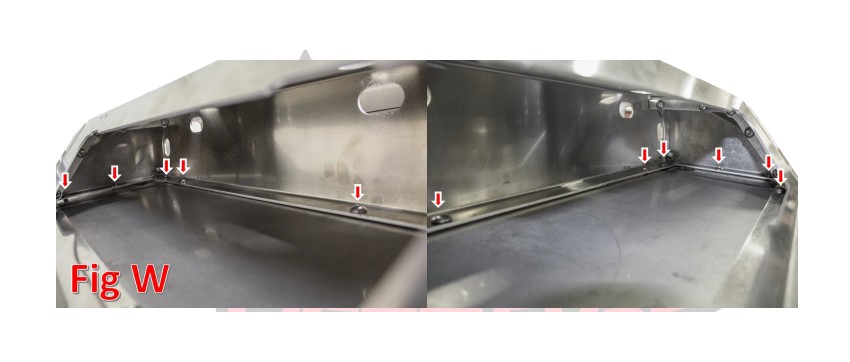
4. Set the roof rack section in place. Then, use the supplied 3/8” Bolts (x16), 3/8” Washers (x16), and 3/8” Nuts (x16) to loosely secure it. The bolt holes can be accessed through the toolbox openings (The picture does not show all of the mounting bolts). Once all mounting bolts have been installed, torque them to 20 foot pounds. (Fig W)
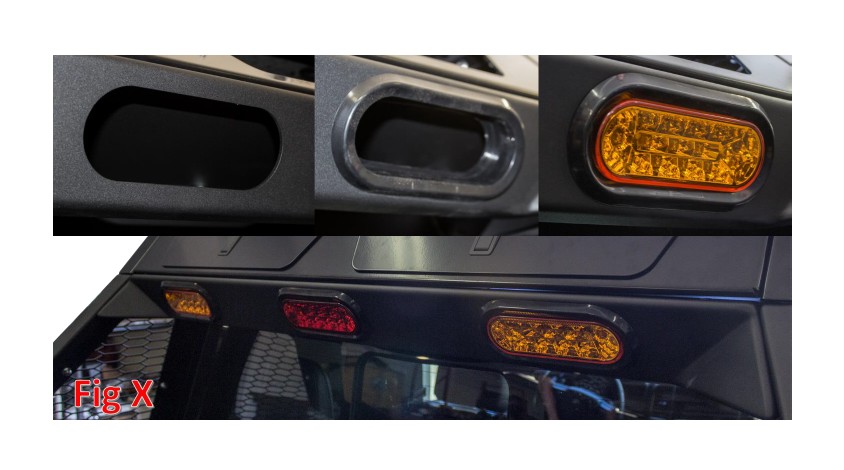
5. Locate the supplied LED Light Mounting Grommets (x3). Fit these into the predrilled holes on the back side of the main rack. Then, fit the supplied LED Lights (x3) into the newly installed grommets. (Fig X)
6. Wire your LED lights to preference.
7. Stand back and enjoy your new ADD HoneyBadger Chase Rack.
8. Check and re-tighten if needed, all mounting bolts after 100 miles and periodically thereafter.
