FREE 1 to 3-Day Delivery on Orders $149+ Details
How to Install Addictive Desert Designs Front Fender Inners for Boatec Fiberglass Fenders (10-14 Raptor) on your Ford F-150
Installation Time
1 hours
Tools Required
- 1/8" drill bit
- 3/16" drill bit
- Grinder
- Cut off Wheel for grinder
- Power Drill
- Phillips head Bit attachment
- Rivet gun for 3/16" rivets
- 10mm socket
- 8mm socket
- 5.5mm socket
- Ratchet
PREPARATION STEPS
1. Disconnect the negative terminal on the battery. With the vehicle on level ground and the emergency brake set.
2. You will need the following tools:
a. 1/8" drill bit
b. 3/16" drill bit
c. Grinder
d. Cut off Wheel for grinder
e. Power Drill
f. Phillips head Bit attachment
g. Rivet gun for 3/16" rivets
h. 10mm socket
i. 8mm socket
j. 5.5mm socket
k. Ratchet
3. Hardware Included:
a. 3 - Mounting Tabs (1 each Small, Medium and Large)
b. 10 - Self Tapping Screws
c. 12 - 3/16" Rivets
d. 12 - fender washers
INSTALLATION INSTRUCTIONS
1. Remove factory Front Fenders and Fender Inners.
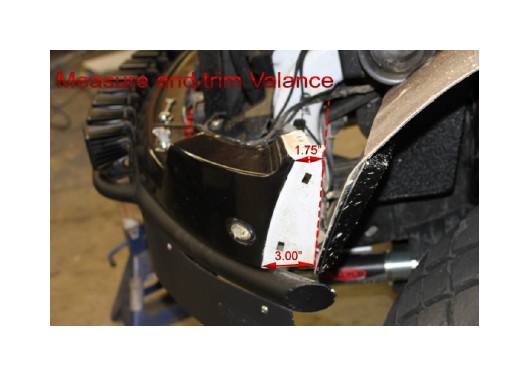
2. Mark front valance for trimming ( 1.75" on top and 3.00" on bottom) and cut as in image at right.
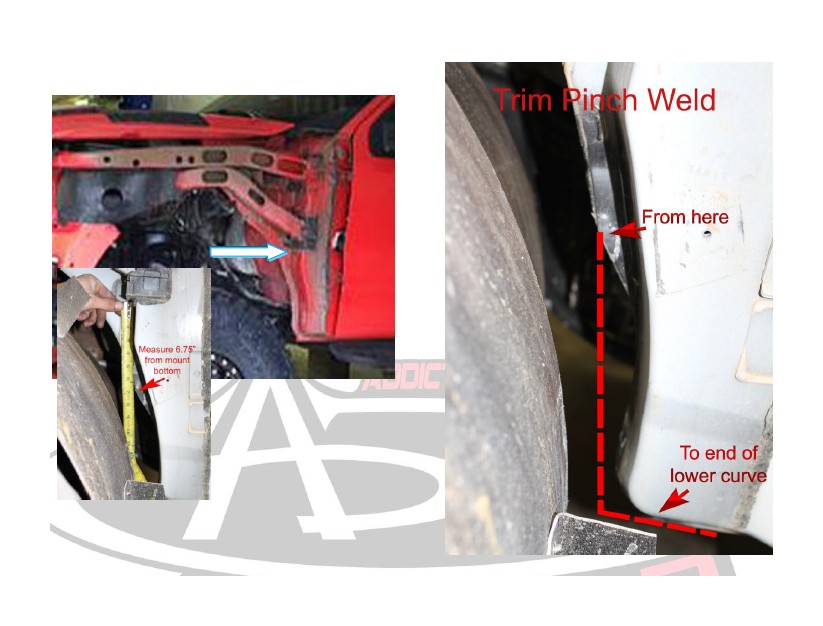
3. Measure and Cut away pinch welds at the rear of the wheels. Start at 6.75" down from mount, see picture below right, and cut down to the end of the curve in the body. Clean up any burrs and coat to protect the bare surfaces.
4. Fit the Inner into place by using the Front Outer Frame Member (Right behind the front valance which was cut in sequence #2) and the rear of the liner pushed into the pinch weld in the rear.
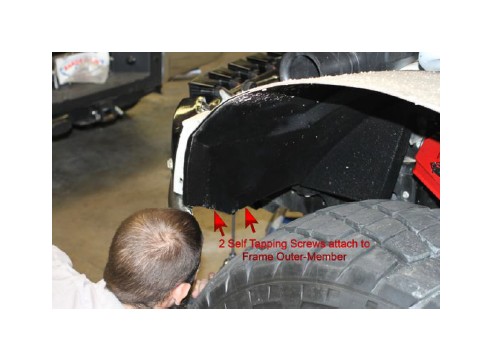
5. With the liner in place, mark and drill 1/8" holes from the bottom up through the liner into the Frame Member avoiding factory holes. Use 2 - Self tapping screws to attach the front of the liner to the Front Frame Outer Member.
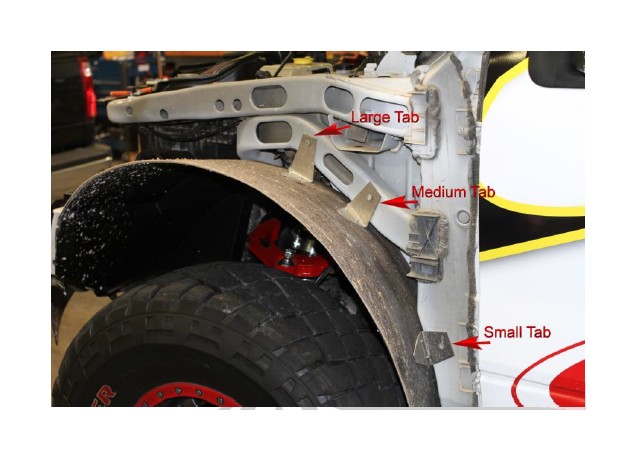
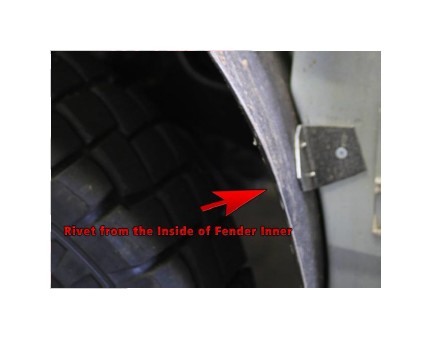
6. Find the three mounting tabs, starting from the large tab put into position and drill a 1/8" hole. Use the self tapping screw to attach to the Fender Inner Frame. Once the tab is attached drill the tabs with the 3/16" drill bit and attach the rivets with fender washers between from the inside of the Fender Inner. Continue same procedure for the Medium and Small Tabs.
**Make sure the fender is pushed into the wheel well into the pinch weld as each tab is attached.
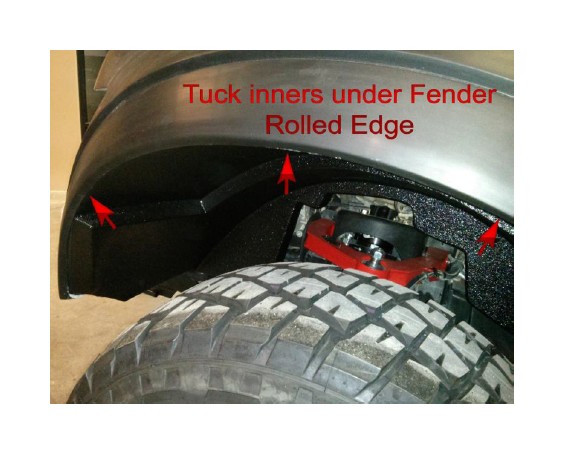
7. Once all of the tabs are installed and riveted securely, install the Boatec Fenders according to their instructions ensuring the Fender Inner is tucked under the Fender Edge. At this time there may be some trimming necessary, use care in removing material to be sure the Fenders and Liners fit together properly.
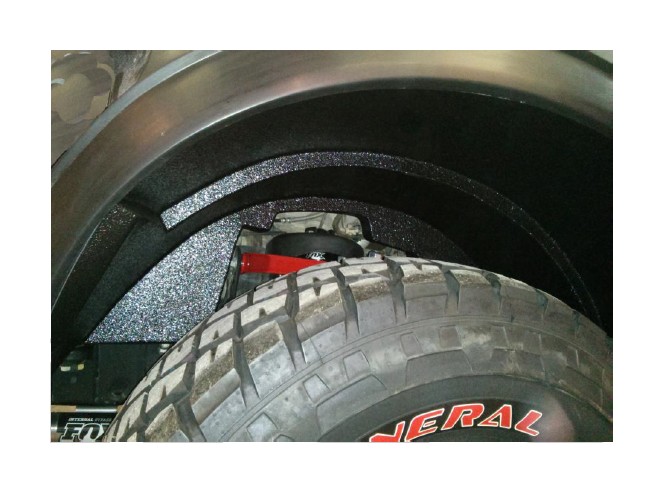
8. Now that fit is verified, remove the Fender Inners and have the inside covered with bedliner material (i.e. Line-x, rhinoliner or equivalent).
9. With the Fender Inners covered in bedliner material, reinstall using the self tapping screws and the installation is complete, step back and enjoy. You can even have a frosty beverage if you wish!