FREE 1 to 3-Day Delivery on Orders $149+ Details
How to Install Addictive Desert Designs Bump Stop Kit (2017 Raptor) on your Ford F-150
Installation Time
4 hours
Tools Required
- Ratchet
- T-50 Torx Socket
- 8mm Socket
- 10mm Socket
- 13mm Socket
- 9/16” Socket and Wrench
- 3/4” Socket
- Grinder
- Grinding Wheel
- Black Paint
PREPARATION
1. Disconnect the negative terminal on the battery. Park the vehicle on level ground and set the emergency brake.
2. We recommend reading through the installation instructions in whole before performing the work.
3. Estimated Installation Time: 4 Hours
4. You will need the following tools:
a. Ratchet
b. T-50 Torx Socket
c. 8mm Socket
d. 10mm Socket
e. 13mm Socket
f. 9/16” Socket and Wrench
g. 3/4” Socket
h. Grinder
i. Grinding Wheel
j. Black Paint
Note: this installation requires 2 people for best results
5. Included in Kit:
4 – Hex Head Bolts – 3/8”-24 x 1 1/2”
4 – Hex Head Bolts – 3/8”-24 x 4”
12 – Flat Washers – 3/8”
4 – Metal Lock Nuts – 3/8”-24
4 – U-Bolts – 1/2”-20 x 4 1/2”
8 – Washers – 1/2”
8 – Grade 8 High Hex Nut – 1/2”-20
REMOVAL
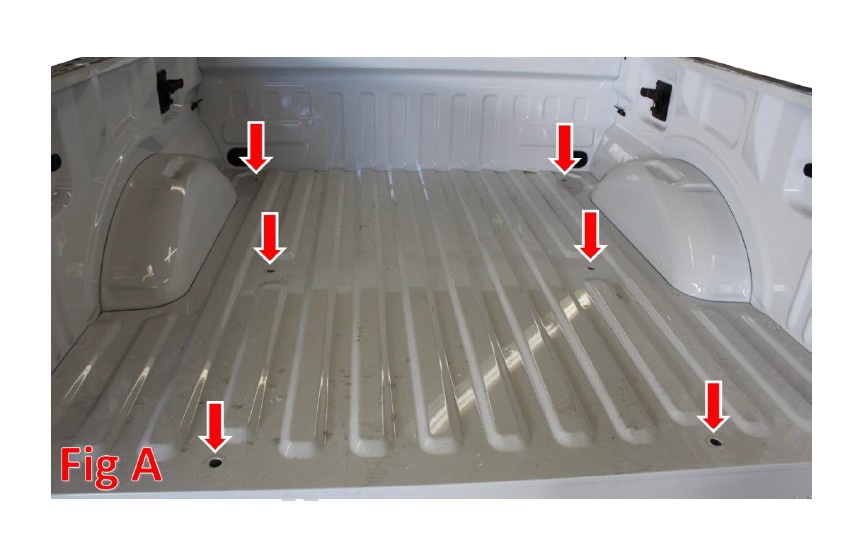
1. Using a T-50 Torx Socket, remove the OEM truck bed bolts (x6). (Fig A)
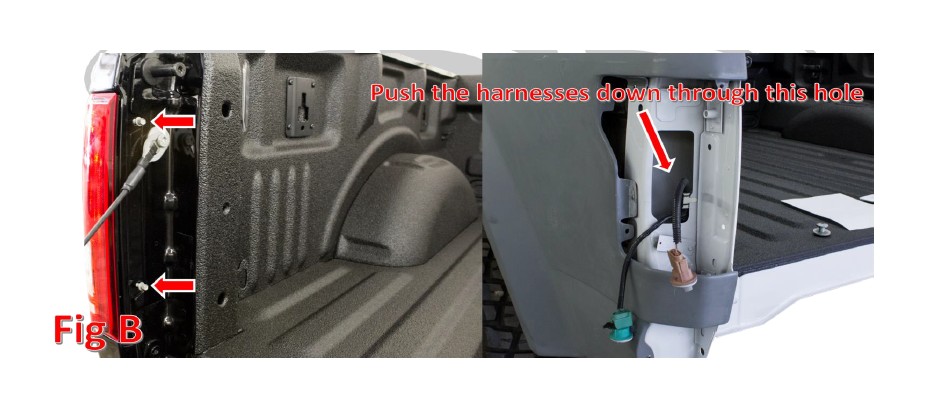
2. Remove the 8mm bolts (x2) holding on each taillight. As you are pulling the taillight out, twist the bulb/sockets out of the taillight housing. Then, remove the bulbs from the sockets, and push the wires down through their hole so that they are loose from the bed. (Fig B)
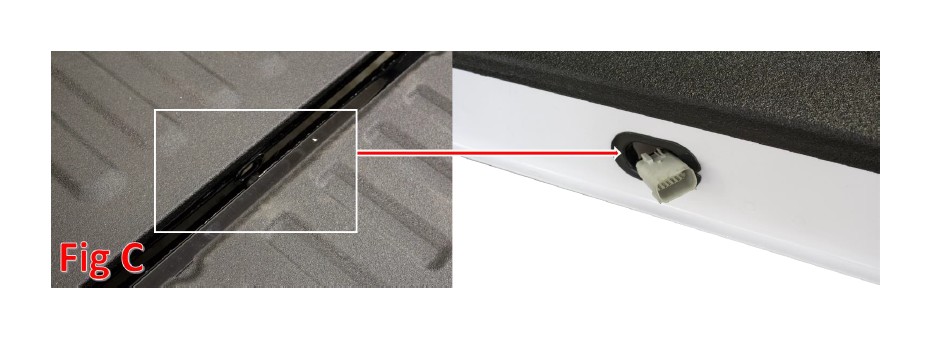
3. Unplug the backup camera connector that sits in the bottom/center section of the tailgate. (Fig C)
4. Remove the tailgate.
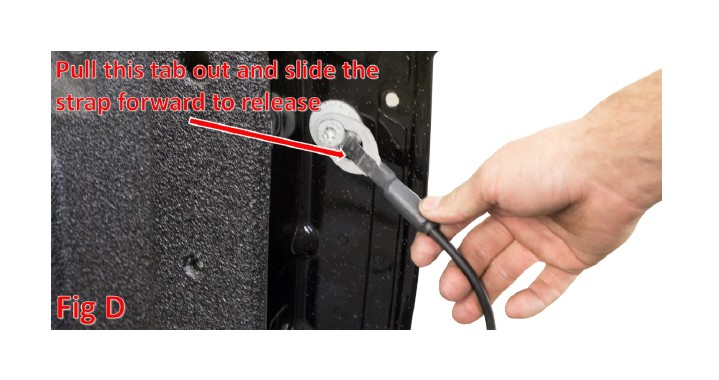
a. Hold the tailgate half open. Then, remove the tailgate straps by pulling the metal tab (on the end of the tailgate strap that connects it to the bed) towards the center of the bed and sliding the strap end off of the bolt head that holds it in place. (Fig D)
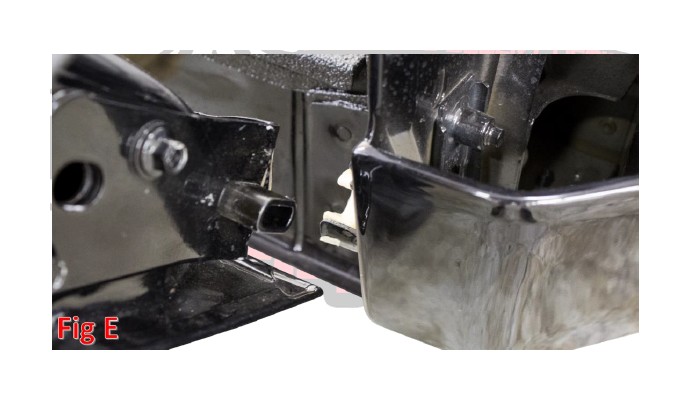
b. While still holding the tailgate half open, pull the bottom of the tailgate (on the passenger side of the vehicle) out of the slot in the bushing that it fits into. (Fig E)
c. Pull the tailgate off of the truck.
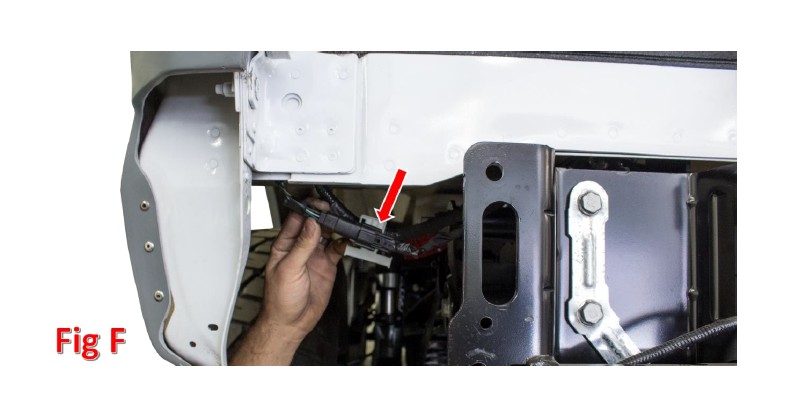
5. Unplug the connector for the bed cargo light. It sits underneath the driver side taillight. (Fig F)
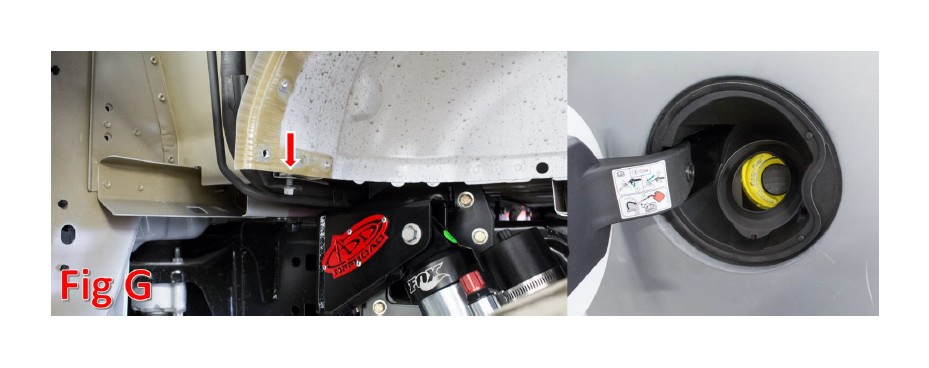
6. Remove the 10mm bolt that holds the fuel filler in place. It can be accessed through the wheel well. Then, push the fuel filler neck through the rubber grommet on the fuel door until its loose from the bed. (Fig G)
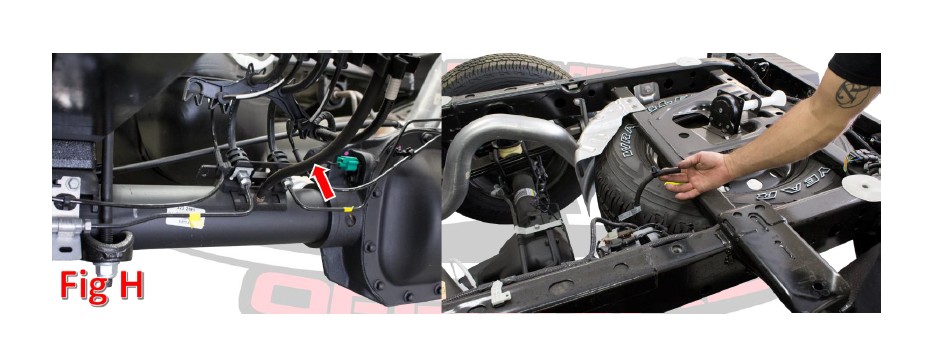
7. From underneath the truck, remove the plastic clip that holds differential breather tube to the bottom of the truck bed. Fig H points out which tube is the differential breather tube.
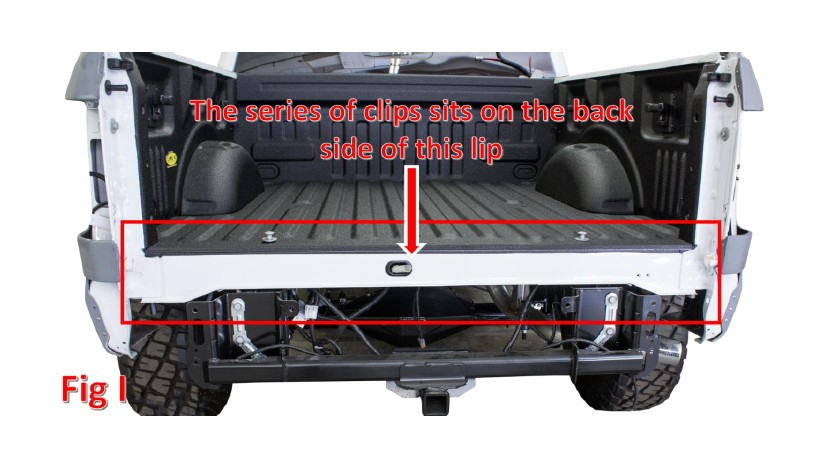
8. Underneath the back lip of the truck bed, there is a series of clips holding the rear wire harness to the bottom of the truck bed. Remove all these clips. (Fig I)
9. Remove the bed from the truck and place it on a set of stands.
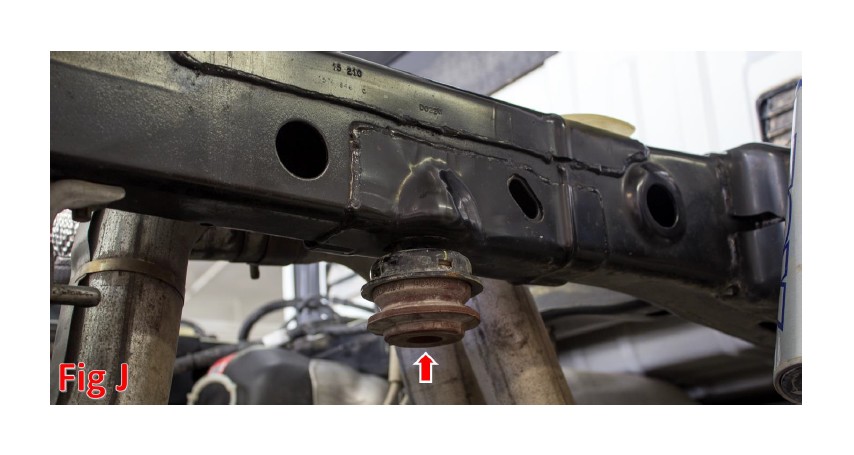
10. Using a 13mm Socket, remove the factory bump stop. Save these bolts for reuse. (Fig J)
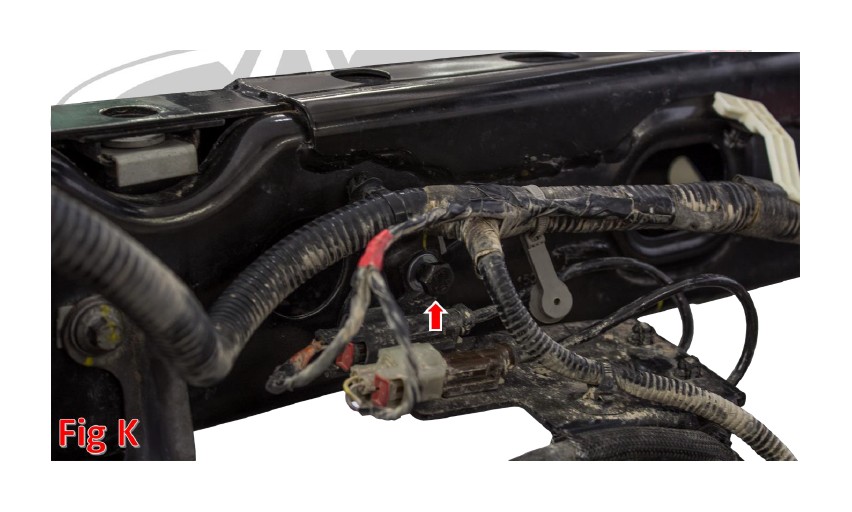
11. Using a 10mm Socket, remove the wiring bracket that is on the inner rail of the driver side frame above the axle. (Fig K)
12. Prepare to install your new ADD Bump Stop Kit.
INSTALLATION
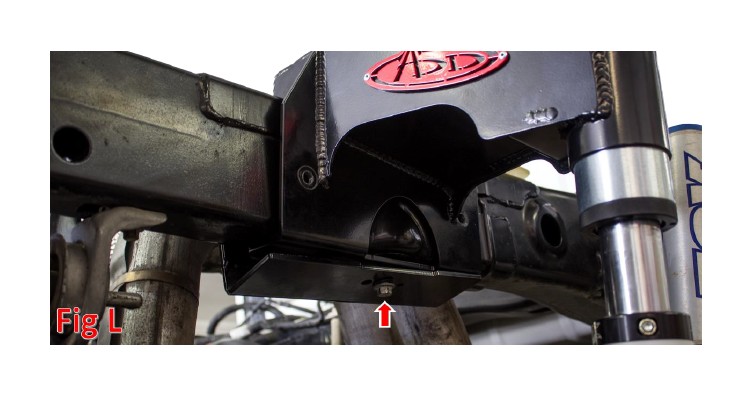
1. Hold the Inner Mounting Plate and the Bump Stop Holder in place. Then, loosely reinstall the factory bump stop bolt to hold them in place. Do this on both sides of the frame. (Fig L)
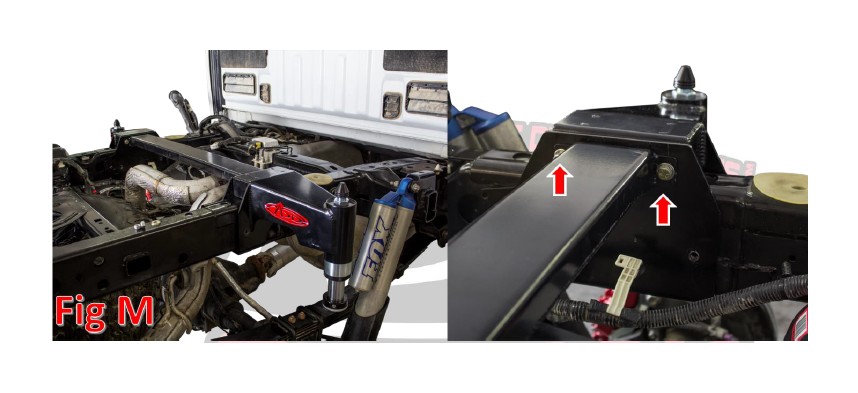
2. Set the Bump Stop Cross Member in place. Secure it by loosely installing the supplied 3/8 x 1 1/2” Bolts (x4) and 3/8” Washers (x4). (Fig M)
3. Tighten the factory bump stop bolt to factory torque specification. Then, tighten the supplied mounting bolts (x4) to 35 foot pounds.
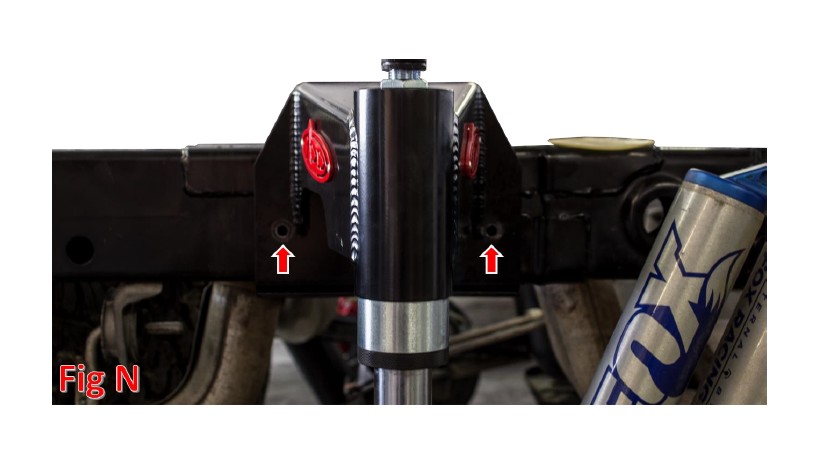
4. Using the Bump Stop Holder as a template, drill two 3/8” holes through your frame. Then, repeat this step on the other side of the frame. (Fig N) Make sure everything is out of the way on the inside of the frame so you don’t drill through any wires or connectors.
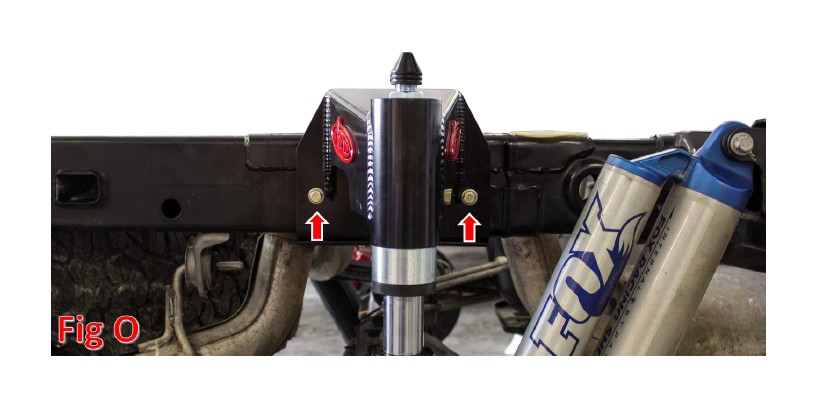
5. Install the supplied 3/8 x 4” Bolts (x4), 3/8” Washers (x8), and 3/8” Nuts (x4) into the newly drilled holes. Tighten these bolts to 35 foot pounds. (Fig O)
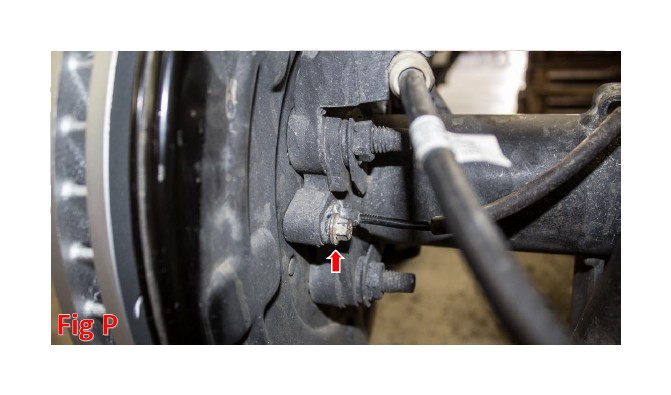
6. Using a 10mm Socket, remove the bolt holding your ABS sensor, then remove the sensor (located on the back side of your wheel hub). (Fig P)
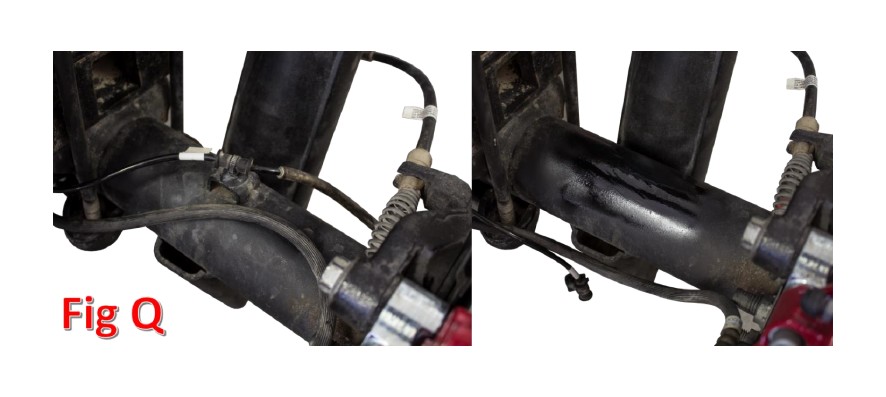
7. Remove the ABS wiring from the bracket that sits on the top side of the axle. Then, grind that bracket off the axle. Make sure to paint over any exposed metal when you are done. Repeat this step on the other side of the vehicle. (Fig Q)
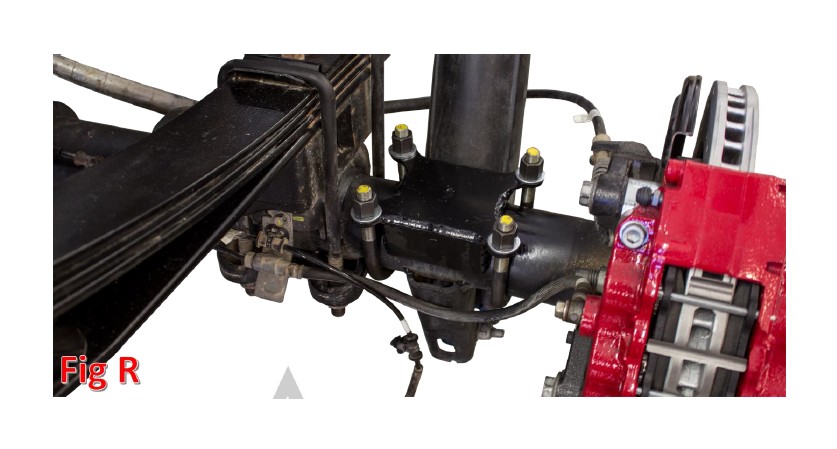
8. Hold the strike pads in place, then secure them using the supplied U-Bolts (x4), 1/2” Washers (x8), and 1/2” Nuts (x8). Make sure the strike pad sits level in comparison to your leaf spring block. Once all nuts are in place, tighten them to 55 foot pounds. (Fig R)
9. Route the ABS Sensor wire around the bump pad, out of harm’s way. Then, reinstall the sensor by reversing Installation Step 6.
10. Reinstall your truck bed by reversing Removal Steps 1-9.
11. Stand back and enjoy your new ADD Bump Stop Kit.
12. Check and re-tighten if needed, all mounting bolts after 100 miles and periodically thereafter.