 FREE 1 to 3-Day Delivery on Orders $149+ Details
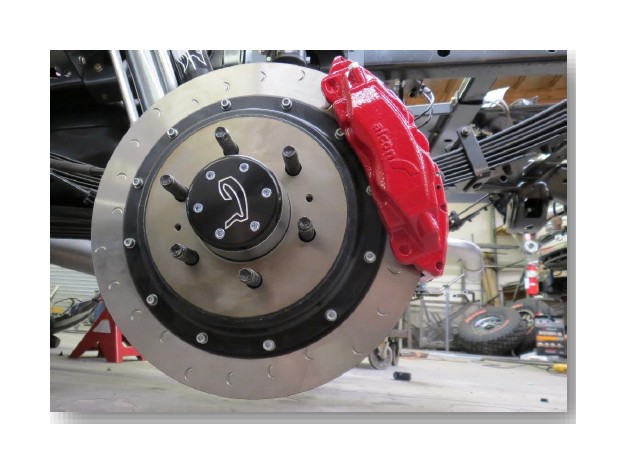
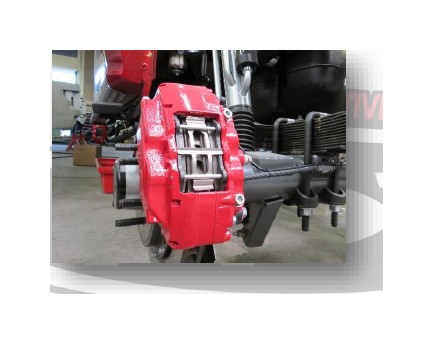
How to Install Addictive Desert Designs Alcon Slotted Front Brake Kit (09-14 All) on your Ford F-150
PREPARATION STEPS
1. Use a jack to lift your truck, then set your vehicle on jack stands. Never work under an unsupported vehicle.
2. You will need the following tools:
a. 10mm Allen Wrench
b. 8mm Allen Wrench
c. 13/16 Socket
d. 13mm Socket
e. 10mm Wrench
f. 8mm Wrench
Note: This installation requires 2 people for best results
** This kit is not compatible with OEM tie rod ends. If your tie rod ends are stock, you must order an aftermarket tie rod end kit. Our HD Off-road Tie Rod End Kit part number is AC01150299NA.**
3. Included in Kit:
a. 4 assembled calipers
b. 4 rotors
INSTALLATION INSTRUCTIONS
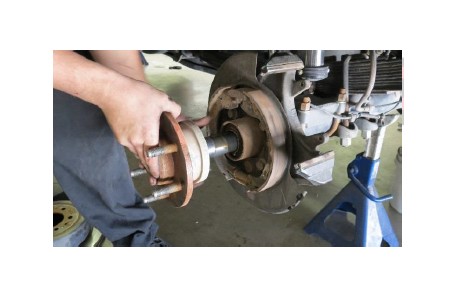
1. Remove the front wheels.
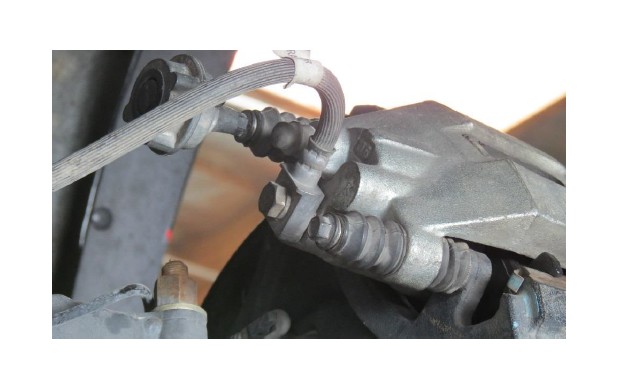
2. Remove factory caliper with bracket (13/16” socket). Remove the factory brake line as well.
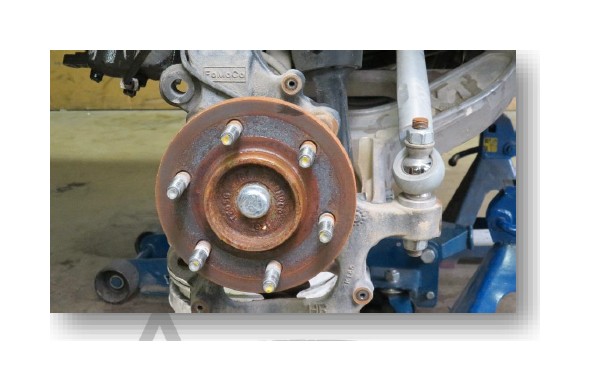
3. Carefully, remove the factory rotor from the vehicle.
4. Remove 8mm bolts located on the dust shield. Then remove the dust shield.
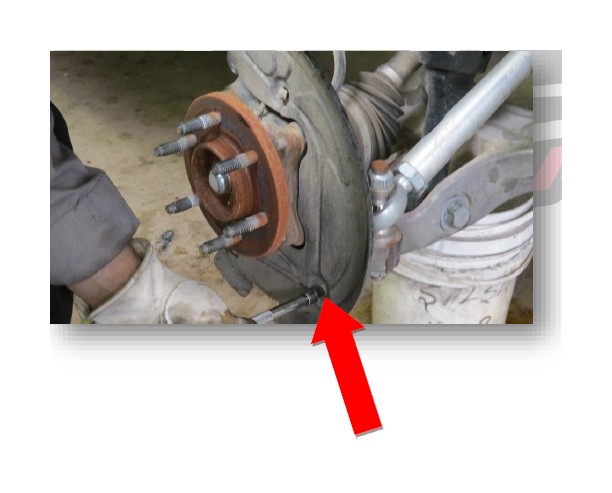
5. Install caliper adaptor, using factory bolts and red loctite.
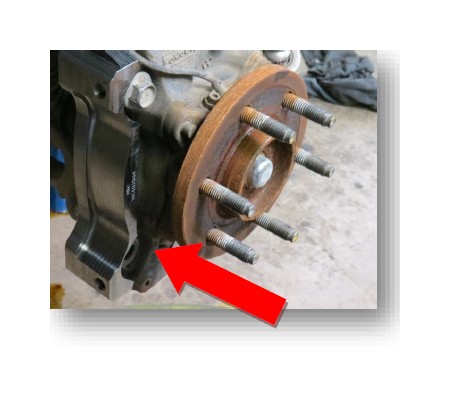
6. Install the new rotor.
7. Place the new caliper on the vehicle using a 10mm allen wrench.
8. Place the front wheels back on the vehicle, after bleeding the calipers.
9. Remove the rear wheels from your vehicle.
10. Remove the 10mm factory caliper bolts.
11. Remove factory brake line using ½” socket.
If you own a 2009-2011 F-150, step 12-24 apply to your truck. 2012-2014 these steps do not apply to your truck. 2009-2011 F-150 owners also need to order part #’s FOCL3Z-2210-C and FOCL3Z-2209-C from your local Ford dealer.
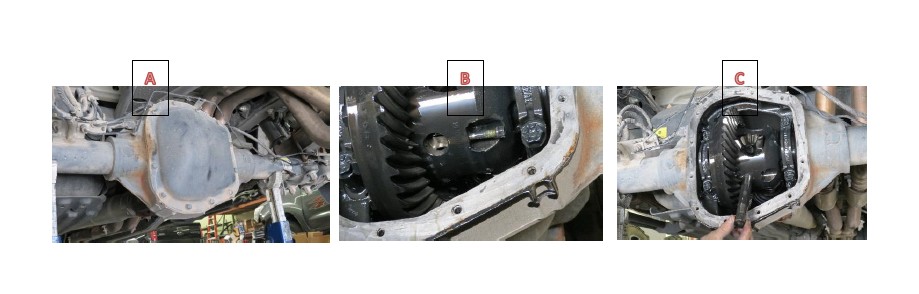
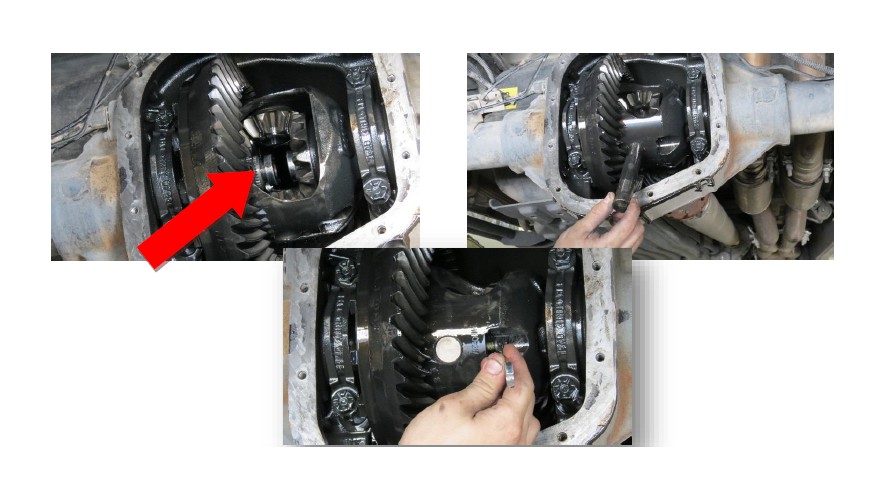
12. Remove rear diff cover using a 13mm socket. (see A below)
13. Remove 8mm bolt from differential for removal of king pin. (See B below)
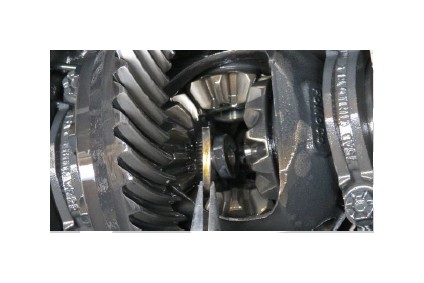
14. Remove king pin at this time. (see C below)
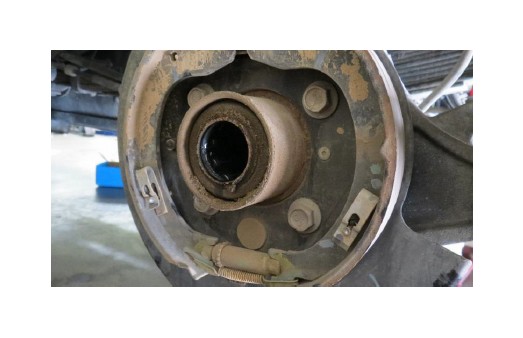
15. Push axle shafts in, to reveal the “C” clips and remove.
16. At this time you will carefully pull out axle shafts.
17. Use 8mm allen wrench to remove sensor.
18. Next you will remove the emergency brake cable.
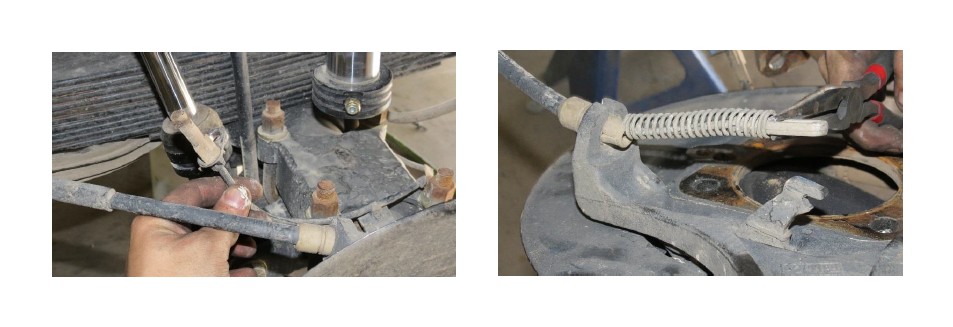
19. Remove the four 13/16” bolts located on brake bracket.
20. Install new bracket, using new hardware.
21. Carefully, reinstall axle shafts on vehicle.
22. Once the shafts are in place, install the factory “C” clip back onto vehicle. Once the “C” clip is in place, place the king pin back in the differential carrier.
23. Reinstall the 8mm bolt to hold king pin into place.
24. You are now ready to place differential cover on vehicle using Grey silicone.
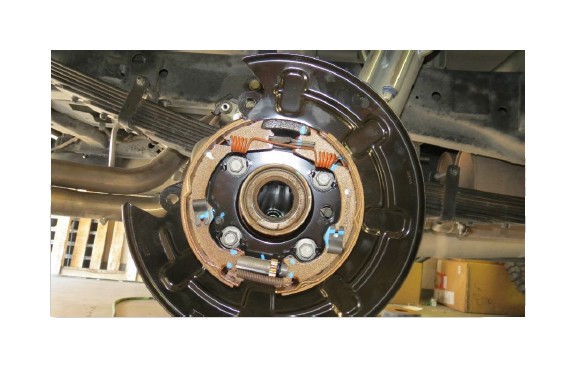
25. Trim rear dust plate to fit new caliper.
26. Install your new rotor and caliper bracket using the new hardware provided in the kit.
27. Now you may install your new caliper using 10mm allen head.
28. Reinstall brake line at this time.
29. Place wheels back onto vehicle.
30. To complete this installation you will now need to bleed the brake lines.
Now step back and enjoy your new brake kit.

