 FREE 1 to 3-Day Delivery on Orders $149+ Details
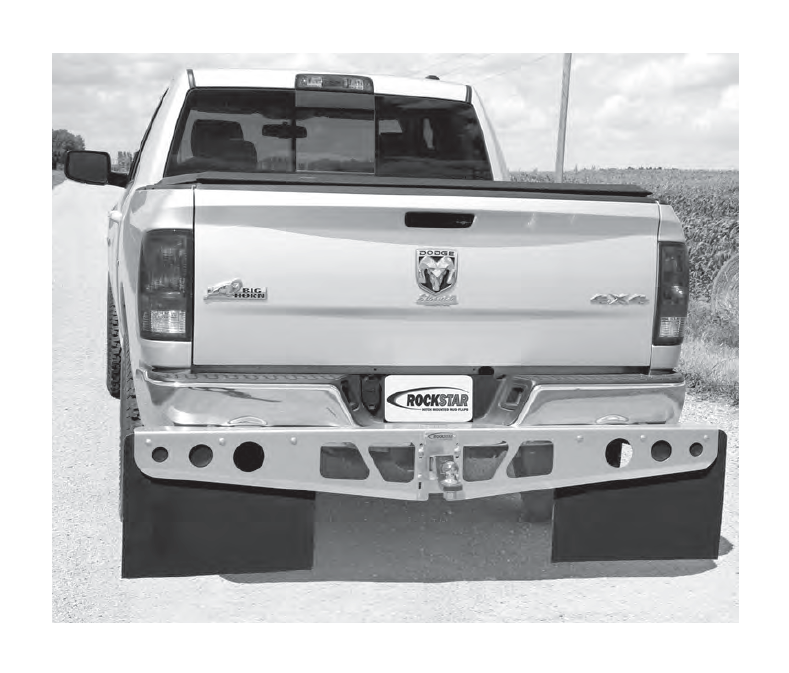
How to Install Rockstar Removable Mud Flap System - Smooth Mill on your F-150
Installation Time
30 minutes
Tools Required
- 9/16” Box Wrench
- Torque Wrench (ft. lbs.) w/9/16” Socket
- Utility Knife
- Straight Edge
- Protective Eyewear
IMPORTANT!
READ AND UNDERSTAND THESE INSTRUCTIONS FOR SAFETY, INSTALLATION, OPERATION, AND MAINTENANCE. SAVE ALL INSTRUCTIONS FOR FUTURE REFERENCE.
STEP 1
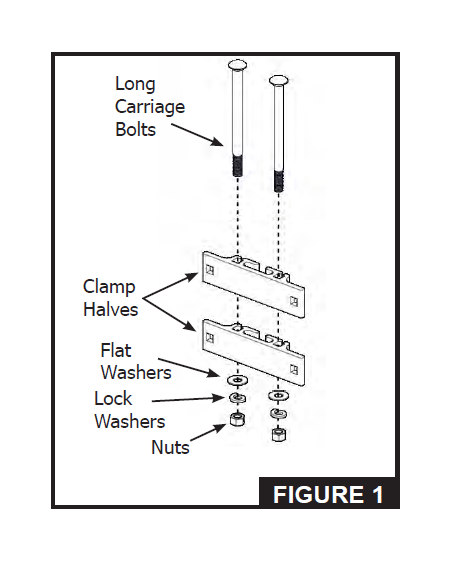
Insert (2) long carriage bolts through clamp halves with flat washer, lock washer and nut.
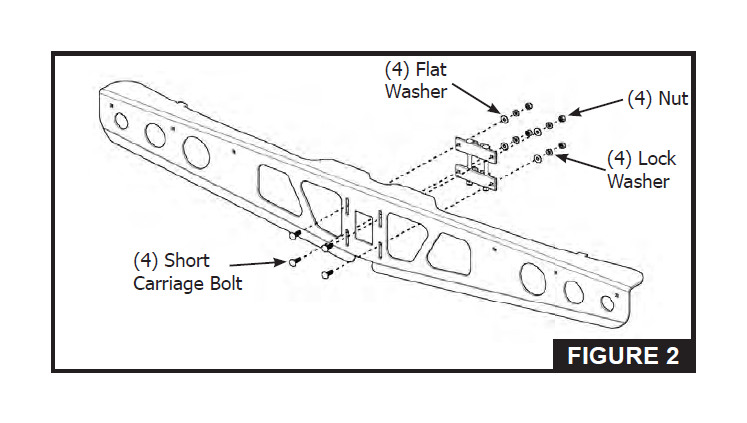
Orientate flat surface of clamp assembly with backside of frame so nuts on long bolts face down. Attach clamps to frame with (4) short carriage bolts, flat washers, lock washers so nuts face vehicle. Leave all bolts loose for now.
STEP 3
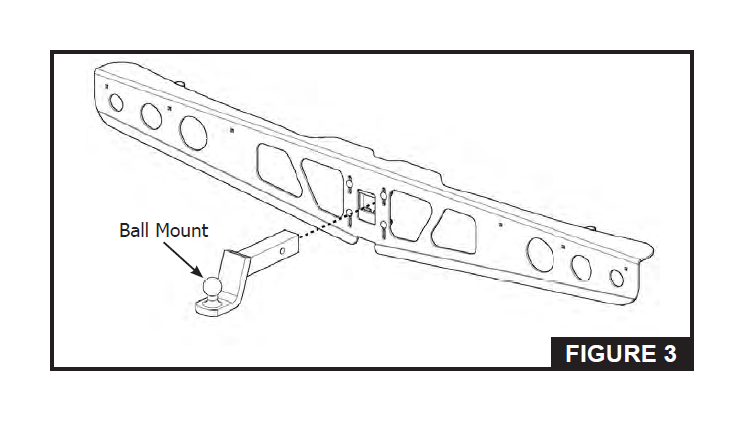
Slide ball mount through frame and clamps. Lift assembly up and insert ball mount into receiver tube. Secure with pin and clip.
NOTE: If ball mount holes do not align to allow pin to be inserted or if mud flap frame cannot be positioned to hang straight and plumb, a longer ball mount may be needed before proceeding.
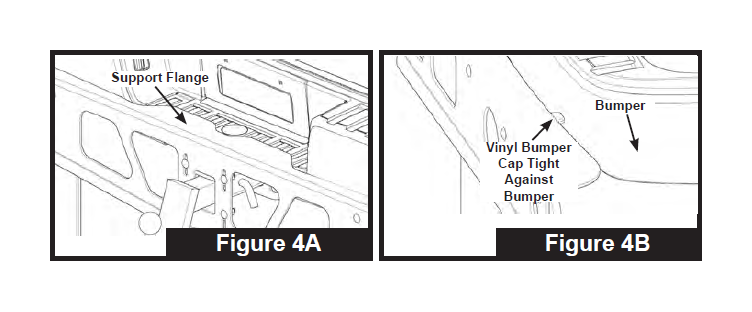
Position support flange on bumper step (Figure 4A) and push frame tight against bumper until both vinyl bumper caps are “tight” against vehicle bumper (Figure 4B).
TIP: If clamp assembly butts up to receiver before both bumper caps are against bumper, remove clamps and reassemble them on ball mount side of mud flap frame.
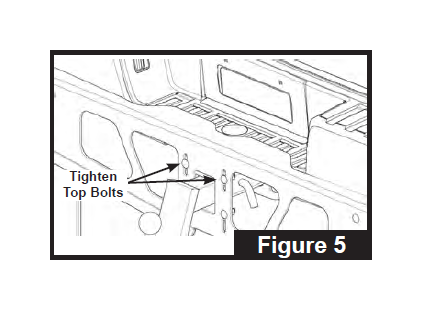
STEP 5
Finger tighten short carriage bolts on clamp assembly. Ensure frame is square/level with bumper then tighten top bolts only on each side equally.
STEP 6
Tighten both long bolts to secure frame to ball mount. Torque both long bolts to 32 ft.lbs.
STEP 7
Tighten bottom carriage bolts equally on each side. Then torque all 4 short bolts to 32 ft.lbs.
STEP 8
Orientate rubber flaps as shown in Figure 1. Note letter “D” inside circle goes to driver side, “P” passenger side, with letter/circle outlines facing to vehicle tires. Bolt rubber flap to frame using (3) carriage bolts, flat washers, lock washers and nuts. Tighten these nuts until washers start to compress into rubber flap.
NOTE TO INSTALLER/OPERATOR:
1. DODGE WITH OEM DUAL EXHAUST: Cut outlined hole in 1/8” thick rubber material that is in line with OEM exhaust.
2. MODEL SPECIFIC and CUSTOM FIT INSTALLS--ALWAYS CHECK GROUND CLEARANCE OF HITCH MOUNTED MUD FLAP.
Suggested clearance is 4” to 6”above ground. If too low, undo hitch pin and remove mud flap assembly. Use straight edge to mark a cut line at bottom of each flap. Make trim cut along line.
USER/OPERATOR SAFETY AND MAINTENANCE:
• Always route safety chains under mud flap frame, not through holes.
• Always remove mud flaps before entering automatic car wash systems.
• Do Not use mud flap frame as a step.
• Do Not hook up anything to mud flap frame.
• Periodically check all bolts/nuts and retighten if needed.

